Pokémon Theta Emerald The Last Dance is the fifth and final game in the line of the Pokémon Theta Emerald series. As part of that series, The Last Dance bears some similarities to the previous games. The adventure unfolds in Hoenn, where you can collect all of the 900+ Pokémon from the Pokémon series in your Pokédex.
You are again cast as a young adventurer, arriving fresh-faced in Hoenn without a single Pokémon to your name. Your goal is to change that. As you wander the map, you catch Pokémon and train them into the ultimate team. With these Pokémon, you enter a series of battles with other Trainers. The biggest battles take place in Gyms, where the winner receives Gym badges. After you have conquered all of the Gyms, it’s time to head to Ever Grande City and take on the Elite Four, the most tremendous Pokémon Masters in the world.
The Last Dance also offers some big differences that make it an entirely new game. Rather than face either Team Magma or Team Aqua, the two rival Pokémon Trainer clans, The Last Dance casts you as a third party attempting to make peace between the two warring groups. You must track down both Team Magma and Team Aqua, stopping them before they can further their plots to forever change the face of Hoenn. You may visit some of the same locations, but your goals are often different.
Some of the Pokémon that were readily available or rare, or didn’t exist, in Pokémon Emerald are all available to be caught and used.
The biggest addition to Pokémon Emerald is the Battle Frontier. This new region is like a theme park for Pokémon Trainers. There are seven arenas to battle through, and each successful Trainer offers a greater challenge than the last. If you like to battle, you’ll love this new area.
A word of warning for any Trainer who thought Pokémon Emerald weren’t enough of a challenge—wait until you play The Last Dance. The game is a lot tougher, requiring you to really hone your battle tactics. Many more Trainers walk the routes. The Gym Leaders have newer, stronger Pokémon. And if you want to become the Pokémon Champion, you’d better bring your best, because the Elite Four are like no one you’ve ever battled before.
| Using the Guide |
| This book contains a wealth of information that enhances your Pokémon Theta Emerald The Last Dance experience. The next section takes you through the basics of Pokémon catching and battling. The walkthrough chapters help you complete your adventure in Hoenn. Check out the full Pokédex for detailed statistics and move lists on the more than 900 Pokémon you can collect in Hoenn. |
Pokémon 101
The essence of Pokémon is battling—encountering other Pokémon Trainers in the field and engaging them in skill contests. But there’s more to raising and battling Pokémon than mastering powerful move sets. To succeed as a Trainer, you must assemble the best Pokémon team you can—which doesn’t necessarily mean stacking it with the strongest Pokémon in all of Hoenn. You must choose a well-rounded team, of which there are thousands of possible combinations. The following section is a primer for budding Pokémon Trainers who hope to achieve the title of Pokémon Champion. It details how to catch, raise, train, and breed Pokémon. In The Last Dance, as with the other Pokémon games and other ROM hacks, you get out of it what you put in. The harder you work to build a great team, the more fun you’ll have touring Hoenn and battling against both its Trainers and your friends.
Gotta Catch ‘Em All
At the beginning of Pokémon Theta Emerald The Last Dance, you receive your starter Pokémon. You can carry up to six in the your team, as well as fill an entire Pokédex with more than 900 Pokémon. To round out not only your team, but also the Pokédex, search Hoenn to catch wild Pokémon. Wild Pokémon are not visible on the world map. They love to hide and jump out, surprising adventurers. If you know where to look, you’ll find more Pokémon than you know what to do with!
In the Wild
Hoenn is teeming with wild Pokémon. Behind every rustling leaf or shifting blade of grass there may be a new friend. You may also reel in a new member of your Pokémon team from below the waves. Here’s how to best situate yourself for a new wild Pokémon encounter in Hoenn’s environments.
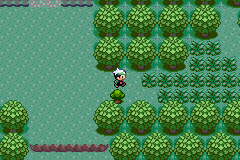
Grass
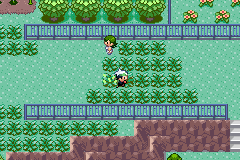
To encounter wild Pokémon, run through tall grass. Walk around these leafier areas, and you’ll meet a wild Pokémon every few steps. There are times when you will not want to encounter wild Pokémon. Maybe your Pokémon are weak from a tough battle. If that’s the case, either stay off the grass or use an Item such as Repel to keep wild Pokémon from interrupting your journey.
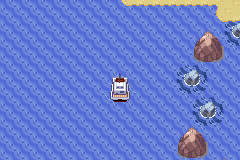
Surfing/Diving
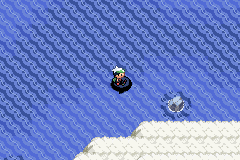
Many Pokémon live in Hoenn’s waters. To encounter these Pokémon, take to the open blue by either surfing on the back of a Kangaskhan, after defeating Norman, or slipping beneath the waves, after beating the seventh Gym. As you skim across the surface, wild Pokémon just up to greet you. While under the water, look in the seaweed patches to find wild Pokémon.
Fishing
The only way to catch some Water-type Pokémon is by fishing. In order to cast your line, you must first find a Fishing Rod. There are three types of Fishing Rods in Hoenn: Old Rod, Good Rod, and Super Rod, and each Rod offers different results. Some wild Pokémon turn up their noses at an Old Rod, preferring to wait for a Super Rod’s bait. Some Pokémon nibble at the Rods, but the frequency changes depending on which Rod you use. For example, a rare Pokémon caught with the Good Rod may be common when you upgrade to the Super Rod.
Find the three different Fishing Rods here:
- Dewford Town (Old Rod)
- Route 118 (Good Rod)
- Mossdeep City (Super Rod)
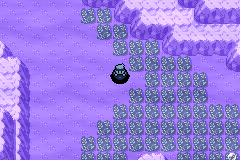
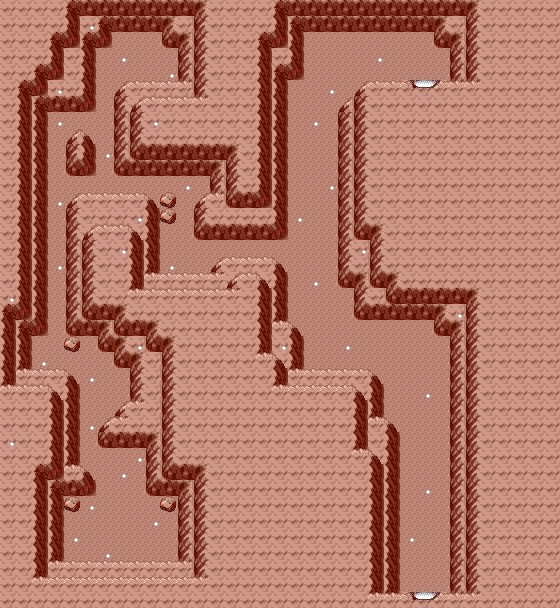
Caves
Some Pokémon linger in Hoenn’s caves. They are hard to see in the dark, so even if you’re not looking behind boulders, they can surprise you. If you’re trying to get to a Pokémon Center with weak Pokémon, tramping through a cave is not the best route.
Rock Smash
After you get the third Gym Bades, you can smash small boulders. This sometimes releases hiding Pokémon, such as Geodude. Not every rock unveils a Pokémon, but if you’re going to reduce boulders to gravel, be ready for the occasional surprise.
| Poké Balls |
| You cannot catch wild Pokémon unless you have a Poké Ball. The more Poké Balls you have, the better. There are many types of Poké Balls, some better suited for certain situations and Pokémon than others. Some Poké Balls are more expensive, and while the expensive Ultra Balls may have a higher success rate than a regular Poké Ball, your results may vary. If you have the cash, feel free to load up on expensive Poké Balls, but be aware that sometimes the best tools for the job are the cheapest. Use this table to track the many specialty types of Poké Balls created by the Devon Corporation, Hoenn’s biggest manufacturer of Poké Balls.NameDescriptionLocationPriceMaster BallThe very best Poké Ball with the ultimate level of performance. With it, you will catch any wild Pokémon without fail.Pokémon Lottery at the Lilycove Dept. Store; Team Aqua Hideout; Lilycove Dept. Store-Net BallA somewhat different Poké Ball that is more effective when catching Water- or Bug-type Pokémon.Pokémart in Mossdeep City; Lilycove Dept. Store Repeat BallA somewhat different Poké Ball that is more effective when catching a Pokémon of a species that you’ve caught before.Rustboro City; Route 116; Lilycove Dept. Store |
Evolution and Breeding
After you catch a Pokémon, you must raise it and teach it new moves. The natural result of raising a Pokémon is Evolution, the process of strengthening a Pokémon so it can take on its advanced forms. However, for some Pokémon, there is more to Evolution than gaining enough experience points to trigger a shape change. Certain Items and conditions also affect the Evolution process.
Normal Evolution Tactics
As you battle wild Pokémon and Pokémon Trainers, your Pokémon gain experience. The more experience a Pokémon gains, the more it levels up. When a Pokémon reaches a pre-determined level, it attempts to evolve into its next form, if it has one.
The more battles a Pokémon participates in, the quicker it will gain levels. Every level requires more experience than the last to achieve. When your Pokémon are at low levels, they rapidly gain levels. At a higher level, gaining levels takes longer—but the results are greater. And besides, the further you are in your adventure, the more experience you earn from Trainer battles or wild Pokémon encounters.
There are ways to share experience among your Pokémon and spread out the level gains. (It’s not a good team tactic to have a couple of Pokémon at Lv. 35 while the rest of your team is sitting idle at Lv. 13.) Any Pokémon that participates in a battle gain experience after a victory. So you can set a Pokémon you want to gain levels in the “lead” position (it’s the first Pokémon put into a battle) and when the battle starts, switch it out for a stronger Pokémon or one that is a better fit for the battle conditions. When the battle ends, the Pokémon you switched out in the beginning receives some of the experience earned. The more Pokémon who participate in a battle, even if they are switched in and out for just a single turn, the more the experience is spread out. This slows level gains, ut it’s a good way to help a team evenly level up.
You can also get the Exp. Share, a Key Item that automatically diverts experience to the rest of the team, even if none of them does not participate in a battle. This is a great tool for leveling up a new Pokémon or a weaker Pokémon. Use that Exp. Share and watch those level counts creep up.
| Preventing Evolution |
| When a Pokémon reaches the required level for Evolution, the process automatically begins. You cannot reverse it. However, you can stop the Evolution process before it is complete. This keeps the Pokémon in its current form, but it gains the extra level and whatever benefits that brings. Why would you want to halt Evolution? For one thing, the evolved form of a Pokémon may learn new moves at a decreased pace. The move a Pokémon learns at Lv. 39 in current form may not be learned until Lv. 44 in its evolved form. You give up the increased stats of the evolved form to get that move sooner—there is a trade-off for everything. You can also equip a Pokémon with the Everstone to automatically prevent Evolution. Every level gain after the required number for Evolution triggers the Evolution process. An Everstone prevents this process from starting until you un-equip it. |
Special Condition Evolutions
Evolution Items
Some Pokémon will not evolve unless they like their Trainer, and it sometimes can depend on the day. Every Pokémon has a Friendship rating associated with their Trainer, but it cannot be checked as easily as other stats. To find out if your Pokémon likes you, stop by the Friendship rater in Verdanturf Town. This woman has a special gift for “reading” a Pokémon’s pleasure, and she’ll reward you with more than information, depending on whether or not your Pokémon likes you.
To increase a Pokémon’s Friendship rating, spend time with it. Use the Pokémon in battles or at least keep it on your team while on an adventure. The more time it spends with you, the more it will like you. You can also give the Pokémon special treats it likes the taste of, such as Iron and Zinc. Keep your Pokémon happy by healing it when it is injured. If your Pokémon has been Poisoned, for example, the quicker you reverse the damage, the more the Pokémon will like you.
It’s also possible to make a Pokémon dislike you. If you feed the Pokémon bitter-tasting herbs instead of yummy recovery Items, it will become upset. If you use a Pokémon until it faints, the Pokémon will dislike you. And while leaving a Pokémon at a Day Care Center or in storage will not make it dislike you, the longer it is out of sight, the easier it is for the Pokémon to forget how much it liked you.
It is possible to curry a Pokémon’s favor again show it grow indifferent or dislike you. Spend more time with it and feet it treats, and soon you will be best friends again.
Evolution Items
A handful of Pokémon will not evolve unless they either consume, hold an Evolution Item, or consume it depending on gender. These special Items are linked to the Pokémon’s type and are in areas that match up with the Evolution Item’s namesake. For example, the Fire Stone is found in the Fiery Path. In the Lilycove City Dept. Store, you can buy some Evolution Items if you need them.
Unique Evolutions
- Tyrogue can evolve into one of three Pokémon, depending on its stats
- Hitmonlee if its Attack is higher than its Defense
- Hitmonchan if its Defense is higher than its Attack
- Hitmontop if its Attack and Defense stats are equal
- Some Pokémon only evolve by level up on the time of day, their gender
- When a Nincada evolves into Ninjask at Level 20, if you have an empty slot in party, a Shedinja will join your party
- Some Pokémon only evolve if they learn or know a move
- Sliggoo can only evolve into Goodra in an area where it is raining
- Mantyke can only evolve into Mantine unless you have Remoraid in your party
- Eevee can evolve into Sylveon if it knows a Fairy-type move
Breeding Pokémon
You can get more Pokémon through breeding, which you can do only at the Day Care Center on Route 117. The Day Care Center’s function is to “baby-sit” Pokémon while you are on an adventure. While you battle Trainers, the Pokémon left at the Day Care Center gain levels—for a price.
Sometimes magical things happen while you are gone. If you leave two Pokémon at the Day Care Center, there is a chance that when you retrieve them, there will be a surprise waiting for you: an Egg! From this Egg, you can hatch a new Pokémon, albeit one at Lv. 1.
Certain conditions must be met to create an Egg. Most important, the two Pokémon left at the Day Care Center must be opposite genders and they must like each other. To find out if the two Pokémon are compatible, chat with the man in front of the Day Care Center. He has a sense about these things and will tell you if the two Pokémon have a spark. When an Egg is created, the resulting Pokémon is the most basic form of the female parent Pokémon.
| NOTE |
| Pokémon keep track of family trees. You cannot mate the offspring of a Pokémon with its parent, even if they are compatible. |
Some Pokémon cannot produce Eggs, no matter what. Usually these are Legendary Pokémon, such as Kyogre, so don’t try to use the Day Care Center as a breeding ground for Legendary Pokémon. Use these tables to determine which Pokémon are compatible. Pokémon are compatible with other Pokémon in the same group. Some Pokémon belong to multiple groups, meaning they can breed with more Pokémon.
| Group 0: No Eggs-Group Pokémon | ||||
| Nidorina | Nidoqueen | Articuno | Zapdos | Moltres |
| Mewtwo | Mew | Pichu | Cleffa | Igglybuff |
| Togepi | Unown | Tyrogue | Smoochum | Elekid |
| Magby | Raikou | Entei | Suicune | Lugia |
| Ho-Oh | Celebi | Azurill | Wynaut | Regirock |
| Regice | Registeel | Latias | Latios | Kyogre |
| Groudon | Rayquaza | Jirachi | Deoxys | Budew |
| Chingling | Bonsly | Mime Jr. | Happiny | Munchlax |
| Riolu | Mantyke | Uxie | Mesprit | Azelf |
| Dialga | Palkia | Heatran | Regigigas | Giratina |
| Cresselia | Darkrai | Shaymin | Arceus | Victini |
| Cobalion | Terrakion | Virizion | Tornadus | Thundurus |
| Reshiram | Zekrom | Landorus | Kyurem | Keldeo |
| Meloetta | Genesect | Greninja (Battle Bond) | Xerneas | Yveltal |
| Zygarde | Diancie | Hoopa | Volcanion | Type: Null |
| Silvally | Tapu Koko | Tapu Lele | Tapu Bulu | Tapu Fini |
| Cosmog | Cosmoem | Solgaleo | Lunala | Nihilego |
| Buzzwole | Pheromosa | Xurkitree | Celesteela | Kartana |
| Guzzlord | Necrozma | Magearna | Marshadow | Poipole |
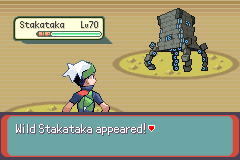
| Naganadel | Stakataka | Blacephalon | Zeraora | Meltan |
| Melmetal | Toxel | Dracozolt | Arctozolt | Dracovish |
| Arctovish | Zacian | Zamazenta | Eternatus | Kubfu |
| Urshifu | Zarude | Regieleki | Regidrago | Glastrier |
| Spectrier | Calyrex | Enamorus | Donphang | Bigglyruff |
| Thairwoosa | Misdactylus | Strolarona | Magnefrag | Tronphan |
| Telibird | Stariyama | Hydroidon | Solarona | Tyraniton |
| Gimmighoul | Gholdengo | Malamence | Galgaraze | Koraidon |
| Miraidon | Basilux | Lazeroph | ||
| Group 1: Plant-Group Pokémon | ||||
| Oddish | Gloom | Vileplume | Bellsprout | Weepinbell |
| Victreebel | Exeggcute | Exeggutor | Tangela | Bellossom |
| Sunkern | Sunflora | Carnivine | Tangrowth | Petilil |
| Lilligant | Maractus | Foongus | Amoonguss | Fomantis |
| Lurantis | Morelull | Shiinotic | Bounsweet | Steenee |
| Tsareena | Comfey | Gossifleur | Eldegoss | Smoliv |
| Dolliv | Arboliva | Bramblin | Brambleghast | Toedscool |
| Toedscruel | Capsakid | Scovillain | Bulbasaur | Ivysaur |
| Venusaur | Paras | Parasect | Chikorita | Bayleef |
| Meganium | Hoppip | Skiploom | Jumpluff | Lotad |
| Lombre | Ludicolo | Seedot | Nuzleaf | Shiftry |
| Shroomish | Breloom | Roselia | Cacnea | Cacturne |
| Tropius | Turtwig | Grotle | Torterra | Roserade |
| Cherubi | Cherrim | Snover | Abomasnow | Snivy |
| Servine | Serperior | Cottonee | Whimsicott | Ferroseed |
| Ferrothorn | Phantump | Trevenant | Grookey | Thwackey |
| Rillaboom | Applin | Flapple | Appletun | Sprigatito |
| Floragato | Meowscarada | |||
| Group 2: Bug-Group Pokémon | ||||
| Caterpie | Metapod | Butterfree | Weedle | Kakuna |
| Beedrill | Venonat | Venomoth | Scyther | Pinsir |
| Ledyba | Ledian | Spinarak | Ariados | Yanma |
| Pineco | Forretress | Gligar | Scizor | Shuckle |
| Heracross | Wurmple | Silcoon | Beautifly | Cascoon |
| Dustox | Nincada | Ninjask | Kricketot | Kricketune |
| Burmy | Wormadam | Mothim | Combee | Vespiquen |
| Yanmega | Gliscor | Sewaddle | Swadloon | Leavanny |
| Venipede | Whirlipede | Scolipede | Karrablast | Escavalier |
| Joltik | Galvantula | Shelmet | Accelgor | Durant |
| Larvesta | Volcarona | Scatterbug | Spewpa | Vivillon |
| Grubbin | Charjabug | Vikavolt | Blipbug | Dottler |
| Orbeetle | Sizzlipede | Centiskorch | Snom | Frosmoth |
| Kleavor | Nymble | Lokix | Rellor | Rabsca |
| Paras | Parasect | Surskit | Masquerain | Volbeat |
| Illumise | Trapinch | Vibrava | Flygon | Skorupi |
| Drapion | Dwebble | Crustle | Cutiefly | Ribombee |
| Dewpider | Araquanid | Wimpod | Golisopod | |
| Group 3: Flying-Group Pokémon | ||||
| Pidgey | Pidgeotto | Pidgeot | Spearow | Fearow |
| Zubat | Golbat | Doduo | Dodrio | Aerodactyl |
| Hoothoot | Noctowl | Crobat | Natu | Xatu |
| Murkrow | Skarmory | Taillow | Swellow | Starly |
| Staravia | Staraptor | Honchkrow | Chatot | Pidove |
| Tranquill | Unfezant | Sigilyph | Rufflet | Braviary |
| Vullaby | Mandibuzz | Fletchling | Fletchinder | Talonflame |
| Rowlet | Dartrix | Decidueye | Pikipek | Trumbeak |
| Toucannon | Oricorio | Rookidee | Corvisquire | Corviknight |
| Flittle | Espathra | Bombirdier | Flamigo | Farfetch’d |
| Togetic | Wingull | Pelipper | Swablu | Altaria |
| Togekiss | Woobat | Swoobat | Archen | Archeops |
| Ducklett | Swanna | Hawlucha | Noibat | Noivern |
| Sirfetch’d | Quaxly | Quaxwell | Quaquaval | Wattrel |
| Kilowattrel | ||||
| Group 4: HumanShape-Group Pokémon | ||||
| Abra | Kadabra | Alakazam | Machop | Machoke |
| Machamp | Drowzee | Hypno | Hitmonlee | Hitmonchan |
| Mr. Mime | Jynx | Electabuzz | Magmar | Hitmontop |
| Makuhita | Hariyama | Sableye | Meditite | Medicham |
| Croagunk | Toxicroak | Electivire | Magmortar | Timburr |
| Gurdurr | Conkeldurr | Throh | Sawk | Gothita |
| Gothorita | Gothitelle | Elgyem | Beheeyem | Pawniard |
| Bisharp | Toxtricity | Mr. Rime | Charcadet | Armarouge |
| Ceruledge | Kingambit | Ralts | Kirlia | Gardevoir |
| Volbeat | Illumise | Spinda | Cacnea | Cacturne |
| Chimchar | Monferno | Infernape | Buneary | Lopunny |
| Lucario | Gallade | Mienfoo | Mienshao | Pancham |
| Pangoro | Hawlucha | Scorbunny | Raboot | Cinderace |
| Clobbopus | Grapploct | Impidimp | Morgrem | Grimmsnarl |
| Group 5: Mineral-Group Pokémon | ||||
| Geodude | Graveler | Golem | Magnemite | Magneton |
| Onix | Voltorb | Electrode | Porygon | Sudowoodo |
| Steelix | Porygon2 | Shedinja | Nosepass | Lunatone |
| Solrock | Baltoy | Claydol | Beldum | Metang |
| Metagross | Bronzor | Bronzong | Magnezone | Porygon-Z |
| Probopass | Roggenrola | Boldore | Gigalith | Trubbish |
| Garbodor | Vanillite | Vanillish | Vanilluxe | Klink |
| Klang | Klinklang | Cryogonal | Golett | Golurk |
| Honedge | Doublade | Aegislash | Klefki | Minior |
| Dhelmise | Rolycoly | Carkol | Coalossal | Stonjourner |
| Nacli | Naclstack | Garganacl | Varoom | Revavroom |
| Glimmet | Glimmora | Snorunt | Glalie | Froslass |
| Dwebble | Crustle | Yamask | Cofagrigus | Ferroseed |
| Ferrothorn | Carbink | Bergmite | Avalugg | Sinistea |
| Polteageist | Runerigus | Falinks | Cufant | Copperajah |
| Duraludon | Fidough | Dachsbun | Frigibax | Arctibax |
| Baxcalibur | ||||
| Group 6: Indeterminate-Group Pokémon | ||||
| Grimer | Muk | Gastly | Haunter | Gengar |
| Koffing | Weezing | Misdreavus | Wobbuffet | Slugma |
| Magcargo | Gulpin | Swalot | Shuppet | Banette |
| Duskull | Dusclops | Chimecho | Drifloon | Drifblim |
| Mismagius | Spiritomb | Dusknoir | Rotom | Solosis |
| Duosion | Reuniclus | Frillish | Jellicent | Tynamo |
| Eelektrik | Eelektross | Litwick | Lampent | Chandelure |
| Pumpkaboo | Gourgeist | Sandygast | Palossand | Mimikyu |
| Ralts | Kirlia | Gardevoir | Castform | Shellos |
| Gastrodon | Gallade | Yamask | Cofagrigus | Stunfisk |
| Phantump | Trevenant | Sinistea | Polteageist | Runerigus |
| Milcery | Alcremie | Pincurchin | Dreepy | Drakloak |
| Dragapult | ||||
| Group 7: Ground-Group Pokémon | ||||
| Rattata | Raticate | Sandshrew | Sandslash | Vulpix |
| Ninetales | Diglett | Dugtrio | Meowth | Persian |
| Mankey | Primeape | Growlithe | Arcanine | Ponyta |
| Rapidash | Tauros | Eevee | Vaporeon | Jolteon |
| Flareon | Cyndaquil | Quilava | Typhlosion | Sentret |
| Furret | Aipom | Espeon | Umbreon | Girafarig |
| Dunsparce | Sneasel | Teddiursa | Ursaring | Swinub |
| Piloswine | Houndour | Houndoom | Phanpy | Donphan |
| Stantler | Smeargle | Miltank | Torchic | Combusken |
| Blaziken | Poochyena | Mightyena | Zigzagoon | Linoone |
| Slakoth | Vigoroth | Slaking | Electrike | Manectric |
| Numel | Camerupt | Torkoal | Spoink | Grumpig |
| Zangoose | Kecleon | Absol | Shinx | Luxio |
| Luxray | Ambipom | Glameow | Purugly | Stunky |
| Skuntank | Hippopotas | Hippowdon | Weavile | Leafeon |
| Glaceon | Mamoswine | Tepig | Pignite | Emboar |
| Oshawott | Dewott | Samurott | Patrat | Watchog |
| Lillipup | Herdier | Stoutland | Purrloin | Liepard |
| Pansage | Simisage | Pansear | Simisear | Panpour |
| Simipour | Munna | Musharna | Blitzle | Zebstrika |
| Drilbur | Excadrill | Sandile | Krokorok | Krookodile |
| Darumaka | Darmanitan | Zorua | Zoroark | Minccino |
| Cinccino | Deerling | Sawsbuck | Emolga | Cubchoo |
| Beartic | Bouffalant | Heatmor | Chespin | Quilladin |
| Chesnaught | Fennekin | Braixen | Delphox | Bunnelby |
| Diggersby | Litleo | Pyroar | Skiddo | Gogoat |
| Furfrou | Espurr | Meowstic | Sylveon | Litten |
| Torracat | Incineroar | Yungoos | Gumshoos | Rockruff |
| Lycanroc | Mudbray | Mudsdale | Stufful | Bewear |
| Oranguru | Passimian | Komala | Skwovet | Greedent |
| Nickit | Thievul | Wooloo | Dubwool | Yamper |
| Boltund | Obstagoon | Perrserker | Wyrdeer | Ursaluna |
| Sneasler | Fuecoco | Crocalor | Skeledirge | Lechonk |
| Oinkologne | Pawmi | Pawmo | Pawmot | Maschiff |
| Mabosstiff | Cyclizar | Orthworm | Greavard | Houndstone |
| Cetoddle | Cetitan | Annihilape | Farigiraf | Dunsparce2 |
| Ekans | Arbok | Pikachu | Raichu | Nidoran♀ |
| Nidoran♂ | Nidorino | Nidoking | Psyduck | Golduck |
| Farfetch’d | Seel | Dewgong | Rhyhorn | Rhydon |
| Mareep | Flaaffy | Ampharos | Wooper | Quagsire |
| Snubbull | Granbull | Delibird | Seedot | Nuzleaf |
| Shiftry | Whismur | Loudred | Exploud | Skitty |
| Delcatty | Mawile | Wailmer | Wailord | Spinda |
| Seviper | Spheal | Sealeo | Walrein | Chimchar |
| Monferno | Infernape | Piplup | Prinplup | Empoleon |
| Bidoof | Bibarel | Pachirisu | Buizel | Floatzel |
| Buneary | Lopunny | Lucario | Rhyperior | Snivy |
| Servine | Serperior | Woobat | Swoobat | Scraggy |
| Scrafty | Mienfoo | Mienshao | Pancham | Pangoro |
| Dedenne | Popplio | Brionne | Primarina | Togedemaru |
| Grookey | Thwackey | Rillaboom | Scorbunny | Raboot |
| Cinderace | Sobble | Drizzile | Inteleon | Silicobra |
| Sandaconda | Sirfetch’d | Eiscue | Cufant | Copperajah |
| Sprigatito | Floragato | Meowscarada | Tandemaus | Maushold |
| Fidough | Dachsbun | Finizen | Palafin | Clodsire |
| Group 8: Water 1-Group Pokémon | ||||
| Poliwag | Poliwhirl | Poliwrath | Politoed | Mantine |
| Clamperl | Huntail | Gorebyss | Tympole | Palpitoad |
| Seismitoad | Froakie | Frogadier | Greninja | Mareanie |
| Toxapex | Pyukumuku | Tadbulb | Bellibolt | Squirtle |
| Wartortle | Blastoise | Psyduck | Golduck | Slowpoke |
| Slowbro | Seel | Dewgong | Horsea | Seadra |
| Lapras | Omanyte | Omastar | Kabuto | Kabutops |
| Dratini | Dragonair | Dragonite | Totodile | Croconaw |
| Feraligatr | Marill | Azumarill | Wooper | Quagsire |
| Slowking | Corsola | Remoraid | Octillery | Delibird |
| Kingdra | Mudkip | Marshtomp | Swampert | Lotad |
| Lombre | Ludicolo | Wingull | Pelipper | Surskit |
| Masquerain | Corphish | Crawdaunt | Feebas | Milotic |
| Spheal | Sealeo | Walrein | Relicanth | Piplup |
| Prinplup | Empoleon | Bidoof | Bibarel | Buizel |
| Floatzel | Shellos | Gastrodon | Phione | Manaphy |
| Tirtouga | Carracosta | Ducklett | Swanna | Alomomola |
| Stunfisk | Inkay | Malamar | Skrelp | Dragalge |
| Clauncher | Clawitzer | Popplio | Brionne | Primarina |
| Dewpider | Araquanid | Sobble | Drizzile | Inteleon |
| Chewtle | Drednaw | Clobbopus | Grapploct | Cursola |
| Pincurchin | Eiscue | Quaxly | Quaxwell | Quaquaval |
| Wattrel | Kilowattrel | Clodsire | ||
| Group 9: Water 2-Group Pokémon | ||||
| Goldeen | Seaking | Chinchou | Lanturn | Qwilfish |
| Carvanha | Sharpedo | Barboach | Whiscash | Luvdisc |
| Finneon | Lumineon | Basculin | Wishiwashi | Bruxish |
| Arrokuda | Barraskewda | Basculegion | Overqwil | Veluza |
| Dondozo | Tatsugiri | Magikarp | Gyarados | Remoraid |
| Octillery | Wailmer | Wailord | Relicanth | Alomomola |
| Inkay | Malamar | Finizen | Palafin | |
| Group 10: Water 3-Group Pokémon | ||||
| Tentacool | Tentacruel | Shellder | Cloyster | Krabby |
| Kingler | Staryu | Starmie | Lileep | Cradily |
| Anorith | Armaldo | Binacle | Barbaracle | Crabrawler |
| Crabominable | Klawf | Wiglett | Wugtrio | Omanyte |
| Omastar | Kabuto | Kabutops | Corsola | Corphish |
| Crawdaunt | Skorupi | Drapion | Tirtouga | Carracosta |
| Archen | Archeops | Clauncher | Clawitzer | Wimpod |
| Golisopod | Cursola | |||
| Group 11: Monster-Group Pokémon | ||||
| Cubone | Marowak | Lickitung | Kangaskhan | Snorlax |
| Larvitar | Pupitar | Tyranitar | Aron | Lairon |
| Aggron | Cranidos | Rampardos | Shieldon | Bastiodon |
| Lickilicky | Amaura | Aurorus | Bulbasaur | Ivysaur |
| Venusaur | Charmander | Charmeleon | Charizard | Squirtle |
| Wartortle | Blastoise | Nidoran♀ | Nidoran♂ | Nidorino |
| Nidoking | Slowpoke | Slowbro | Rhyhorn | Rhydon |
| Lapras | Chikorita | Bayleef | Meganium | Totodile |
| Croconaw | Feraligatr | Mareep | Flaaffy | Ampharos |
| Slowking | Treecko | Grovyle | Sceptile | Mudkip |
| Marshtomp | Swampert | Whismur | Loudred | Exploud |
| Tropius | Turtwig | Grotle | Torterra | Gible |
| Gabite | Garchomp | Snover | Abomasnow | Rhyperior |
| Axew | Fraxure | Haxorus | Druddigon | Helioptile |
| Heliolisk | Tyrunt | Tyrantrum | Bergmite | Avalugg |
| Salandit | Salazzle | Turtonator | Drampa | Chewtle |
| Drednaw | ||||
| Group 12: Fairy-Group Pokémon | ||||
| Clefairy | Clefable | Jigglypuff | Wigglytuff | Chansey |
| Blissey | Plusle | Minun | Audino | Flabébé |
| Floette | Florges | Spritzee | Aromatisse | Swirlix |
| Slurpuff | Hatenna | Hattrem | Hatterene | Indeedee |
| Tinkatink | Tinkatuff | Tinkaton | Pikachu | Raichu |
| Togetic | Marill | Azumarill | Hoppip | Skiploom |
| Jumpluff | Snubbull | Granbull | Shroomish | Breloom |
| Skitty | Delcatty | Mawile | Roselia | Castform |
| Snorunt | Glalie | Roserade | Pachirisu | Cherubi |
| Cherrim | Togekiss | Froslass | Phione | Manaphy |
| Cottonee | Whimsicott | Dedenne | Carbink | Cutiefly |
| Ribombee | Togedemaru | Impidimp | Morgrem | Grimmsnarl |
| Milcery | Alcremie | Falinks | Tandemaus | Maushold |
| Group 13: Dragon-Group Pokémon | ||||
| Bagon | Shelgon | Salamence | Deino | Zweilous |
| Hydreigon | Goomy | Sliggoo | Goodra | Jangmo-o |
| Hakamo-o | Kommo-o | Charmander | Charmeleon | Charizard |
| Ekans | Arbok | Horsea | Seadra | Magikarp |
| Gyarados | Dratini | Dragonair | Dragonite | Kingdra |
| Treecko | Grovyle | Sceptile | Trapinch | Vibrava |
| Flygon | Swablu | Altaria | Seviper | Feebas |
| Milotic | Gible | Gabite | Garchomp | Scraggy |
| Scrafty | Axew | Fraxure | Haxorus | Druddigon |
| Skrelp | Dragalge | Helioptile | Heliolisk | Tyrunt |
| Tyrantrum | Noibat | Noivern | Salandit | Salazzle |
| Turtonator | Drampa | Applin | Flapple | Appletun |
| Silicobra | Sandaconda | Duraludon | Dreepy | Drakloak |
| Dragapult | Frigibax | Arctibax | Baxcalibur | |
| Group 14: Ditto-Group Pokémon |
| Ditto |
Breeding Moves and Stats
Breeding does more than create new Pokémon. Be clever about which Pokémon you breed so you’re sure to create new Pokémon that have great talents than their parents did at their early stages, such as moves and increased stats.
Newborn Pokémon inherit stats from the parent of the opposite gender. If the baby Pokémon is male, it enjoys the stat increases of the female parent Pokémon. If the baby Pokémon is female, it earns the stat upgrades of the male parent Pokémon. You can use this to your advantage if you have two compatible Pokémon of opposite genders and both have excellent skills and stats. The offspring will be Lv. 5, but loaded with power.
Your new Pokémon can also be on the receiving end of the high-level moves its parents took a long time to learn. Three types of moves can be taught through this strategy: Learned Moves, Inherited Moves, and Egg Moves.
- Learned Moves: Moves any Pokémon caught in the wild would know at Lv. 1.
- Inherited Moves: Moves learned through the Evolutionary process or via a TM can be passed from the male parent Pokémon, even if the move cannot be learned or used until after Lv. 1.
- Egg Moves: Egg Moves are learned from the male parent Pokémon, but these are different than Inherited Moves. Egg Moves are moves the Pokémon would not normally be able to learn.
When a Pokémon hatches, it has the moves a wild Pokémon at Lv. 1 would know. For example, a new Treecko will know Pound and Leer. The Pokémon has enough room to learn two more moves; these spots can be filled with Inherited Moves. Inherited Moves and Egg Moves take greater precedence over Learned Moves, so if the Pokémon has access to more moves than you have empty space for, it will replace the Learned Moves with the Inherited and Egg Moves.
There are ways to breed a Pokémon with impressive move sets. If both parents know the same high-level move, the baby Pokémon will also know it, even though it is Lv. 1. Plus, TM moves are passed down as well, so you don’t have to worry about using it again.
The included Pokédex details which Egg Moves the newborn Pokémon can learn, so check the entries before you breed to make the “ultimate” Pokémon. Play your cards right to have a really amazing Pokémon on your team. It takes a little time, but the results are worth it.
Hatching Eggs
When the Day Care Center alerts you of a new Egg, you must work at hatching it. First, you must have an empty space on your team to accept the Egg. Without it, the Day Care Center will keep the Egg. After you have the Egg, leave it in your Active Pokémon list to hatch it. Every Egg has a special number of steps required to hatch it, so tramp around Hoenn and you’ll soon have a bouncing baby Pokémon.
| TIP |
| Breed two of the same Pokémon to hatch the resulting Egg faster. |
Pokémon Battles
There are two types of battles in Pokémon Theta Emerald The Last Dance: battles against wild Pokémon and those against Pokémon Trainers. To succeed at a battle, you must have a basic understanding of the battle system, from selecting moves to pitting Pokémon against weaker types. Battles with wild Pokémon are always 1-on-1 Battles. Battles with Pokémon Trainers can be either 1-on-1 or 2-on-2.
Course of Action
When the battle starts, the first Pokémon on your team enters the field. This Pokémon is called your lead Pokémon. You can switch out your led Pokémon when you’re not in a battle. After your lead Pokémon is outside of battle, it’s time to choose a course of action. You have four choices:
- Fight: The Fight command allows you tell the Pokémon which move to use in the battle, whether it is offensive or defensive. Each move has a limited number of uses, which is detailed by its Power Point (PP) level. You can replenish PP between battles at a Pokémon Center, or in battle with a recovery Item.
- Pokémon: This command allows you to shift Pokémon in and out of battle. Is your Pokémon not doing so well against its opponent? Do you have a Pokémon in reserve who is better suited for a particular battle? Call back the Pokémon in the battle and replace it with another Pokémon from the team.
- Bag: Your Bag is full of Items, such as Potions and berries. You can use these Items in battle to recover HP or increase your fighting abilities. If you are battling a wild Pokémon, dip into your Bag to get a Poké Ball with which to catch it. Using an Item from your Bag completes your turn. You cannot complete a battle move and use an Item in the same turn.
- Run: You cannot flee from a Trainer Battle, but if you are battling against a wild Pokémon, use this command to exit the fight. This is not always successful. Some opponent Pokémon have special abilities or moves that can prevent you from running.
Trainer Battles

Hoenn’s fields are full of Pokémon Trainers looking for battles. If you interact with them, the Trainer challenges you to a battle. You cannot refuse, and you must battle until all of one Trainer’s Pokémon have fainted (lost all HP).
There are a few different battle types in Pokémon Theta Emerald The Last Dance. In addition to regular 1-on-1 Battles, there are 2-on-2 Battles where two Trainers send out a single Pokémon each. In these battles, you must respond with two Pokémon. Your lead Pokémon and the second Pokémon are automatically sent into the battle. There are also some four-Trainer battles where you have an ally. During these battles, you and your ally each send out your lead Pokémon.
Using Moves
Offensives moves can dish out different kinds of damage. Some moves direct damage at a single opponent. Other moves affect every Pokémon in the battle.
- Affect One Opponent: In 1-on-1 Battles, this is a given. However, during 2-on-2 Battles, you must select which opponent Pokémon you want to target with a move.
- Affect Two Opponents: Some moves in 2-on-2 Battles affect both of your opponent Pokémon. TM50 (Dazzling Gleam) is a good example of this. It emits a powerful flash on both opponents.
- Affect Random Opponents: You cannot direct certain moves at an individual opponent during 2-on-2 Battles. Rayquaza’s Outrage, for example, randomly attacks either of the opponent Pokémon during the course of attack.
- Affect All Pokémon: Some attack moves affect your own Pokémon during battle. When you cast a move that affects every Pokémon outside of battle, be sure that your Pokémon will not be eliminated because of it. Make sure you either have enough HP, or that it will finish the battle in your favor, even if it causes your Pokémon to faint.
Pokémon Types and Battle Strategies
The true essence of a Pokémon battle is the art of matching up your opponent Pokémon’s type with a move type that will send it reeling. Every Pokémon is assigned a specific type, such as Fire or Steel. Every type has at least one type against which it is weak. For example, Water-type Pokémon are weak against Electric-type moves.
Because of this system, you must have a well-rounded Pokémon team that spans several types. It’s a good idea to have Water-, Fire-, and Electric-type Pokémon on your team. Beyond those three types, you may wish to concentrate on raising strong Rock- and Ground-type Pokémon, as well as Psychic- and Flying-type Pokémon. However you assemble your team, though, is up to you.
This chart details the strengths and weakness of Pokémon types and move types. Use the legend to determine which kinds of moves you should use against opponent Pokémon, as well as to identify when you should switch out your Pokémon should an opponent Trainer send in something that exploits your weaknesses.
| NOTE |
| In Pokémon Theta Emerald The Last Dance, many Pokémon are dual-type, meaning they have two types, such as Grass and Water. In some situations, the second type can work against what would normally be a power move. The Fire-type attack that would damage a Grass-type Pokémon is negated by the secondary Water-type. |

Damage Multipliers
To be a successful Trainer, you must master damager multipliers. Depending on what type of move you use against an opponent Pokémon, you can see a variety of effects. You can also affect the amount of damage done by holding Items that affect a Pokémon’s strength (such as giving Charcoal to a Fire-type Pokémon) or scoring the occasional Critical Hit. Certain moves, such as TM21 (Rain Dance), affect a Pokémon’sattacks, depending on the type of Pokémon in the battle.
| Multipliers | |
| Condition | Multiplier |
| Move is the same type as Pokémon | 1.5x |
| Move is effective against opponent’s type | 2-4x |
| Move scores a Critical Hit | 1.5x |
Battle Messages
During a battle’s course, you may see messages at the screen’s bottom. These messages let you know if the attacks you are using (or the attacks being used against you) are working, if an attack is not effective, or if your Pokémon has scored a Critical Hit.
| Battle Messages | |
| Message | Damage Multiplier |
| “It’s super effective!” | x2-4 |
| No message | x1 |
| “It’s not very effective.” | x0.5 |
| “It has no effect.” | x0 |
| “A Critical Hit” | x1.5 |
| TIP |
| If a Pokémon uses a move that is the same type as itself (for example, a Water-type Pokémon uses a Water-type Move), the damage is 1.5x greater. |
Status Anomalies
Some moves are Special Attacks that cause additional effects beyond damage. These attacks cause status changes, such as Poison and Sleep, which have lasting effects beyond the single turn. You can cure many of these status changes with healing Items, such as Antidote or Awakening. A trip to the Pokémon Center can also reverse these effects.
| Status Anomalies and Their Cures | ||||
| Status Problem | Effect | Recovery Moves | Recovery Items | |
| Attraction | Pokémon is Attracted to its opponent, and will not attack it 50% of the time. | Switch Pokémon with another Pokémon. | Red Flute, Mental Herb | |
| Burned | Pokémon takes burn damage every round. This status anomaly also lowers the Pokémon’s Attack. | Refresh, TM56 (Rest) | Burn Heal, Full Heal, Full Restore, Heal Powder, Lava Cookie, Rawst Berry, Lum Berry | |
| Confusion | Pokémon is Confused and may attack itself. | Switch Pokémon with another. Recovers automatically after a number of turns. | Yellow Flute, Full Heal, Heal Powder, Full Restore, Persim Berry | |
| Fainted | Pokémon cannot participate in battle. | Revive and recover at Pokémon Center. | Revive, Max Revive, Revival Herb | |
| Flinch | Pokémon flinches and cannot attack that round. | This condition lasts only one turn. | N/A | |
| Frozen | Pokémon cannot move from the frostbite. | Recovers when attacked by Fire-type moves or automatically over time. | Ice Heal, Full Heal, Full Restore, Heal Powder, Lava Cookie, Aspear Berry, Lum Berry | |
| Paralysis | 25% of time your Pokémon tries to attack, it can’t move because of Paralysis. This status anomaly also lowers your Pokémon’s speed. | Refresh, TM56 (Rest) | ParalyzeHeal, Lava Cookie, Full Heal, Full Restore, Heal Powder, Cheri Berry, Lum Berry | |
| Poison | Pokémon takes damage every round. Depending upon the type of Poisoning, the damage amount inflicted may increase every round | Refresh, TM56 (Rest) | Antidote, Full Heal, Full Restore, Heal Powder, Lava Cookie, Pecha Berry, Lum Berry | |
| Sleep | Pokémon is unable to move while it remains asleep. | Awakens automatically after a number of battle rounds. | Awakening, Full Heal, Full Restore, Heal Powder, Lava Cookie, Chesto Berry, Lum Berry, Blue Flute | |
Trainer Knowledge
Pokémon Natures
Your Pokémon have Natures, things that add to their individual personalities. Natures affect the stat increases your Pokémon enjoys while leveling up. Use this table to judge how your Pokémon will change and grow with each level.
Manually Raising Stats
You can also increase your Pokémon’s stats manually by feeding it special Items between battles. These Items affect stats in a positive way.
- HP Up: Raises the base number of Hit Points
- Protein: Raises the base sum of the Pokémon’s Attack
- Iron: Raises the base amount of the Pokémon’s Defense
- Calcium: Raises the base number of the Pokémon’s Special Attack
- Zinc: Raises the base number of the Pokémon’s Special Defense
- Carbos: Raises base Speed points
In-Field Moves
While exploring Hoenn, you might notice that some Pokémon might have a move pop up in the Pokémon menu. These special moves have unique abilities that have a use both in and out of battle.
| Moves with Field Abilities | |
| Move | Ability |
| TM26 (Dig) | Tunnel out of caves. |
| Teleport | Teleport automatically to the last Pokémon Center visited. |
| Soft-Boiled/Milk Drink | Transfers 20% of the user’s HP to another Pokémon in the party. |
| Sweet Scent | Attracts wild Pokémon, increasing the random battle frequency. |
The Keys to Hoenn Maps and Events
The sections contains detailed maps, shop and move lists, and the many things you can do in each area. Each map is accompanied by the Pokémon you will encounter on that specific route—so stock up on Poké Balls in town before heading into a region with a specific Pokémon you truly want.
| NOTE |
| Many routes have areas that can accessed only after you receive a Gym Badge. |
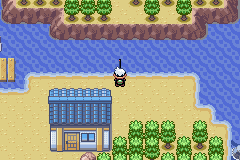
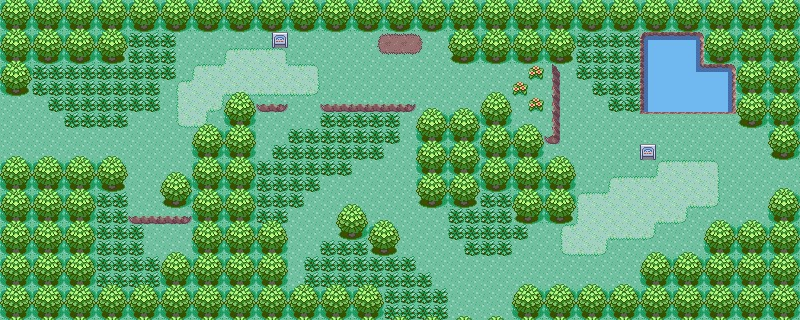
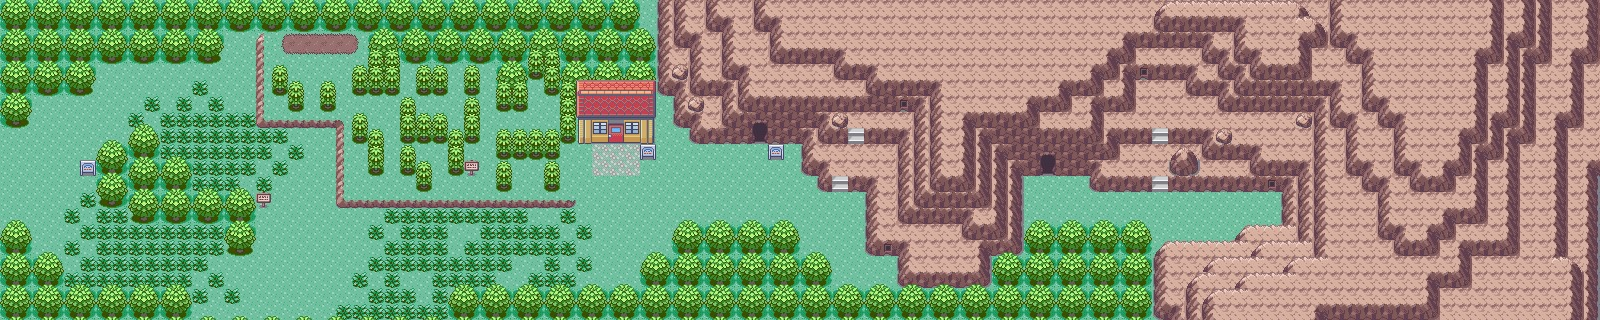
Littleroot Town
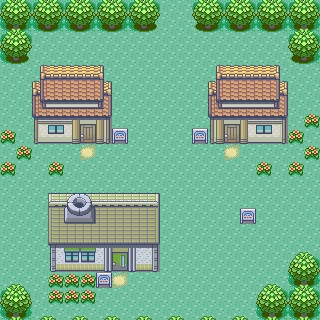
Welcome to your new home: Littleroot Town. The small township is located in the southern region of Hoenn, surrounded on all sides by thick forest. Though you will stray far from home while exploring Hoenn and becoming a Pokémon Master, this place will always remain special.
| Items |
| Amulet Coin |
| Exp. Share |
| Mewtwonite X (HIDDEN) |
| Mega Ring |
| Pokédex |
| Poké Ball x50 |
| Potion |
| S.S. Ticket |
| Shiny Charm |
| Pokémon Appearances | |
| Pokémon | Conditions |
| Rowlet | Awarded to you after rescuing Prof. Birch |
| Fuecoco | Awarded to you after rescuing Prof. Birch |
| Totodile | Awarded to you after rescuing Prof. Birch |
Event 1: New Neighborhood
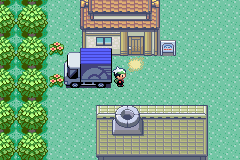
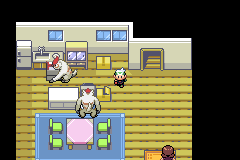
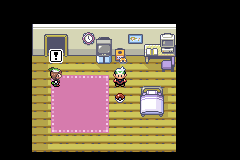
Pokémon Theta Emerald The Last Dance begins with you making your new home in Littleroot Town. Your father is already away at work, so you and your mother must take care of getting everything put away. Thankfully, the moving company’s Pokémon are doing most of the heavy lifting. Your mother suggests you go upstairs and check out your new room. Set the clock on the wall to the correct time to get things started.
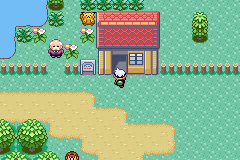
Which house you live in depends on whether you decide to play as a boy or girl. If you chose to be a girl, you live in the house on the right. If you chose to be a boy, you live in the house on the left. When it comes time to visit your neighbor, which is soon, visit the house just opposite of yours.
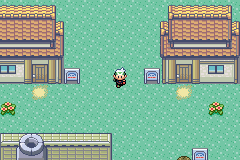
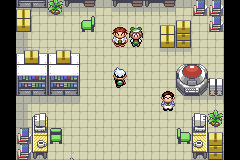
Event 2: Get Neighborly
Now that you are all settled in to your new home, it’s time to meet your neighbors. Littleroot Town is a quiet place, but the people next door seem interesting. Head to the house next to yours and introduce yourself to the Birch family. Prof. Birch is away doing research, but both his wife and your new friend (May or Brendan, depending on whether you chose a boy or girl—your new friend will be the opposite gender) are still home. Head upstairs to meet Prof. Birch’s kid.
Event 3: Rescue Prof. Birch
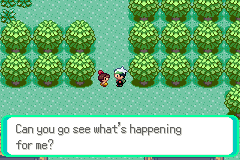
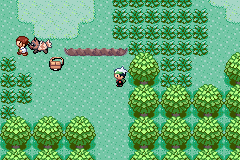
After meeting the Birch family, it’s time to head out into Hoenn. As you head north to Route 101, though, you run into Prof. Birch—and he’s not alone. The professor is being chased by a wild Zigzagoon and he needs your help. Fortunately, Prof. Birch left his knapsack full of Poké Balls nearby.
To help him, Prof. Birch allows you to select one of the three Poké Balls in his bag. This will be your first Pokémon. You can choose either Water-type Totodile, Grass- and Flying-type Rowlet, or Fire-type Fuecoco. After selecting the Pokémon you like the most, battle the Zigzagoon and save Prof. Birch.
Prof. Birch is grateful for your assistance. Back at his Lab in town, he allows you to keep the Pokémon you selected. With your first Pokémon, you can now head out of town and start battling.
| NOTE |
| There is no “correct” Pokémon to choose when Prof. Birch allows you to pick from his three Poké Balls. Choose the one with the look and moves you like the most. As you play, you can catch other Pokémon to complement your first choice. |
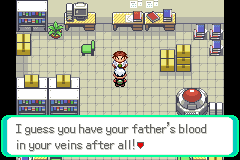
Event 4: After Rival Battle #1
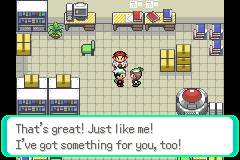
Word reaches Prof. Birch quickly that you successfully battled his kid. He is impressed with your natural talent and gives you a Pokédex so you can catalog your finds. His kid also gives you fifty Poké Balls, essential for catching wild Pokémon
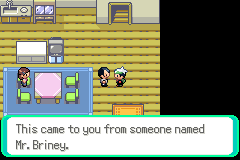
Before you leave Littleroot Town again, though, stop at home. Your mother has a present for you: Exp. Share. This Key Item helps train you and your team by giving experience to everyone in your party, regardless if they were in battle or not.
Event 5: After Beating the Fifth Gym

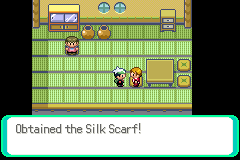
After you receive the Balance Badge from your father at Petalburg Gym, return to your home. Show the Badge to your mother and she absolutely beams—and gives you an Amulet Coin. This helpful Item can double the amount of money won in a battle. She also mentions that a guy named Louie came by and wanted to give you a Mega Ring, an Item that helps your Pokémon Mega Evolve. Who’s Louie?
Event 6: After Defeating The Elite Four
Defeating the Elite Four is quite an achievement. Head home and share the news with your parents. They proudly give you a ticket for the S.S. Tidal, Capt. Stern’s new ferry. The ferry, which is finally ready to set to sea, can be found in both Lilycove City and Slateport City.
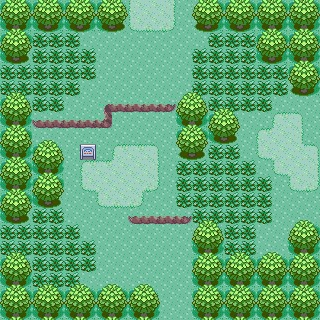
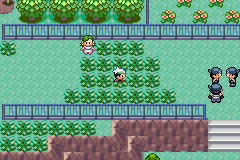
Route 101
| Pokémon Appearances | |
| Pokémon | Conditions |
| Rattata | 20% |
| Sentret | 20% |
| Zigzagoon | 10% |
| Bidoof | 10% |
| Patrat | 10% |
| Bunnelby | 10% |
| Yungoos | 5% |
| Skwovet | 5% |
| Pidgey | 4% |
| Taillow | 4% |
| Pidove | 1% |
| Pikipek | 1% |
Event 1: Catch ‘Em
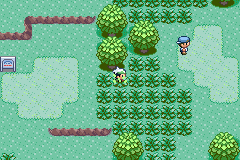
This route has twelve different Pokémon. However, until you receive the fifty Poké Balls from Prof. Birch’s child, you can only battle the wild Pokémon you encounter. Return to this route once you get those Poké Balls and start padding your new Pokédex.
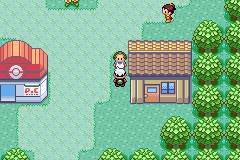
Oldale Town
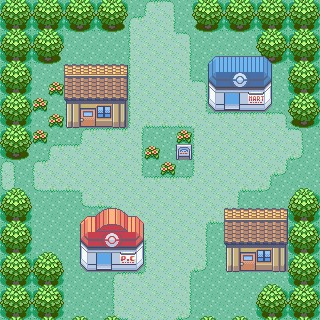
Oldale Town is a small township near Littleroot Town. It’s the first place you encounter both a Pokémart and a Pokémon Center. Chat with everybody in town—not only do they have interesting things to say, but you may be surprised by their generosity.
| Pokémart Merchandise | |
| Item | Price |
| Poké Ball* | 200 |
| Potion | 200 |
| Antidote | 200 |
| ParalyzeHeal | 200 |
| Awakening | 200 |
| *Only available until after getting the Pokédex | |
Event 1: Speak to Pokémart Representative
When you first arrive in Oldale, visit the Pokémart representative standing near the south entrance of the Town. The representative is happy to show and tell you about the shop and she even hands out free samples of the wares.
Event 2: West is a No-Go
The way to Route 102 is blocked by a researcher. The scientist is sketching what he believes are footprints from rare Pokémon. You can access Route 102 only after heading up through Route 103 and finding Prof. Birch’s child. When you come back, the researcher sheepishly stands aside.
Event 3: The Pokémon Center
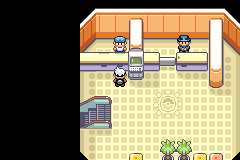
You definitely want to stop by the Pokémon Center while visiting Oldale Town. Every city in Hoenn hosts a Pokémon Center, which is the most useful place for a budding Trainer. The woman at the main counter on the first floor is always happy to heal your Pokémon for free. The PC next to the counter lets you access your storage to switch out Pokémon and access stored Items. Because your pockets aren’t bottomless, you’ll find yourself stopping by the PC often, especially if you’re a shopper.
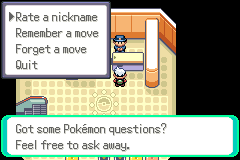
Head upstairs to find Jack and Matt. Jack is someone who can do a lot for you, especially further through your gameplay. He can change the name of your Pokémon, remember a move from a Pokémon’s past move set, and forget a move from the Pokémon’s current moves. Matt, however, is a different story. Matt, or AbsolBlogsPokemon (https://www.youtube.com/@AbsolBlogsPokemon), will not talk to you until you have a Pokédex. After that, he will introduce himself and tell you that he can change a Pokémon to any other Pokémon. But, there is a chance, as it is completely random as to what you get back, and it has a pre-determined level, depending on how many Badges you have acquired. In essence, it can be a double-edged sword, however you look at it.
| NOTE |
| The prices for Items at the Pokémarts are consistent at every shop across Hoenn. A Poké Ball costs the same in Oldale Town as it does in Slateport City. |
Route 103
| Pokémon Appearances on Land | |
| Pokémon | Conditions |
| Hoothoot | 20% |
| Starly | 20% |
| Fletchling | 10% |
| Rookidee | 10% |
| Budew | 10% |
| Growlithe | 10% |
| Wooper | 5% |
| Shinx | 5% |
| Tyrogue | 4% |
| Flabébé | 4% |
| Abra | 1% |
| Sneasel | 1% |
| Pokémon Appearances in Water | |
| Pokémon | Conditions |
| Goldeen | Surfing (60%), Good Rod (60%) |
| Shellos | Surfing (30%) |
| Basculin | Surfing (9%) |
| Clauncher | Surfing (1%), Super Rod (4%) |
| Magikarp | Old Rod (70%) |
| Wishiwashi | Old Rod (30%) |
| Arrokuda | Good Rod (20%) |
| Finneon | Good Rod (20%) |
| Octillery | Super Rod (40%) |
| Carvanha | Super Rod (40%) |
| Remoraid | Super Rod (15%) |
| Barraskewda | Super Rod (1%) |
| Items |
| Cheri Berries x4 |
| Guard Spec. |
| Leppa Berries x2 |
| PP Up |
Shortcut Alert
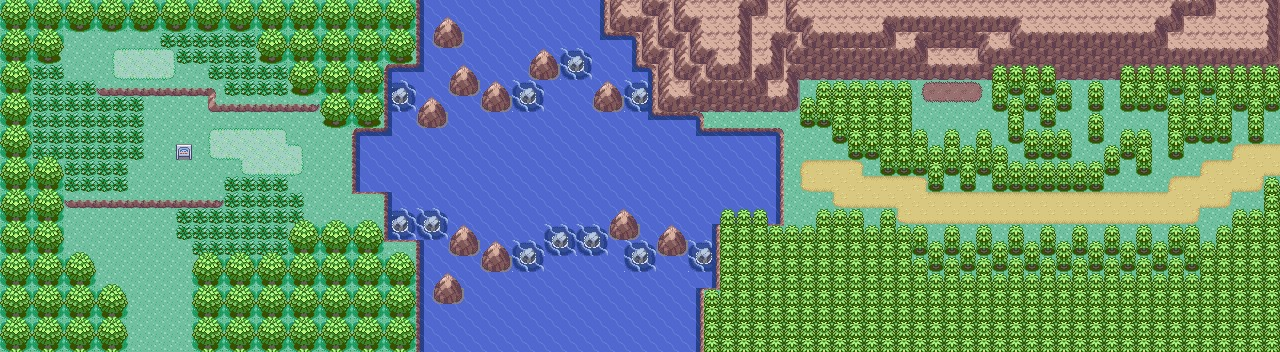
Once you have the Balance Badge, you can cross the water to the east in Route 103 and easily access both Mauville City and Slateport City via Route 110.
Event 1: Battle with Prof. Birch’s Child
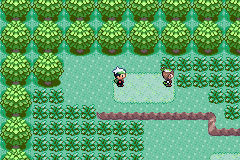
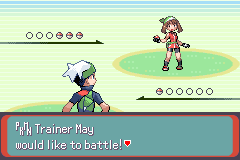
Prof. Birch’s child is waiting for a battle in Route 103. In fact, this is the first of a series of battles with the kid. With each battle, Prof. Birch’s child gets better and better, coming at you with more experienced Pokémon and smarter battle strategies. Enjoy this first battle while you can, because he or she will not be so easy later in your adventure.
| TIP |
| The battle may seem mismatched because Prof. Birch’s child brings out a trio of Pokémon, but keep at it and you will emerge victorious. |
Route 102

| Pokémon Appearances on Land | |
| Pokémon | Conditions |
| Nidoran♂ | 20% |
| Nidoran♀ | 20% |
| Sewaddle | 10% |
| Venipede | 10% |
| Scatterbug | 10% |
| Grubbin | 10% |
| Blipbug | 5% |
| Snom | 5% |
| Applin | 4% |
| Drifloon | 4% |
| Rockruff | 1% |
| Ralts | 1% |
| Pokémon Appearances in Water | |
| Pokémon | Conditions |
| Surskit | Surfing (60%) |
| Lotad | Surfing (30%) |
| Psyduck | Surfing (5%) |
| Dewpider | Surfing (4%) |
| Wimpod | Surfing (1%) |
| Magikarp | Old Rod (70%) |
| Wishiwashi | Old Rod (30%) |
| Poliwag | Good Rod (60%), Super Rod (40%) |
| Goldeen | Good Rod (20%) |
| Corphish | Good Rod (20%), Super Rod (15%) |
| Poliwhirl | Super Rod (40%) |
| Clauncher | Super Rod (4%) |
| Binacle | Super Rod (1%) |
| Items |
| Oran Berries x2 |
| Pecha Berries x2 |
| Potion |
Event 1: Trainer Battles
You encounter your first Trainer battles while walking through Route 102. However, Trainers will not challenge you unless you speak to them. Trainers sometimes look around. If you want to avoid a battle, just don’t talk to them. However, avoiding Trainer battles is not the way to become the best Trainer in Hoenn. Every successful battle results in experience points for your Pokémon, plus you receive cash. You’ll need as much cash as you can get to shop for needed Items.
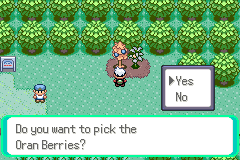
Event 2: Berry Picking
There are berry trees all over Hoenn, and the first ones you find are along Route 102. Berries have many uses—they negate status changes or they heal Pokémon.
When you pick the berries, the tree crumbles back to the dirt. You could pocket the berries and keep walking, but that’s hardly the neighborly thing to do. You are encouraged to plant berries in the vacant soil so they can grow new trees. All it takes is one berry to sprout a new tree, so keep one berry from your harvest and plant the other. If there are particular berries that you are fond of or use more than others, plant those whenever possible. The berries may take time to grow, but you’ll soon have a bumper crop all over Hoenn of your favorite berries.
| TIP |
| To speed up berry tree growth, water the seedlings with the Wailmer Pail, a Key Item you receive in Route 104. |
Petalburg City
Petalburg City is the biggest township you have visited yet. The city has its own Gym, which is where you must go to prove yourself as a Pokémon Trainer. Although you cannot compete in the Petalburg Gym just yet (patience, young Trainer) stop in and say hello to the very familiar (and familial) Gym Leader.
| Pokémart Merchandise (Right) | |
| Item | Price |
| Poké Ball | 200 |
| Potion | 200 |
| Antidote | 200 |
| ParalyzeHeal | 200 |
| Awakening | 200 |
| Escape Rope | 550 |
| Repel | 350 |
| X Speed | 1000 |
| X Attack | 1000 |
| X Defense | 550 |
| Orange Mail | 50 |
| Great Ball* | 600 |
| Super Potion* | 700 |
| Pokémart Merchandise (Left) | ||
| Item | Price | |
| Power Weight | 10000 | |
| Power Bracer | 10000 | |
| Power Belt | 10000 | |
| Power Lens | 10000 | |
| Power Band | 10000 | |
| Power Anklet | 10000 | |
| Pokémon Appearances in Water | |
| Pokémon | Conditions |
| Surskit | Surfing (60%) |
| Marill | Surfing (30%) |
| Psyduck | Surfing (5%) |
| Dewpider | Surfing (4%) |
| Wimpod | Surfing (1%) |
| Magikarp | Old Rod (70%) |
| Wishiwashi | Old Rod (30%) |
| Poliwag | Good Rod (60%), Super Rod (40%) |
| Goldeen | Good Rod (20%) |
| Corphish | Good Rod (20%) |
| Baculin (White) | Super Rod (40%) |
| Clauncher | Super Rod (15%) |
| Poliwhirl | Super Rod (4%) |
| Crawdaunt | Super Rod (1%) |
| Items |
| Balance Badge |
| Ether |
| Max Revive |
| Rare Candy (HIDDEN) |
| TM09 (Facade) |
| TM91 (Surf) |
Event 1: Visit the Gym
Your father runs the Gym in Petalburg City, so be sure to stop there as soon as you visit town. You need to compete at every Gym in Hoenn, but your father will not battle you until you have four Gym badges. However, he offers some words of encouragement and sends you on your way. Your father has a Gym badge that is essential to your adventure, though, so come back to him as soon as you have the required four Gym badges.
Event 2: Meet Wally
Much like Prof. Birch’s child (and a certain gentleman in sunglasses), Wally is somebody you encounter throughout your adventures in Hoenn. Wally is about to head to Verdanturf Town for an extended stay, but your father thinks he should have a Pokémon to keep him company. Accompany Wally to the grassy Route 102 and help him catch his first Pokémon, Ralts. Perhaps having a Pokémon will be enough to turn Wally’s health situation around?
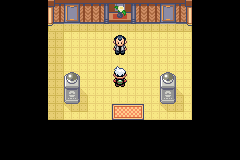
Event 3: Gym Leader Battle #5—Norman
| Norman, Petalburg Gym Leader | |||
| Pokémon Type: | Normal | ||
| Recommended Move Type: | Fighting | ||
| Gym Leader’s Pokémon | |||
| Pokémon | Level | Type | |
| Swellow | Lv. 27 | Normal | Flying |
| Staraptor | Lv. 27 | Normal | Flying |
| Obstagoon | Lv. 29 | Dark | Normal |
| Kangaskhan | Lv. 31 | Normal | |
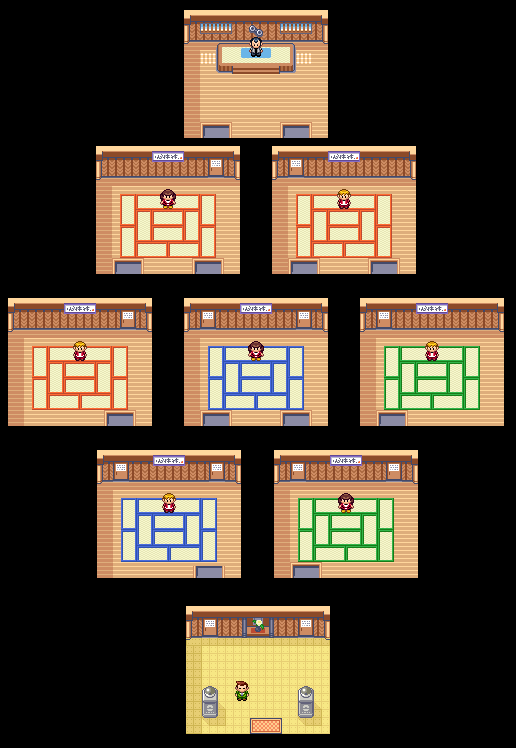
Once you have earned four Gym badges, it’s time to return to Petalburg and battle your father, Norman. But before you can challenge your father, you must battle at least three Trainers first. The Petalburg Gym is set up as a series of rooms. Each room contains a Trainer who specializes in a way of battling, such as causing Confusion or using HP recovery. A sign on each door explains what kind of tactics to expect from the Trainer just beyond.
Your father has set up the Gym this way to test your various methods for reacting to different battling tactics. But when it finally comes time to battle your father, you’re going to need more than just a strong Pokémon. Your father has several Potions, so have Pokémon with good moves that can counter his Pokémon types. If you can keep on top of his Pokémon with super effective moves, he won’t have a chance to break out his Potions.
| Items Won |
| Balance Badge: Increases your Pokémon’s Defense and allows you to traverse over water.TM09 (Facade) |
| TIP |
| You only need to battle three Trainers to reach Norman, but why not take on all seven and earn the extra experience points? |
Event 4: Post-Gym Pick-Up
After you win the Balance Badge at the Petalburg Gym, visit Wally’s House just next door. His father, so pleased with the help you’ve given Wally, rewards you with TM91 (Surf). This Technical Machine is a powerful Water-type move to have, but it can also damage your ally in a 2-on-2 battle, so be wary.
| NOTE |
  There’s more to do in town than just visit the Gym and see Wally. When you visit the Pokémon Center, look for a gentleman standing near the PC in the corner. The fellow is interested in your exploits and would love to hear all about them. From a collection of available word, assemble a brief profile of yourself and tell it to gentleman. Don’t forget to explore the two small ponds in Petalburg once you receive the Balance Badge. There are some goodies near the shores that you shouldn’t be without! There’s more to do in town than just visit the Gym and see Wally. When you visit the Pokémon Center, look for a gentleman standing near the PC in the corner. The fellow is interested in your exploits and would love to hear all about them. From a collection of available word, assemble a brief profile of yourself and tell it to gentleman. Don’t forget to explore the two small ponds in Petalburg once you receive the Balance Badge. There are some goodies near the shores that you shouldn’t be without! |
Route 104
| Flower Shop Merchandise | |
| Item | Price |
| Big Plant | 5000 |
| Colorful Plant | 5000 |
| Gorgeous Plant | 5000 |
| Pretty Flower | 3000 |
| Red Plant | 3000 |
| Tropical Plant | 3000 |
| Berry Lady | |
| Item | Price |
| Chilan Berry | 40 |
| Chople Berry | 40 |
| Coba Berry | 40 |
| Kebia Berry | 40 |
| Shuca Berry | 40 |
| Charti Berry | 40 |
| Tanga Berry | 40 |
| Kasib Berry | 40 |
| Babiri Berry | 40 |
| Occa Berry | 40 |
| Passho Berry | 40 |
| Rindo Berry | 40 |
| Wacan Berry | 40 |
| Payapa Berry | 40 |
| Yache Berry | 40 |
| Haban Berry | 40 |
| Colbur Berry | 40 |
| Roseli Berry | 40 |
| Micle Berry | 40 |
| Custap Berry | 40 |
| Kee Berry | 40 |
| MarangaBerry | 40 |
| Pokémon Appearances on Land | |
| Pokémon | Conditions |
| Caterpie | 20% |
| Weedle | 20% |
| Ledyba | 10% |
| Spinarak | 10% |
| Wurmple | 10% |
| Kricketot | 10% |
| Lechonk | 5% |
| Lillipup | 5% |
| Nymble | 4% |
| Seedot | 4% |
| Skorupi | 1% |
| Torchic | 1% |
| Pokémon Appearances in Water | |
| Pokémon | Conditions |
| Wingull | Surfing (95%) |
| Pelipper | Surfing (5%) |
| Magikarp | Old Rod (70%) |
| Wishiwashi | Old Rod (30%) |
| Goldeen | Good Rod (60%) |
| Clauncher | Good Rod (20%), Super Rod (40%) |
| Corphish | Good Rod (20%), Super Rod (15%) |
| Poliwag | Super Rod (40%) |
| Binacle | Super Rod (4%) |
| Octillery | Super Rod (1%) |
| Items |
| Antidote (HIDDEN) |
| Cheri Berries x2 |
| Chesto Berry |
| Heart Scale (HIDDEN) |
| Leppa Berries x2 |
| Oran Berries x2 |
| Pecha Berries x2 |
| Poké Ball |
| Poké Ball (HIDDEN) |
| Potion |
| Potion (HIDDEN) |
| PP Up |
| Super Potion (HIDDEN) |
| TM27 (Bullet Seed) |
| Wailmer Pail |
| White Herb |
| X Accuracy |
Event 1: Visit Mr. Briney’s House
On your way to the Petalburg Woods to the north of this route, look for a small cottage near the shore with a dock next to it. The owner, Mr. Briney, isn’t home right now. However, you return later in your adventure for some help from Mr. Briney—after you’ve helped him.
Event 2: Get a Green Thumb

After passing through Petalburg Woods, you come upon a small flower shop. It’s hard to miss it as the front of the building is decorated with lots of pretty petals. The women running the flower shop aren’t selling their wares just yet. They’re too busy tending the plants. Talk to them to get the Wailmer Pail, a helpful tool for growing berries in Hoenn.
Check back with the shop after you’ve completed more of your adventure. As soon as you can start decorating your Secret Base, these women will sell you some plants to liven up the place.
| TIP |
 After you receive the Wailmer Pail from the flower shop, return to your previous berry seedlings and water them. This helps them grow faster. Water them often and you’ll be pleasantly surprised with the result. After you receive the Wailmer Pail from the flower shop, return to your previous berry seedlings and water them. This helps them grow faster. Water them often and you’ll be pleasantly surprised with the result. |
| TIP |
Be Friendly! Talk to everybody in Hoenn. Almost everybody you meet is gracious and willing to chat, but some of them also share their possessions with you. For example, the young man outside of the flower shop has TM27 (Bullet Seed). He’s merrily spitting seeds and would love to share the talent with your Pokémon for absolutely free. Talk to everybody in Hoenn. Almost everybody you meet is gracious and willing to chat, but some of them also share their possessions with you. For example, the young man outside of the flower shop has TM27 (Bullet Seed). He’s merrily spitting seeds and would love to share the talent with your Pokémon for absolutely free. |
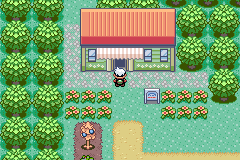
Event 3: 2-on-2 Battle
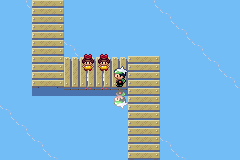
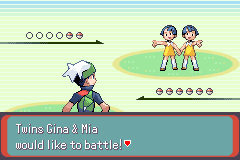
After passing through Petalburg Woods, you must cross a bridge. However, there is no way to get past a pair of twins named Gina and Mia. These girls offer you your first 2-on-2 Battle. The battle setup is simple. The first two Pokémon in your pack are brought out. So, before reaching the twins, move the Pokémon you want to use in battle up to the first and second slots.
When you enter a 2-on-2 Battle, you can choose a specific recipient of each of your Pokémon’s moves. That includes support moves in addition to offensive moves. For example, if you have a move that raises Attack, you can use it on your other Pokémon. This also raises a challenge. If you have a move that affects all of the Pokémon in the battle, such as SelfDestruct, your other Pokémon will be affected negatively, too.
Event 4: After Visiting Devon Corporation President
Once you have helped the Devon Corporation in Rustboro City and accepted the request of the President, return to Mr. Briney’s seaside cottage. The man is so grateful that you helped him retrieve his pet Pokémon that he will ferry you across the sea in his boat. This is the only way to get to Dewford Town right now.
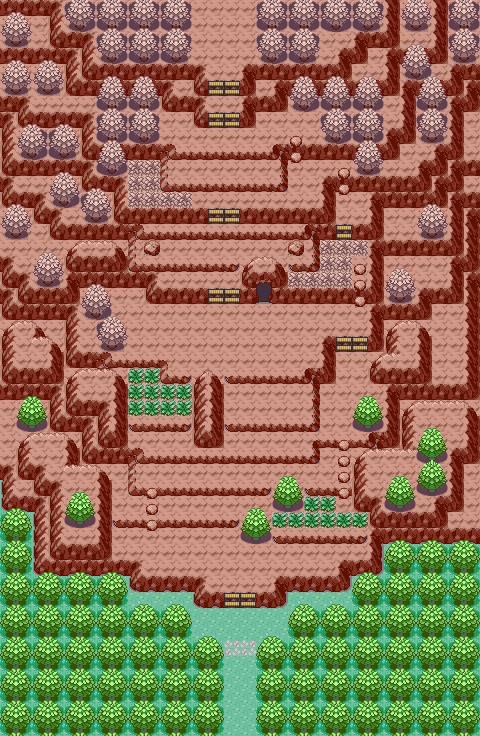
Petalburg Woods
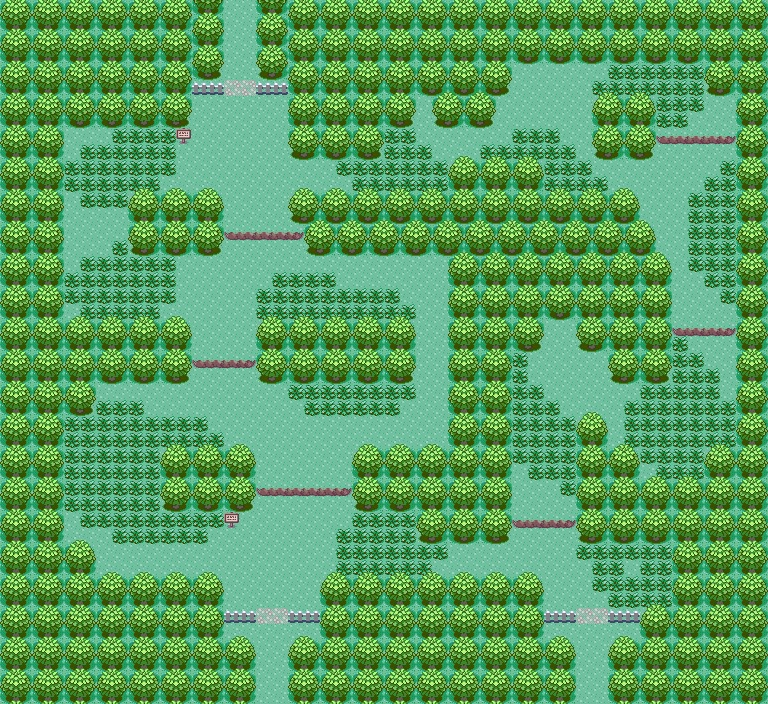
The Petalburg Woods connects the northern and southern halves of Route 104. The thick forest setting is home to several wild Pokémon, so make sure you have a Poké Ball or two before heading in—especially if you can access the right half of the woods via having the Stone Badge.
| Pokémon Appearances | |
| Pokémon | Conditions |
| Nincada | 20% |
| Burmy | 20% |
| Combee | 10% |
| Pineco | 10% |
| Paras | 10% |
| Shroomish | 10% |
| Karrablast | 5% |
| Shelmet | 5% |
| Pinsir | 4% |
| Scyther | 4% |
| Grookey | 1% |
| Heracross | 1% |
| Items |
| Ether |
| Great Ball x2 |
| Miracle Seed |
| Poké Ball (HIDDEN) |
| Potion (HIDDEN) |
| Scizorite (HIDDEN) |
| TinyMushroom (HIDDEN) |
Event 1: Aqua Encounter
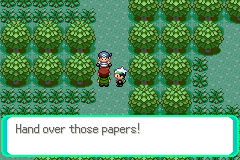
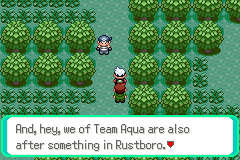
Your first encounter with the enemy groups in Hoenn, Team Aqua and Team Magma, happens in Petalburg Woods.
In the woods here, you meet Team Aqua. They are attempting to steal something from a researcher from Devon Corporation. Battle the Team Aqua Grunt to prevent him from accomplishing his mission. After the battle, the researcher shows his appreciation by handing over a Great Ball.
Event 2: Into the Woods
Once you have the Stone Badge, you can access the right half of Petalburg Woods, including a passage leading back to a previous inaccessible area in Route 104. Explore the woods completely to pick up some great Items and add to your Pokémon collection.
Rustboro City
Rustboro City is home to the first Gym you can compete in—against Gym Leader Roxanne. After touring this pleasant little burg, head for the Gym and prove yourself against this accomplished Trainer. Emerge victorious and you are well on your way to becoming a Pokémon Master.
| Pokémart Merchandise (Left) | |
| Item | Price |
| TM01 (Agility) | 1600 |
| TM03 (Fire Fang) | 1600 |
| TM04 (Thunder Fang) | 1600 |
| TM05 (Ice Fang) | 1600 |
| TM11 (Snarl) | 1600 |
| TM15 (Stored Power) | 1600 |
| Pokémart Merchandise (Right) | |
| Item | Price |
| Poké Ball | 200 |
| Repeat Ball* | 1000 |
| Timer Ball* | 1000 |
| Potion | 200 |
| Super Potion | 700 |
| Antidote | 200 |
| ParalyzeHeal | 200 |
| Escape Rope | 550 |
| Repel | 350 |
| X Speed | 1000 |
| X Attack | 1000 |
| X Defense | 550 |
| *They appear in the catalog only after you smash the rocks blocking Rusturf Tunnel | |
| Pokémon Appearances | |
| Pokémon | Conditions |
| Wiglett | Trade with townsperson |
| Items |
| Great Ball |
| Letter |
| PokéNav |
| Premier Ball |
| Quick Claw |
| Stone Badge |
| TM13 (Rock Tomb) |
| X Defense |
Fancy a Trade?
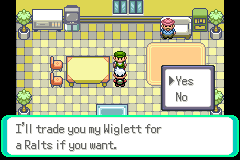
If you want a Water-type Pokémon on your team, talk to the townsperson in the house to the right of the Gym. The townsperson wants to trade a Wiglett for a Ralts. If you did not choose Totodile at the beginning of the adventure, this is a good opportunity to get a Water-type Pokémon and start leveling it up.
Event 1: Pokémon Trainer’s School
You may want to battle the Gym, but don’t rush in without brushing up on your learning. Stop at the Pokémon Trainer’s School and meet a group of budding Trainers under the tutelage of a wise teacher. Of course, none of the kids are paying much attention, but if you listen to the teacher, he rewards you with a special Item: Quick Claw. This Item proves quite useful during your first Gym battle.
Event 2: Gym Leader Battle #1—Roxanne
| Roxanne, Rustboro Gym Leader | |||
| Pokémon Type: | Rock | ||
| Recommended Move Type: | Fighting, Grass, Ground, Steel, Water | ||
| Gym Leader’s Pokémon | |||
| Pokémon | Level | Type | |
| Geodude (Alolan) | Lv. 12 | Rock | Electric |
| Rockruff | Lv. 12 | Rock | |
| Aerodactyl | Lv. 15 | Rock | Flying |
While many of the later Gyms are set up as puzzles, the Rustboro Gym is fairly straightforward. You also might notice that the Trainers will notice you and go right to you to start a battle. They are pretty much practice before the Gym so take them on and keep going through the hallways until you reach Roxanne at the very end. You can always exit the Gym to rest up before the showdown with the Gym Leader.
Once you do reach Roxanne, don’t send out a Fire-type Pokémon. (If you chose Fuecoco as your first Pokémon, you better have other Pokémon in your menagerie to bring out.) However, if you caught a Grass-type Pokémon (or traded for the Wiglett), you have a good shot at beating Roxanne. Just keep on volleying Water- and Grass-type Moves at her Rock-type Pokémon and the Gym badge (specifically, the Stone Badge) will be yours.
| Items Won |
| Stone Badge: Raises your Pokémon Attack strength and allows you to cut down trees.TM13 (Rock Tomb) |
Event 3: Devon Corporation Gets Robbed
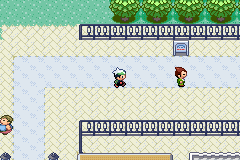
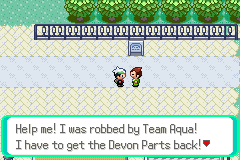
Beating the Gym Leader is hardly the end of the excitement in Rustboro City. Team Aqua apparently regrouped while you were busy and successfully robbed the Devon Corporation. You are led to the same researcher that you met before. He’s staring in disbelief that Team Aqua was able to steal the Devon Parts. The thief is hiding in Rusturf Tunnel, so if you can catch up with him and defeat him, the Devon Corporation will be extremely grateful. The gratefulness translates into a handsome reward.
| TIP |
| Explore all of the buildings in this city. A boy in the apartment complex south of the Devon Corporation is giving away a Premier Ball, a very special type of Poké Ball. Once you get it, hold on to the Premier Ball. Don’t use it right away. Save this strong Poké Ball for later in your adventures when you discover a truly rare Pokémon. |
Event 4: Returning the Devon Parts
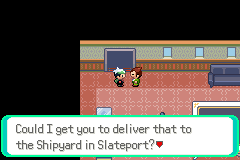
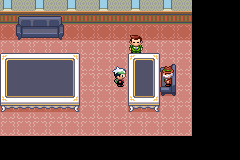
After defeating the Team Aqua Grunt in the Rusturf Tunnel and recovering the Devon Parts, return to the Devon Corporation. Give the Devon Parts to the researcher and he takes you upstairs to the top floor office of the President of the company. You’ve proved your reliability, and the President has a couple of tasks for you. You need to take a Letter to a Trainer named Steven in Dewford Town and deliver a package to Capt. Stern in Slateport City. Both of these cities are reached by water, so you need to find a boat first.
The President doesn’t ask you to run these errands for free. He gives you a new Item called the PokéNav. This communication and information tool is invaluable to Trainers. The PokéNav allows you to receive messages from Trainers you’ve met and battled. It also holds a map of Hoenn that proves extremely useful when you are outside of battle.
| NOTE |
| Two special Poké Balls go on sale in the Pokémart only after you open the path in the Rusturf Tunnel. The Timer Ball is a handy Poké Ball that becomes more and more effective the longer the battle rages. So if you are in for a long battle against a wild Pokémon, having a Timer Ball in your Bag makes the effort worth it. The Repeat Ball has a higher capture rate for Pokémon you have already caught. For example, if you have caught a Marill that has already evolved into Azumarill, you can use a Repeat Ball to easily catch a new Marill. |
Route 116
| Pokémon Appearances | |
| Pokémon | Conditions |
| Skitty | 20% |
| Meowth | 20% |
| Spearow | 10% |
| Wooloo | 10% |
| Buneary | 10% |
| Pawmi | 10% |
| Timburr | 5% |
| Bellsprout | 5% |
| Spritzee | 4% |
| Swirlix | 4% |
| Charmander | 1% |
| Eevee | 1% |
| Items |
| BlackGlasses (HIDDEN) |
| Chesto Berries x2 |
| Ether |
| Pinap Berries x3 |
| Potion |
| Repeat Ball |
| Super Potion (HIDDEN) |
| X Sp. Atk |
Event 1: Rescue Mr. Briney’s Pet
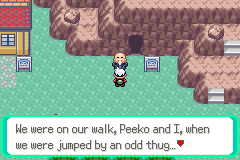
Team Aqua is doing more than stealing Devon Goods—they’re harassing poor Mr. Briney. The Grunt has abducted Mr. Briney’s pet Pokémon, Peeko, and is holding it in the Rusturf Tunnel. Get in there and rescue Peeko. Not only is it the right thing to do, but Mr. Briney will then agree to ferry you across the seas to Dewford Town and Slateport City—both places you need to go for the President of Devon Corporation.
Event 2: Opening Rusturf Tunnel
After you open up the tunnel from the other side (via Verdanturf Town), you can check out the small area on the east side of Route 116. A man there is frantically searching for his glasses. Use the Itemfinder to help him locate the specs and receive the BlackGlasses, a good Item for Dark-type Pokémon to have.
| NOTE |
| Turn up the sound on the system of your choice (or plug in headphones) when using the Itemfinder. The gadget beeps loudly when you are near a special Item. |
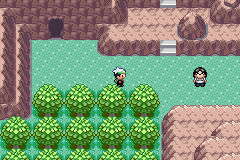
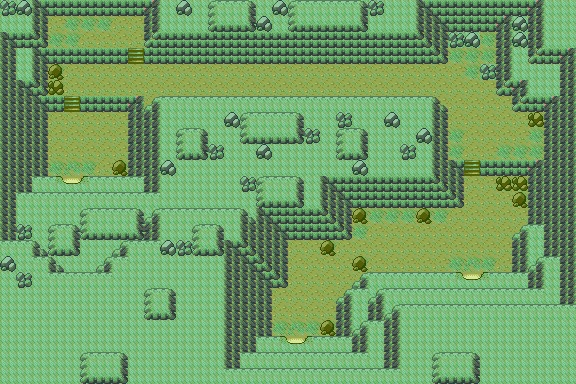
Rusturf Tunnel
| Pokémon Appearances | |
| Pokémon | Conditions |
| Whismur | 20% |
| Diglett | 20% |
| Drilbur | 10% |
| Meowth (Galarian) | 10% |
| Meditite | 10% |
| Durant | 10% |
| Dunsparce | 5% |
| Wynaut | 5% |
| Smeargle | 4% |
| Diglett (Alolan) | 4% |
| Rhyhorn | 1% |
| Noibat | 1% |
| Items |
| Aggronite |
| Devon Parts |
| Max Ether |
| Poké Ball |
Event 1: Get the Goods
The Team Aqua Grunt that’s causing so much trouble for everyone has holed up in the Rusturf Tunnel. Enter the tunnel to battle him. If you win, the Team Aqua Grunt willingly (but reluctantly) hands over the Devon Parts and releases Peeko. Return the Devon Goods and Peeko to their rightful owners for your rewards.
| TIP |
| While the wild Pokémon in Rusturf Tunnel aren’t that formidable, you may wish to use a Repel to prevent them from engaging you on the way to the Team Aqua Grunt. That way, you can approach the battle with Pokémon with full HP and PP for their moves. |
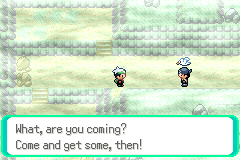
Event 2: Clearing Rusturf Tunnel
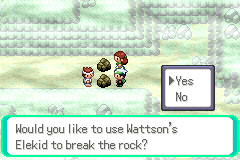
Wattson’s Elekid allows you to smash the boulders in Rusturf Tunnel, but only after you have received the Dynamo Badge. Smashing those rocks not only reunites the two love-struck kids in the tunnel, but you also open up a clever shortcut between Rustboro City and Verdanturf Town.
Route 105, Route 106, and Dewford Town
| Pokémon Appearances on Land | |
| Pokémon | Conditions |
| Regice | Island Cave, after Sealed Chamber mystery is solved |
| Pokémon Appearances in Water (Route 105) | |
| Pokémon | Conditions |
| Tentacool | Surfing (60%), Good Rod (20%), Super Rod (15%) |
| Wingull | Surfing (35%) |
| Pelipper | Surfing (5%) |
| Magikarp | Old Rod (70%) |
| Wishiwashi | Old Rod (30%) |
| Finneon | Good Rod (60%), Super Rod (40%) |
| Goldeen | Good Rod (20%) |
| Lumineon | Super Rod (40%) |
| Pyukumuku | Super Rod (4%) |
| Tentacruel | Super Rod (1%) |
| Pokémon Appearances in Water (Route 106) | |
| Pokémon | Conditions |
| Tentacool | Surfing (60%), Good Rod (20%) |
| Wingull | Surfing (35%) |
| Pelipper | Surfing (5%) |
| Magikarp | Old Rod (70%) |
| Wishiwashi | Old Rod (30%) |
| Finneon | Good Rod (60%) |
| Goldeen | Good Rod (20%) |
| Shellder | Super Rod (40%) |
| Pyukumuku | Super Rod (40%) |
| Cloyster | Super Rod (15%) |
| Staryu | Super Rod (4%) |
| Starmie | Super Rod (1%) |
| Pokémon Appearances in Water (Dewford Town) | |
| Pokémon | Conditions |
| Tentacool | Surfing (60%) |
| Wingull | Surfing (30%) |
| Wailmer | Surfing (5%) |
| Pelipper | Surfing (4%) |
| Squirtle | Surfing (1%) |
| Magikarp | Old Rod (70%) |
| Wishiwashi | Old Rod (30%) |
| Goldeen | Good Rod (60%) |
| Clauncher | Good Rod (20%) |
| Corphish | Good Rod (20%) |
| Krabby | Super Rod (40%) |
| Binacle | Super Rod (40%) |
| Kingler | Super Rod (15%) |
| Crawdaunt | Super Rod (4%) |
| Clawitzer | Super Rod (1%) |
| Lady in Pokémon Center* | |
| Item | Price |
| Normal Gem | 200 |
| Fighting Gem | 200 |
| Flying Gem | 200 |
| Poison Gem | 200 |
| Ground Gem | 200 |
| Rock Gem | 200 |
| Bug Gem | 200 |
| Ghost Gem | 200 |
| Steel Gem | 200 |
| Fire Gem | 200 |
| Water Gem | 200 |
| Grass Gem | 200 |
| Electric Gem | 200 |
| Psychic Gem | 200 |
| Ice Gem | 200 |
| Dragon Gem | 200 |
| Dark Gem | 200 |
| Fairy Gem | 200 |
| *After you beat the fifth Gym | |
| Items |
| Big Pearl (HIDDEN) |
| Heart Scale x2 (HIDDEN) |
| Iron |
| Old Rod |
| Poké Ball (HIDDEN) |
| Protein |
| Silk Scarf |
| Stardust (HIDDEN) |
| TM35 (Bulk Up) |
| TM112 (Sludge Bomb) |
Water Travel
Without the Balance Badge, you must rely on Mr. Briney and his boat to get across the water to Dewford Town and Slateport City. Because you are riding a vessel, you pass the swimming Trainers without a battle invitation. You also don’t encounter any wild Pokémon. However, as soon as you can traverse the water, you can tackle the sea routes yourself and challenge the many Trainers in the water. This is a great way to pick up additional experience for your Pokémon.
| NOTE |
 You pass an Island Cave on the way between Route 104 and Dewford Town. Until you have the Balance Badge, you cannot visit this mysterious locale. And even when you can, there is still another puzzle to solve before a door magically opens. Could this be the resting place of the Legendary Ice-type Pokémon, Regice? You pass an Island Cave on the way between Route 104 and Dewford Town. Until you have the Balance Badge, you cannot visit this mysterious locale. And even when you can, there is still another puzzle to solve before a door magically opens. Could this be the resting place of the Legendary Ice-type Pokémon, Regice? |
Event 1: Learn to Fish
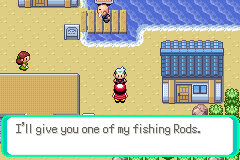
After stepping off Mr. Briney’s boat, see the fisherman on the beach. Share your love of the sea with him and he gives you the Old Rod as a sign of friendship. Now you can start fishing for wild Pokémon in Hoenn’s waters.
| TIP |
| Even though you have a Rod now, you cannot just start catching every wild Pokémon in the water. Some Pokémon will not bite on a line from the Old Rod—and some are so picky they will wait for the Super Rod before getting interested. |
Event 2: Trendy Folks
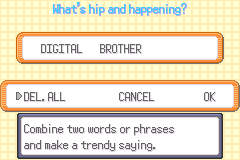
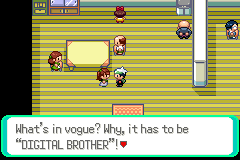
The good people of Dewford Town are into the latest trends, whatever those may be. You can have a big effect on the local scene at Dewford with a few choice words. Talk to the boy just north of the Pokémon Center. He tries to impress you with how cool he is, but you can teach him what cool truly means. Come up with a two-word phrase and teach it to the boy. Before you know it, everybody in town is gabbing about your new catchphrase.
There is a tiny house by the dock where Mr. Briney drops you off. Pop inside and chat with the people there. They bestow upon you the latest in trendy duds, the Silk Scarf.
Event 3: Gym Leader Battle #2—Brawly
| Brawly, Dewford Gym Leader | |||
| Pokémon Type: | Fighting | ||
| Recommended Move Type: | Fairy/Flying/Psychic | ||
| Gym Leader’s Pokémon | |||
| Pokémon | Level | Type | |
| Scraggy | Lv. 16 | Dark | Fighting |
| Hawlucha | Lv. 16 | Fighting | Flying |
| Lucario | Lv. 19 | Fighting | Steel |
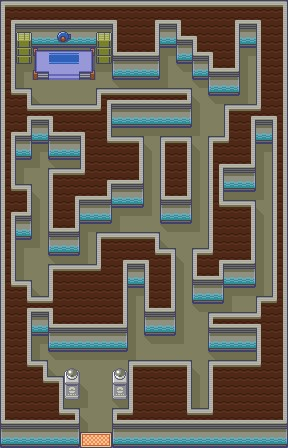
The Dewford Gym is dark—and it stays that way unless you challenge the multitude of Trainers that line the path to Gym Leader Brawly. Every time you compete in a battle, a little more light is shed on the Gym. Once the path to Brawly has been fitfully illuminated, challenge the Gym Leader’s Fighting-type Pokémon with Fairy-, Flying-, or Psychic-type Moves. You’ll do even better if these moves come from same-type Pokémon. Keep countering his moves with powerful attacks and the Knuckle Badge will be yours.
| Items Won |
| Knuckle Badge: Pokémon up to Lv. 30 will obey your commands.TM35 (Bulk Up) |
Granite Cave
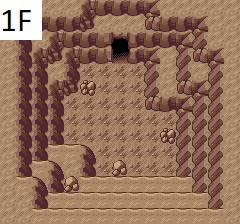
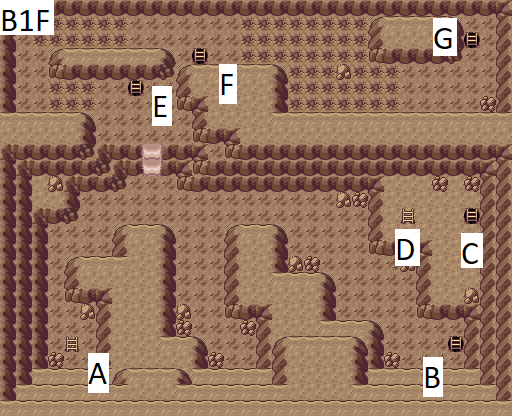
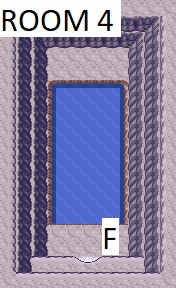
Granite Cave is a pretty dark place. Granite Cave is definitely worth exploring. You’ll find many good items inside, as well as a few new wild Pokémon that you should definitely try to capture with Poké Balls.
| Pokémon Appearances on 1F | |
| Pokémon | Conditions |
| Zubat | 20% |
| Makuhita | 20% |
| Machop | 10% |
| Geodude | 10% |
| Aron | 10% |
| Abra | 10% |
| Nosepass | 5% |
| Mawile | 5% |
| Sableye | 4% |
| Meditite | 4% |
| Tyrogue | 1% |
| Scraggy | 1% |
| Pokémon Appearances on B1F | |
| Pokémon | Conditions |
| Woobat | 20% |
| Makuhita | 20% |
| Timburr | 10% |
| Roggenrola | 10% |
| Aron | 10% |
| Abra | 10% |
| Nosepass | 5% |
| Mawile | 5% |
| Sableye | 4% |
| Golett | 4% |
| Yamask (Galarian) | 1% |
| Stonjourner | 1% |
| Pokémon Appearances on B2F | |
| Pokémon | Conditions |
| Woobat | 20% |
| Makuhita | 20% |
| Timburr | 10% |
| Roggenrola | 10%, Rock Smash (60%) |
| Aron | 10% |
| Abra | 10% |
| Nosepass | 5%, Rock Smash (1%) |
| Mawile | 5% |
| Sableye | 4% |
| Scraggy | 4% |
| Dwebble | 1%, Rock Smash (30%) |
| Carbink | 1% |
| Geodude | Rock Smash (5%) |
| Shieldon | Rock Smash (4%) |
| Pokémon Appearances on 1F (Small Chamber) | |
| Pokémon | Conditions |
| Zubat | 20% |
| Makuhita | 20% |
| Machope | 10% |
| Geodude | 10% |
| Aron | 10% |
| Golett | 10% |
| Scraggy | 5% |
| Yamask (Galarian) | 5% |
| Carbink | 4% |
| Stonjourner | 4% |
| Sigilyph | 1% |
| Beldum | 1% |
| Items |
| Escape Rope |
| Everstone (HIDDEN) |
| Metagrossite |
| Poké Ball |
| Steelixite (HIDDEN) |
| TM32 (Shadow Claw) |
Event 1: Grab the Everstone
While searching for Steven, you come across this special boulder, raised on a small ledge. Examine the boulder to receive the Everstone, a special Held Item that affects a Pokémon’s Evolution process. If you have a Pokémon that you do not want to evolve, pass it the Everstone and it will not try to evolve after each level up past the Evolution requirement.
Event 2: Speedy Delivery
After trekking through the Granite Cave all the way to the small outside section of 1F (the route takes you through the other two floors of the cave), you come to Steven. Hand off the Letter to Steven and he gives you a Metagrossite in appreciation. Place this Mega Stone in your Bag and exit Granite Cave with the Escape Rope, or weave back through the passages and keep encountering wild Pokémon.
| TIP |
| Return to Granite Cave after you have picked up the Mach Bike in Mauville City. This lets you zoom up the steep slope on B1 and cross the fragile floor. You have to be swift, though. Stop too long to make a turn and the floor will crumble beneath your wheels. Explore the rest of the cave on the Mach Bike to pick up some rare Items. |
Routes 107, 108, 109, and Slateport City
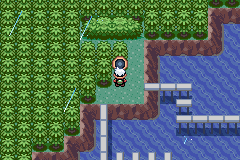
| Pokémart Merchandise (Left) | |
| Item | Price |
| TM18 (Endure) | 400 |
| TM24 (Smart Strike) | 6000 |
| TM28 (False Swipe) | 800 |
| TM34 (Psychic Fangs) | 20000 |
| TM36 (Air Slash) | 10000 |
| TM37 (Body Slam) | 10000 |
| Pokémart Merchandise | |
| Item | Price |
| Poké Ball | 200 |
| Great Ball | 600 |
| Potion | 200 |
| Super Potion | 700 |
| Antidote | 200 |
| ParalyzeHeal | 200 |
| Escape Rope | 550 |
| Repel | 350 |
| Harbor Mail | 50 |
| Pokémon Appearances in Water (Route 107) | |
| Pokémon | Conditions |
| Tentacool | Surfing (60%) |
| Basculin (White) | Surfing (30%) |
| Wailmer | Surfing (5%) |
| Mantine | Surfing (4%) |
| Bruxish | Surfing (1%) |
| Magikarp | Old Rod (70%) |
| Wishiwashi | Old Rod (30%) |
| Staryu | Good Rod (60%) |
| Shellder | Good Rod (20%) |
| Goldeen | Good Rod (20%) |
| Starmie | Super Rod (40%) |
| Slowpoke | Super Rod (40%) |
| Binacle | Super Rod (15%) |
| Cloyster | Super Rod (4%) |
| Slowbro | Super Rod (1%) |
| Pokémon Appearances in Water (Route 108) | |
| Pokémon | Conditions |
| Tentacool | Surfing (60%) |
| Carvanha | Surfing (30%) |
| Frillish | Surfing (9%) |
| Tentacruel | Surfing (1%) |
| Magikarp | Old Rod (70%) |
| Wishiwashi | Old Rod (30%) |
| Goldeen | Good Rod (60%) |
| Shellder | Good Rod (20%) |
| Staryu | Good Rod (20%) |
| Corsola | Super Rod (40%) |
| Octillery | Super Rod (40%) |
| Remoraid | Super Rod (15%) |
| Clamperl | Super Rod (4%) |
| Dhelmise | Super Rod (1%) |
| Pokémon Appearances in Water (Route 109) | |
| Pokémon | Conditions |
| Wingull | Surfing (60%) |
| Buizel | Surfing (30%) |
| Wailmer | Surfing (5%) |
| Pelipper | Surfing (4%) |
| Floatzel | Surfing (1%) |
| Magikarp | Old Rod (70%) |
| Wishiwashi | Old Rod (30%) |
| Goldeen | Good Rod (60%) |
| Shellder | Good Rod (20%) |
| Staryu | Good Rod (20%) |
| Slowking | Super Rod (40%) |
| Starmie | Super Rod (40%) |
| Slowpoke | Super Rod (15%) |
| Cloyster | Super Rod (4%) |
| Binacle | Super Rod (1%) |
| Pokémon Appearances in Water (Slateport City) | |
| Pokémon | Conditions |
| Goldeen | Surfing (60%) |
| Clauncher | Surfing (30%) |
| Mantine | Surfing (5%) |
| Seaking | Surfing (4%) |
| Clawitzer | Surfing (1%) |
| Magikarp | Old Rod (70%) |
| Wishiwashi | Old Rod (30%) |
| Finneon | Good Rod (60%) |
| Goldeen | Good Rod (20%) |
| Luvdisc | Good Rod (20%) |
| Binacle | Super Rod (40%) |
| Lanturn | Super Rod (40%) |
| Corphish | Super Rod (15%) |
| Chinchou | Super Rod (4%) |
| Clawitzer | Super Rod (1%) |
| Items |
| Alakazite (HIDDEN) |
| DeepSeaScale or DeepSeaTooth |
| Ether (HIDDEN) |
| Flame Plate (HIDDEN) |
| Great Ball (HIDDEN) |
| Heart Scale x3 (HIDDEN) |
| Potion |
| PP Up |
| Rare Candy (HIDDEN) |
| Revive (HIDDEN) |
| Contest Scarf |
| Soda Pop x6 |
| Soft Sand |
| Soothe Bell |
| Star Piece |
| TM08 (Thief) |
Slateport Market
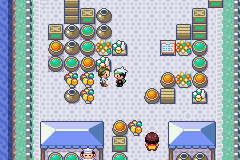
Slateport City has more commerce opportunities than most Hoenn towns. Regular citizens sell special wares at an open-air market to the beach’s north. After you receive the Explorer Kit on Route 111, the two kids at the top edge of the market start selling some slick decorations for your Secret Base.
| Doll Shop | |
| Item | Price |
| Azurill Doll | 3000 |
| Marill Doll | 3000 |
| Skitty Doll | 3000 |
| Energy Guru | |
| Item | Price |
| Protein | 10000 |
| Iron | 10000 |
| Carbos | 10000 |
| Zinc | 10000 |
| Calcium | 10000 |
| HP Up | 10000 |
| Evolution Lady | |
| Item | Price |
| Fire Stone | 1500 |
| Water Stone | 3000 |
| ThunderStone | 1500 |
| Leaf Stone | 3000 |
| Moon Stone | 1500 |
| Sun Stone | 1500 |
| Shiny Stone | 1500 |
| Dusk Stone | 1500 |
| Dawn Stone | 1500 |
| Ice Stone | 1500 |
| Linking Cord | 8000 |
| Time Stone | 3000 |
| Dubious Disc | 2100 |
| Electirizer | 2100 |
| Magmarizer | 2100 |
| Oval Stone | 1000 |
| Protector | 2100 |
| Razor Claw | 15000 |
| Razor Fang | 15000 |
| Reaper Cloth | 2100 |
| Prism Scale | 2000 |
| Sachet | 2000 |
| WhippedDream | 2000 |
| Teapot | 19000 |
| GalaricaCuff | 1500 |
| Galar Wreath | 1500 |
| Strawberry | 500 |
| Sweet Apple | 2200 |
| Tart Apple | 2200 |
| D. Scroll | 10000 |
| W. Scroll | 10000 |
| Bright Armor | 3000 |
| Malice Armor | 3000 |
| Explorer Kit Club Shop | |
| Item | Price |
| Red Brick | 500 |
| Blue Brick | 500 |
| Yellow Brick | 500 |
| Red Balloon | 500 |
| Blue Balloon | 500 |
| Yellow Balloon | 500 |
| C Low Note Mat | 500 |
| D Note Mat | 500 |
| E Note Mat | 500 |
| F Note Mat | 500 |
| G Note Mat | 500 |
| A Note Mat | 500 |
| B Note Mat | 500 |
| C High Note Mat | 500 |
| NOTE |
| The trip to Slateport City on Mr. Briney’s Vessel is fast—blink and you might miss the Abandoned Ship on the way to the city. Once you have the Balance Badge and Mind Badge, return to this vessel and seek out a special Item that Capt. Stern of Slateport City has been looking for. He will reward your efforts. |
Event 1: Fizzy Drinks
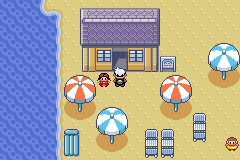
There is a small beach house on the sand in front of Slateport City. The joint is full of Trainers, but if you win every battle, the owner gives you a six-pack of Soda Pop. This fizzy drink restores your Pokémon’s HP.
Event 2: Shipyard
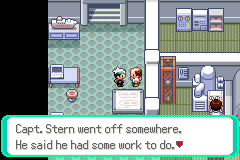
The President asked you to deliver a package to Capt. Stern, so visit the Shipyard to make the drop. Unfortunately, Capt. Stern isn’t there. He’s away right now doing some important work.
Event 3: Oceanic Museum
On your first visit to the Oceanic Museum, you cannot get in. Out front, there is a huge line of people with very familiar-looking uniforms. But after you find out that Capt. Stern is absent, the line has vanished. Head into the Oceanic Museum, pay the entrance fee, and then start talking to everybody inside. You’ll run into a Team Aqua Grunt you had a previous encounter with, and his ego is still bruised. However, he gives you a gift.
Find Capt. Stern upstairs among the ship models. When you try to give the Devon Goods to Capt. Stern, though, the Team Aqua Grunts attempt to steal the package again. Battle the Grunts to keep them from getting the Parts.
| NOTE |
| After you leave the Oceanic Museum, you’re visited by a stranger who is currently chronicling talented Trainers. And it seems he has his eye on you. Who is this fellow? |
Event 4: See the City

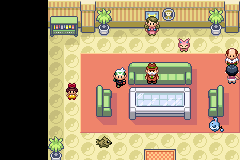
Explore the entirety of Slateport City after dropping the Devon Parts off with Capt. Stern. The open-air market has lots of fantastic goods. And visit the Pokémon Fan Club to learn valuable insights on how to condition Pokémon for Pokémon Contests.
The Chairman of the Pokémon Fan Club awards you a specific colored scarf if you have completely maxed out your lead Pokémon’s Condition with PokéBlocks.
- If your Pokémon has a high Beauty rating, he awards a Blue Scarf.
- If your Pokémon has a high Cool rating, he awards a Red Scarf.
- If your Pokémon has a high Cute rating, he awards a Pink Scarf.
- If your Pokémon has a high Smart rating, he awards a Green Scarf.
- If your Pokémon has a high Tough rating, he awards a Yellow Scarf.
Speak to the person at the back wall in the clubhouse. A club member gives you a Soothe Bell if your Pokémon truly likes you.
Event 5: After Defeating Team Magma
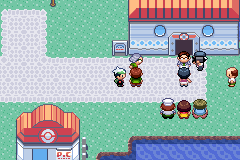
After you defeat Team Magma at their Hideout on Jagged Pass, return to Slateport City to catch up with Team Aqua. They successfully steal Capt. Stern’s submersible, but the chase to find it leads you to the feet of a very impressive Pokémon.
Event 6: After Exploring the Abandoned Ship
Once you finish exploring the Abandoned Ship, return the Scanner to Capt. Stern at the Shipyard. As a reward, Capt. Stern gives you one of two Held Items that help a Clamperl in battle. If you choose the DeepSeaTooth, it will boost Clamperl’s Sp. Atk. If you choose the DeepSeaScale, it will boost Clamperl’s Sp. Def.
Slateport City Battle Tent
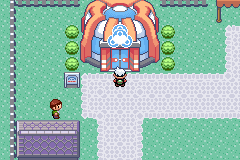

Slateport hosts the first of three Battle Tents you encounter during your travels through Hoenn. These contests test your skills as a Trainer by providing highly individual challenges. At the Slateport Battle Tent, you must complete a series of battles—but not with your own Pokémon. You must choose three of five randomly selected rental Pokémon and battle Trainers with their own randomly selected Pokémon. If you can win three battles in a row, you will win a Full Heal.
You don’t have to do all three battles in a row. You can save between each round in case the battle goes awry. But if you go from one victory into around round without saving your game, you must start all over again if you lose.
Route 110
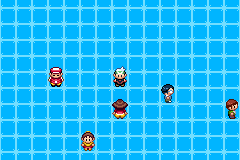
| Pokémon Appearances on Land | |
| Pokémon | Conditions |
| Mareep | 20% |
| Electrike | 20% |
| Blitzle | 10% |
| Yamper | 10% |
| Doduo | 10% |
| Gulpin | 10% |
| Emolga | 5% |
| Helioptile | 5% |
| Joltik | 4% |
| Toxel | 4% |
| Scorbunny | 1% |
| Tauros | 1% |
| Pokémon Appearances in Water | |
| Pokémon | Conditions |
| Goldeen | Surfing (60%), Good Rod (60%), Super Rod (15%) |
| Shellos | Surfing (30%) |
| Veluza | Surfing (5%) |
| Whiscash | Surfing (4%) |
| Gastrodon | Surfing (1%) |
| Magikarp | Old Rod (70%) |
| Wishiwashi | Old Rod (30%) |
| Barboach | Good Rod (20%) |
| Chinchou | Good Rod (20%), Super Rod (40%) |
| Lanturn | Super Rod (40%) |
| Pincurchin | Super Rod (4%) |
| Stunfisk | Super Rod (1%) |
| Items |
| Dire Hit |
| Elixir |
| Full Heal (HIDDEN) |
| Itemfinder |
| Manectite (HIDDEN) |
| Poké Ball |
| Rare Candy |
| Revive (HIDDEN) |
Event 1: Trick House

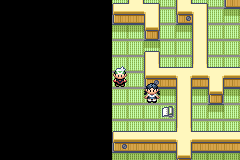
When you walk up the path through Route 110, you come across a small house with a pink roof: Trick House. This is the home of the Trick Master, a mischievous man who arranges his house differently after every one of your badge battles. If you manage to find the Trick Master when you enter the home (and he moves with every visit), he lets you attempt to weave your way through his back room/
There are two goals inside the Trick House. First, you must find the password that allows you through the exit, and then you must find the exit itself. The Trick House is full of Trainers who have lost their way inside. There are eight different variations on the Trick House, but the Trick Master needs time to re-do the labyrinth after you successfully complete one, so stop back later to see what surprises he has in store for you.
| Trick Master | ||
| Visit | Hiding Place | Prize |
| 1 | Under Table | Rare Candy |
| 2 | Right Tree | TM58 (Taunt) |
| 3 | Chest of Drawers | Hard Stone |
| 4 | Left Window | Smoke Ball |
| 5 | Left Tree | TM121 (Trick Room) |
| 6 | Cupboard | Magnet |
| 7 | Right Window | PP Max |
| 8 | SW Cushion | Tent |
Event 2: Cycling Road
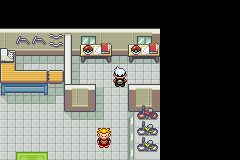
A bicycle highway above Route 110 offers a quick route to Mauville City. However, you don’t have a Bike just yet, so the high road is off-limits. After you get the Bikes from Mauville City, you can use the Cycling Road to quickly zip between Mauville City and Slateport City.
If you have a Mach Bike, a race sheet on the road chronicles the fastest times from one end to the other, but it also counts the number of collisions you have, so watch the road!
Event 3: Battle with Prof. Birch’s Child
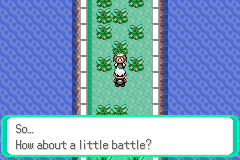
Prof. Birch’s kid is waiting for you on Route 110. He or she has been practicing battle tactics and has assembled some strong Pokémon. You cannot pass into Mauville City without battling this budding Trainer, so make sure your Pokémon are in top condition before the challenge. If you win the battle, you receive the Itemfinder helps you discover dropped or buried Items in Hoenn. The Itemfinder beeps when you are near a secret Item, so prick up your ears and keep your eyes on the ground.
Event 4: New Mauville
After you receive the Balance Badge, there is a quest to undertake south of Mauville City. Talk with a man in Mauville City, and he asks you to visit an underground electrical plant called New Mauville, in the northeast corner of Route 110. Access the island by traversing the water near the Cycling Road’s northern exit and head to the east, ducking under the highway itself.
Mauville City
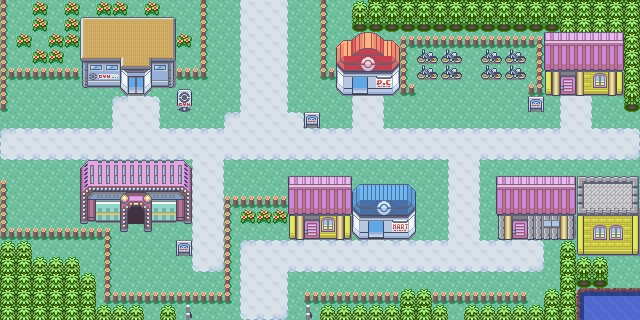
Mauville City is situated at the north end of the bicycle highway that sits high above Route 110. The city hosts its own Gym, in which you must complete if you want to earn the necessary talents to progress deep into Hoenn. Check out all of the town’s features, as there is a lot to do in Mauville that you cannot do elsewhere, such as get some Bikes or try out some parlor games for prizes.
| Pokémart Merchandise (Left) | |
| Item | Price |
| TM10 (Bulldoze) | 3000 |
| TM14 (Low Sweep) | 6000 |
| TM17 (Venoshock) | 6000 |
| TM31 (U-turn) | 6000 |
| Pokémart Merchandise (Right) | |
| Item | Price |
| Poké Ball | 200 |
| Great Ball | 600 |
| Super Potion | 700 |
| Antidote | 200 |
| ParalyzeHeal | 200 |
| Awakening | 200 |
| X Speed | 1000 |
| X Attack | 1000 |
| X Defense | 550 |
| Guard Spec. | 1500 |
| Dire Hit | 1000 |
| X Accuracy | 1000 |
| Items |
| Acro Bike |
| Basement Key |
| Coin Case |
| Lopunnite (HIDDEN) |
| Mach Bike |
| Reveal Glass |
| TM19 (Volt Switch) |
| TM93 (Thunderbolt) |
Event 1: Get a Bike
You cannot use the highway along Route 110 without a Bike, so stop by the pink-roofed house on the city’s right side. The owner of the bicycle shop, Rydel, sells two styles of bicycles: a speed Bike (Mach Bike) and a trick Bike (Acro Bike).
Use the Mach Bike to cover distance quickly, or zip across fragile floors and head up steep slopes. The Acro Bike is slick enough to let you hop across special trick routes and access previously unreachable areas.
Event 2: Battle with Wally
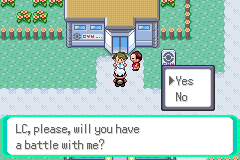
Before you can enter the Mauville Gym, you must battle against Wally. The little fella has been practicing his battling skills since you first saw him and would like to challenge you.
Event 3: Gym Leader Battle #3—Wattson
| Wattson, Mauville Gym Leader | |||
| Pokémon Type: | Electric | ||
| Recommended Type: | Ground | ||
| Gym Leader’s Pokémon | |||
| Pokémon | Level | Type | |
| Luxio | 20 | Electric | |
| Emolga | 20 | Electric | Flying |
| Rotom (Wash) | 22 | Electric | Water |
| Manectric | 24 | Electric | |
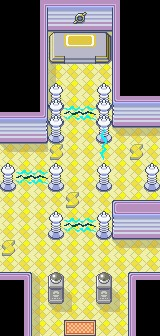
The path to Wattson is blocked by a series of electric fences. The fences are controlled by switches on the Gym’s floor, so carefully step on the switches to open up the route to Wattson. Battle the Trainers on the way for valuable experience. Remember, you can always step outside the Gym and visit the Pokémon Center before going in for the final challenge.
Wattson’s line-up is primarily Electric-type Pokémon, but one is Flying and the other has Levitate, so in addition to using reliable Ground-type moves, you can also use moves super effective against the secondary types to wrest the Dynamo Badge from Wattson.
| Items Won |
| Dynamo Badge: Increases your Pokémon’s Speed and grants use of Wattson’s Elekid to break rocks.TM19 (Volt Switch) |
Event 4: New Mauville Quest
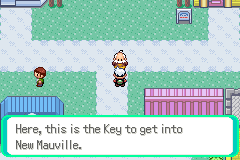
After you can travel over water, seek out Wattson standing at the crossroads in Mauville City. He asks you to perform a quest to help Mauville City. Apparently the electric generator in the underground New Mauville is malfunctioning. Wattson gives you the Basement Key that grants access to New Mauville. If you complete his task, he gives you TM93 (Thunderbolt).
Mauville City Game Corner
| Game Corner Prizes | |
| Item | Price in Coins |
| Treecko Doll | 1000 |
| Torchic Doll | 1000 |
| Mudkip Doll | 1000 |
Check out the Game Corner in the southwest corner of Mauville City where you can exchange some ![]() for Coins and play a couple of minigames. However, before you can play, you must get a Coin Case from the woman who lives next to the Pokémart. (She requests a Harbor Mail in return.) Once you have the Coin Case, return to the Game Corner and buy some Coins to get started. You can exchange the Coins you win for great prizes at the main counter.
for Coins and play a couple of minigames. However, before you can play, you must get a Coin Case from the woman who lives next to the Pokémart. (She requests a Harbor Mail in return.) Once you have the Coin Case, return to the Game Corner and buy some Coins to get started. You can exchange the Coins you win for great prizes at the main counter.
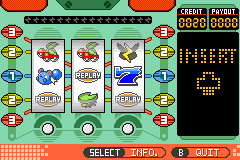
The Slot Machines let you bet Coins on a series of lines. If you line up certain icons, you win more Coins. The more Coins you play in a turn, the more Coins you might win. Of course, there’s always a chance you’ll lose, too.
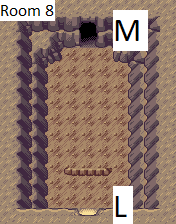
The Roulette Tables allow you to bet on which symbol the metal ball will drop on after spinning around the wheel. There are multiple ways to bet on this game, such as picking individual spaces or choosing all symbols of a like-color.
Before leaving, talk to the girl in the corner. She won an extra Doll and is happy to share it with you.
Route 117
| Pokémon Appearances on Land | |
| Pokémon | Conditions |
| Volbeat | 20% |
| Illumise | 20% |
| Drowzee | 10% |
| Pachirisu | 10% |
| Fidough | 10% |
| Varoom | 10% |
| Tandemaus | 5% |
| Bonsly | 5% |
| Happiny | 4% |
| Munchlax | 4% |
| Togepi | 1% |
| Riolu | 1% |
| Pokémon Appearances in Water | |
| Pokémon | Conditions |
| Surskit | Surfing (60%) |
| Lotad | Surfing (30%) |
| Marill | Surfing (5%) |
| Dewpider | Surfing (4%) |
| Wimpod | Surfing (1%) |
| Magikarp | Old Rod (70%) |
| Wishiwashi | Old Rod (30%) |
| Goldeen | Good Rod (60%) |
| Corphish | Good Rod (20%), Super Rod (15%) |
| Poliwag | Good Rod (20%), Super Rod (40%) |
| Poliwrath | Super Rod (40%) |
| Clawitzer | Super Rod (4%) |
| Basculin (White) | Super Rod (1%) |
| Items |
| Great Ball |
| Mawilite (HIDDEN) |
| Revive |
| Wepear Berries |
Event 1: Visit the Day Care Center
The Day Care Center is an incredibly important location in Hoenn. This is where you can drop off your Pokémon, two at a time, to leave up while you are away on your adventures. It only costs ![]() 100 to drop them off and another
100 to drop them off and another ![]() 100 for every level they gain while in the Day Care Center’s custody.
100 for every level they gain while in the Day Care Center’s custody.
The Day Care Center is also where breeding happens. If you drop two compatible Pokémon off at the center, you may find a surprise when you return: an Egg. Carry the Egg with you and it will soon hatch into a new Pokémon.
| TIP |
| There are a lot of Trainers on the west route to Verdanturf Town. If you want to gain more experience and cash, this is an excellent place to do so. |
Verdanturf Town
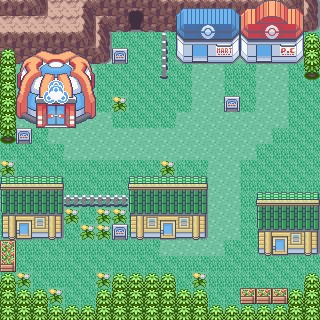
Verdanturf Town is a smaller township in Hoenn, located near the center of the main landmass. The other entrance to the Rusturf Tunnel is here, which is almost complete. Perhaps you can help the final stage of construction and maybe earn something cool in the process?
| Pokémart Merchandise (Left) | |
| Item | Price |
| TM43 (Electro Ball) | 10000 |
| TM47 (Rock Blast) | 6000 |
| TM51 (Metronome) | 800 |
| TM52 (Grass Knot) | 6000 |
| TM53 (Thunder Wave) | 800 |
| Pokémart Merchandise (Right) | |
| Item | Price |
| Great Ball | 600 |
| Nest Ball | 1000 |
| Super Potion | 700 |
| Antidote | 200 |
| ParalyzeHeal | 200 |
| Awakening | 200 |
| Burn Heal | 200 |
| Ice Heal | 200 |
| Repel | 350 |
| X Sp. Atk | 350 |
| Fluffy Tail | 100 |
| Items |
| Gardevoirite (HIDDEN) |
| Pidgeotite (HIDDEN) |
Event 1: Check in on Wally
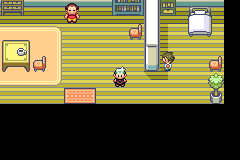
Verdanturf was where Wally was headed the last time you saw him, so stop by his house and say “hello.” Wally feels good about his loss to you in Mauville City. You’ve actually inspired him to try even harder next time. And he will, so be ready.
Event 2: Visit Rusturf Tunnel
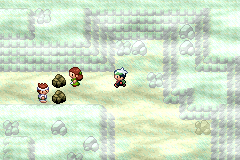
Enter the cave between the Battle Tent and the Pokémart. This is Rusturf Tunnel, and you’ve been here before—but on the other side of the boulder that block the tunnel. Use Wattson’s Elekid to eliminate the obstruction and unite Verdanturf Town citizen Wander with her boyfriend. In return for your assistance, you receive the Aggronite. You now have a great shortcut between Rustboro City and Verdanturf Town.
Verdanturf Town Battle Tent
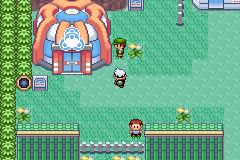
The Battle Tent here is especially difficult—in fact, it’s recommended you don’t try it under your Pokémon are at Lv. 30 or higher. The contest allows you to select which three Pokémon you want to use in your battle—and you have no warning of what random Pokémon your opponent will use. On top of this, you also do not choose which moves your Pokémon use in the battle. It’s all up to the Pokémon’s instinct.
This doesn’t mean you cannot switch out Pokémon. You’ll likely need to switch out your Pokémon a few times in an attempt to match up the right moves for the battle. Like the previous Battle Tent, you can save between battles.
Routes 111 and 112
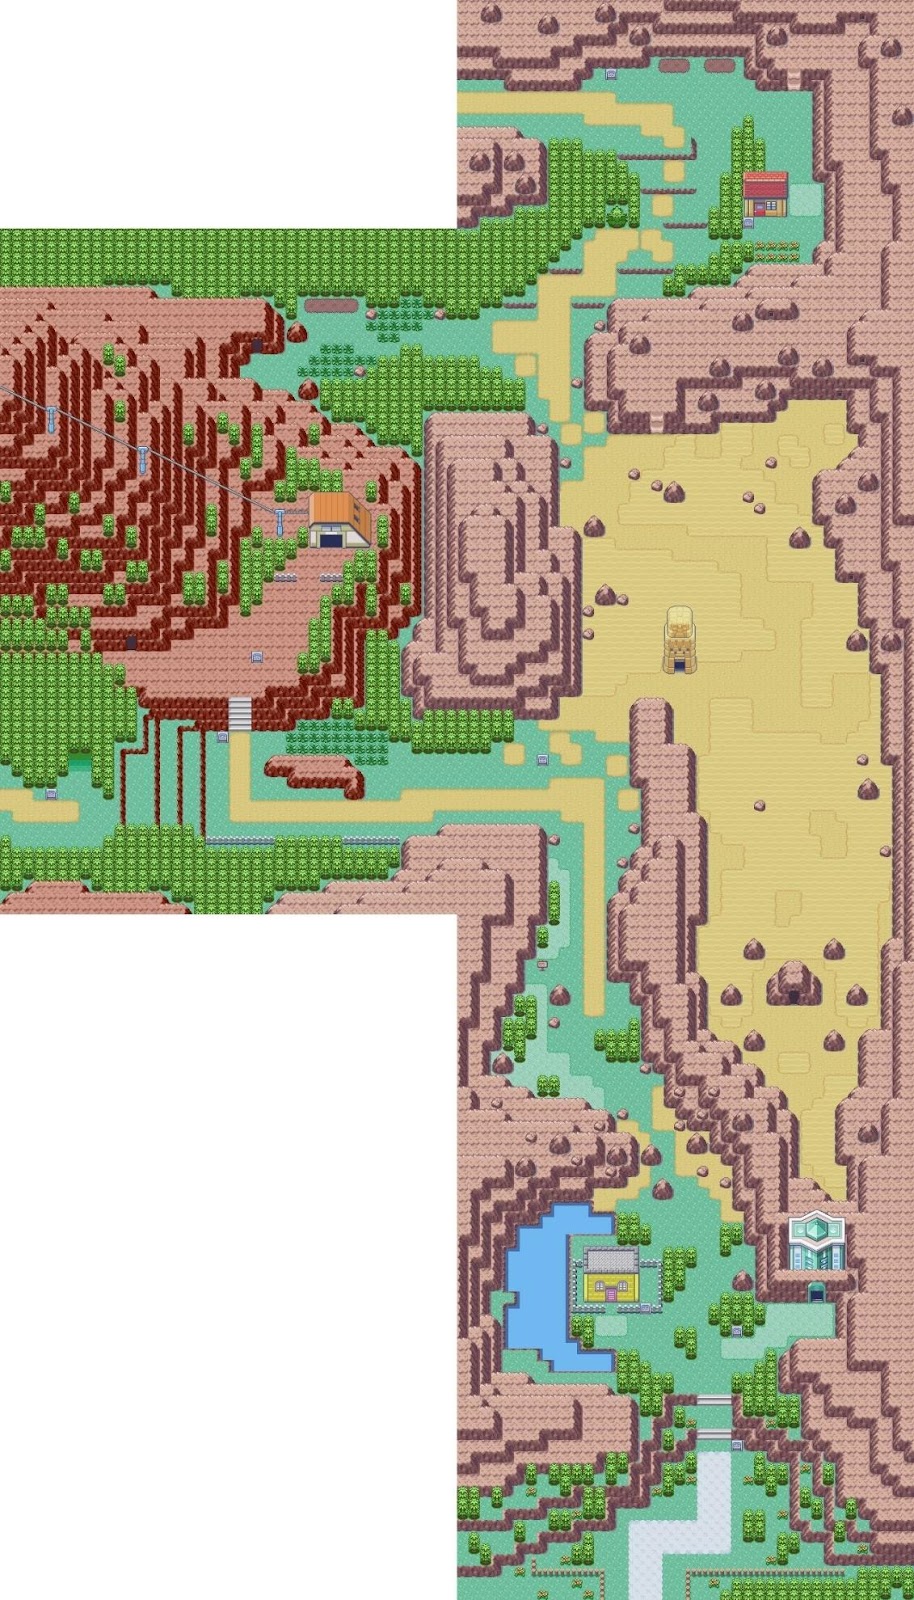
| Trainer Hill Merchandise | |
| Item | Price |
| Super Potion | 700 |
| Antidote | 200 |
| ParalyzeHeal | 200 |
| Awakening | 200 |
| X Speed | 1000 |
| X Sp. Atk | 350 |
| X Attack | 1000 |
| X Defense | 550 |
| Dire Hit | 1000 |
| Guard Spec. | 1500 |
| X Accuracy | 1000 |
| Pokémon Appearances on Land (Route 111) | |
| Pokémon | Conditions |
| Hippopotas | 20% |
| Trapinch | 20% |
| Sandshrew | 10% |
| Cacnea | 10% |
| Baltoy | 10% |
| Sandygast | 10% |
| Sandile | 5% |
| Silicobra | 5% |
| Maractus | 4% |
| Sigilyph | 4% |
| Fennekin | 1% |
| Larvitar | 1% |
| Dwebble | Rock Smash (60%) |
| Roggenrola | Rock Smash (30%) |
| Geodude | Rock Smash (5%) |
| Anorith | Rock Smash (4%) |
| Aron | Rock Smash (1%) |
| Pokémon Appearances in Mirage Tower (1F-3F) | |
| Pokémon | Conditions |
| Hippopotas | 20% |
| Trapinch | 20% |
| Sandshrew | 10% |
| Cubone | 10% |
| Baltoy | 10% |
| Sandile | 10% |
| Silicobra | 5% |
| Dwebble | 5% |
| Yamask (Galarian) | 4% |
| Sigilyph | 4% |
| Stonjourner | 1% |
| Gible | 1% |
| Pokémon Appearances in Water (Route 111) | |
| Pokémon | Conditions |
| Surskit | 60% |
| Lotad | 30% |
| Marill | 5% |
| Dewpider | 4% |
| Wimpod | 1% |
| Magikarp | Old Rod (70%) |
| Wishiwashi | Old Rod (30%) |
| Goldeen | Good Rod (60%) |
| Poliwag | Good Rod (20%) |
| Corphish | Good Rod (20%) |
| Clauncher | Super Rod (40%) |
| Crawdaunt | Super Rod (40%) |
| Polwhirl | Super Rod (15%) |
| Basculin (Red & Blue) | Super Rod (5%) |
| Pokémon Appearances in Mirage Tower (4F) | |
| Pokémon | Conditions |
| Hippopotas | 20% |
| Trapinch | 20% |
| Sandshrew | 10% |
| Cubone | 10% |
| Baltoy | 10% |
| Sandile | 10% |
| Silicobra | 5% |
| Dwebble | 5% |
| Yamask (Galarian) | 4% |
| Sigilyph | 4% |
| Gimmighoul | 1% |
| Gimmighoul (Roaming) | 1% |
| Pokémon Appearances (Route 112) | |
| Pokémon | Conditions |
| Numel | 20% |
| Vulpix | 20% |
| Ponyta | 10% |
| Pansear | 10% |
| Litleo | 10% |
| Nickit | 10% |
| Salandit | 5% |
| Sizzlipede | 5% |
| Pawniard | 4% |
| Houndour | 4% |
| Growlithe | 1% |
| Litten | 1% |
| Items |
| Elixir |
| Explorer Kit |
| HP Up |
| Macho Brace |
| Nugget |
| Protein (HIDDEN) |
| Rare Candy |
| Razz Berry |
| Stardust |
| Stardust (HIDDEN) |
| TM22 (Sandstorm) |
Event 1: Winstrates
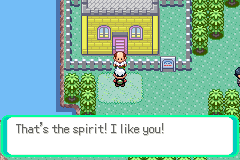
The first house you see as you head up Route 111 is the home of the Winstrates, an entire family of Trainers. You must challenge every member of the family in succession to win the prized Item: Macho Brace.
| NOTE |
| Unless you have the Dynamo Badge, you cannot head very far into Route 111. Two boulders block the way. Complete the necessary challenges to earn the ability to break them, then come back. |
Event 2: TV Interview
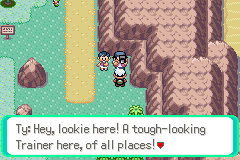
Television is a big part of daily life in Hoenn. So many televisions means a constant need for new programming, so a reporter/cameraman team is seeking out notable Trainers in Hoenn to interview. You meet them along Route 111. The media people aren’t just looking for a few words, though. You must battle them before the interview, and then select a choice comment to describe the battle. The next time you are in a house with a television, check it out. Your interview may be the lead story.
Event 3: Sandstorm
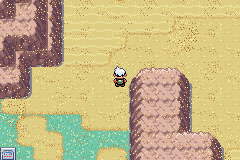
You cannot access the desert on Route 111, due to a massive sandstorm blanketing the desert region to the north. Instead, you must head east in hopes of finding an Item that allows you to see through the storm: Go-Goggles. Once you have the Go-Goggles, you can brave the storm and check out that large stone pillar just beyond the edge of the sand, if it’s there.
Event 4: Cable Car
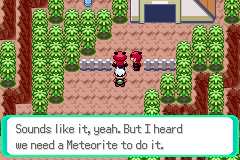
The Cable Car at the top of Route 111 is currently unavailable thanks to a couple of Team Magma Grunts standing guard over the area. You overheat the Grunts talking about Fallarbor Town, so that’s the best load to follow at this point.
| NOTE |
| After you deal with Team Magma at Meteor Falls, the Cable Car is back in commission. Use it to ride up to the top of Mt. Chimney. |
Event 5: Explorer Kit
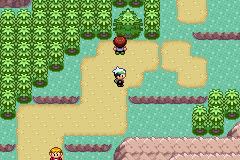
In addition to creating your own team of Pokémon, decorating a Secret Base is a way to completely personalize your Pokémon Theta Emerald The Last Dance experience. But until you visit the young man standing next to a large tree in Route 112, you have no way to access a Secret Base. He gives you an Explorer Kit, which allows you to get a Secret Base of your own. Find Secret Bases in large trees, tall grass, and mountain indentations.
| Rest Stop |
 The Old Lady’s Rest Stop, on Route 112, is a great place to stop and rest your Pokémon before continuing your adventure. The woman running the house provides a bed for free, so stop by anytime and recharge. The Old Lady’s Rest Stop, on Route 112, is a great place to stop and rest your Pokémon before continuing your adventure. The woman running the house provides a bed for free, so stop by anytime and recharge. |
Mirage Tower
Rising out of the sand in the desert, the Mirage Tower can be accessed only after you receive the Go-Goggles. As soon as you can make your way through the sandstorm, heading for this towering pillar and duck inside to find some Pokémon relics.
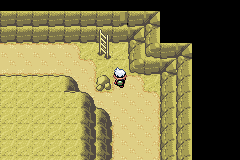
Head up the Mirage Tower using the ladders. There are several wild Pokémon in the Tower, so use Repel if you are in a hurry, or have a Water-type Pokémon in your party to offset the Ground-type Pokémon.
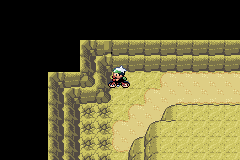
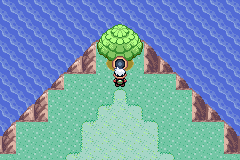
You need the Dynamo Badge and the Mach Bike to access the top floor. Use Wattson’s Elekid to bash the boulders blocking the route upstairs. Patches of fragile flooring crumble away if you linger on them, so speed across with the Mach Bike.
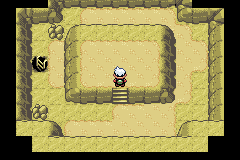
There doesn’t seem to be much up here, except for one Pokémon, Gimmighoul. Gimmighoul is a very cunning and fast Pokémon, and it is the only place to find it, so get to hunting.
Event 6: Desert Ruins
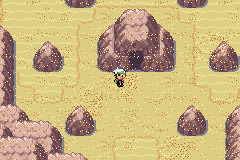
After you have solved the mystery of the Sealed Chamber, come back to Route 111 and trek into the Desert Ruins, which now has an open door. (On your first visit, there is no such opening.) This is the resting place of Regirock, so make sure you are well-stocked on Ultra Balls or Timer Balls before heading into the ruins.
| Trainer Hill |
 There is a Trainer to the right of the Winstrate House in Route 111. Trainer Hill is open for battles throughout the game—and there are plenty of them, making it a great place to hone your tactics and gain coveted experience. However, even if the place is closed, you can still shop at the counter or rest your Pokémon at their convenient Pokémon Center. There is a Trainer to the right of the Winstrate House in Route 111. Trainer Hill is open for battles throughout the game—and there are plenty of them, making it a great place to hone your tactics and gain coveted experience. However, even if the place is closed, you can still shop at the counter or rest your Pokémon at their convenient Pokémon Center. |
Fiery Path
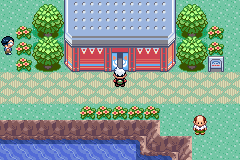
| Pokémon Appearances | |
| Pokémon | Conditions |
| Numel | 20% |
| Slugma | 20% |
| Rolycoly | 10% |
| Koffing | 10% |
| Grimer | 10% |
| Darumaka | 10% |
| Salandit | 5% |
| Heatmor | 5% |
| Torkoal | 4% |
| Magby | 4% |
| Tepig | 1% |
| Fuecoco | 1% |
| Items |
| Charizardite X (HIDDEN) |
| Fire Stone |
Event 1: Using Torkoal’s Strength
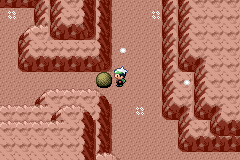
Almost half of the Fiery Path is blocked off by some large boulders that are too big to use Wattson’s Elekid on. Instead, you must come back after receiving the Heat Badge and roll them out of your way. Now you can see the other half of this area and pick up some great Items.
| TIP |
| Half of the wild Pokémon in the Fiery Path are Fire types, so make sure you have an accomplished Water-type Pokémon in your party. |
Route 113
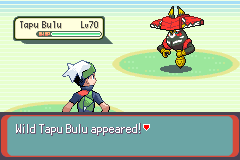
| Glass Workshop Merchandise | |
| Item | Number of Steps |
| Blue Flute | 250 |
| Yellow Flute | 500 |
| Red Flute | 500 |
| White Flute | 1000 |
| Black Flute | 1000 |
| Pretty Chair | 6000 |
| Pretty Desk | 8000 |
| Pokémon Appearances | |
| Pokémon | Conditions |
| Spinda | 20% |
| Snover | 20% |
| Cufant | 10% |
| Mienfoo | 10% |
| Croagunk | 10% |
| Vulpix (Alolan) | 10% |
| Skarmory | 5% |
| Stunfisk (Galarian) | 5% |
| Darumaka (Galarian) | 4% |
| Sneasel (Hisuian) | 4% |
| Klefki | 1% |
| Zorua | 1% |
| Items |
| Ether (HIDDEN) |
| Hyper Potion |
| Max Ether |
| Nugget (HIDDEN) |
| Soot Sack |
| Super Repel |
Event 1: Glass Workshop
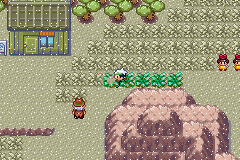
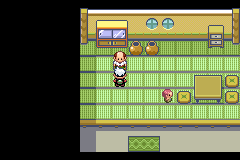
Route 113 is located at the base of volcanic Mt. Chimney, so almost everything is covered with a layer of ash. As you walk through the grass, you knock the ash loose and restore the grass to its original green.
The ash is actually good for something, though. The owner of the Glass Workshop can turn the ash into beautiful Items, but he doesn’t have time to collect ash right now. He gives you a Soot Sack, which collects ash with every step. Different Items require different amounts of ash. You get a little ash with every step, so check out the table above to see how much tromping through the ashen route is required for each piece of work.
| CAUTION |
| Look out for Trainers hiding in the ash. They attempt to surprise you, but if you keep your eyes open for any small bumps in the ash, you can spot the sneaky Trainers well in advance. If you step close to them, they will challenge you to a battle. |
Fallarbor Town
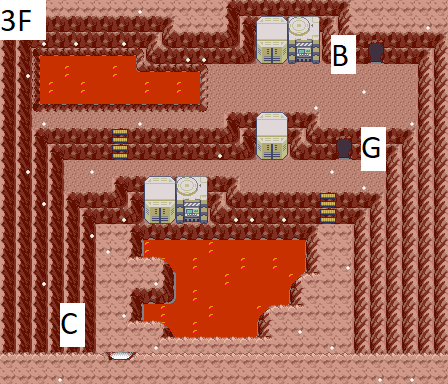
Fallarbor, a small town near the foot of Mt. Chimney, is home to one of the three Battle Tents in Hoenn. This small town has a lot of big-city features, including a Pokémart and Pokémon Center. It’s also where Prof. Cozmo (a famous researcher) lives. As you continue into the heart of Hoenn, Fallarbor is a great place to replenish supplies and rest your Pokémon before getting back to your adventure.
| Pokémart Merchandise (Left) | |
| Item | Price |
| TM55 (Stomping Tantrum) | 10000 |
| TM59 (Swords Dance) | 10000 |
| TM60 (Body Press) | 16000 |
| TM61 (Spikes) | 6000 |
| TM62 (Toxic Spikes) | 6000 |
| Pokémart Merchandise (Right) | |
| Item | Price |
| Great Ball | 600 |
| Super Potion | 700 |
| Antidote | 200 |
| ParalyzeHeal | 200 |
| Escape Rope | 550 |
| Super Repel | 500 |
| X Sp. Atk | 350 |
| X Speed | 1000 |
| X Attack | 1000 |
| X Defense | 550 |
| Dire Hit | 1000 |
| Guard Spec. | 1500 |
| Items |
| Galladite |
| Nugget (HIDDEN) |
Event 1: Team Magma Trouble
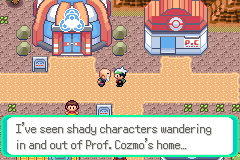
Team Magma has been causing trouble for Prof. Cozmo, a leading citizen of Fallarbor Town. Team Magma’s latest antic? They’ve kidnapped Prof. Cozmo and taken him to Meteor Falls—and only you can rescue him.
Event 2: Lanette
Inside the Pokémon Center, you meet Lanette. She is the programmer who devised the PC Pokémon Storage System. Lanette lives nearby on Route 114 and invites you to stop by when you have a chance. Take her up on the offer as soon as possible.
Event 3: Prof. Cozmo’s Reward
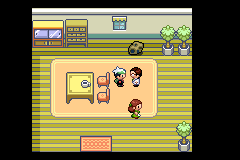
After you get the Meteorite back from Team Magma on Mt. Chimney, return to Prof. Cozmo’s house and hand it over. The pleased professor gives you the Galladite in return.
Fallarbor Town Battle Tent
The third Battle Tent is in Fallarbor Town. This offers another three-battle challenge, but with a different set of rules than the previous Battle Tents. You challenge a series of Trainers who match your Pokémon’s levels, but these battles are short-lived. Each battle lasts only three turns. The goal is to knock the other Pokémon out as fast as possible.

If you can knock a Pokémon out with a single move, you’re off to a good start.
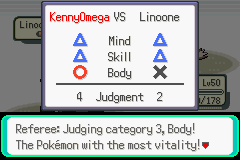
If the battle is not over after three moves, it goes to judging. You are judged on three categories: Mind, Skill, and Body. Aggressive use of offensive moves helps you earn Mind points. The effectiveness of your moves earn you Skill points. The amount of HP remaining at the battle’s end determines your Body points. The Trainer with the most points (the most points you can earn in a single category is two) is declared the winner.
Route 114

| Pokémon Appearances on Land | |
| Pokémon | Conditions |
| Rufflet | 20% |
| Vullaby | 20% |
| Mr. Mime | 10% |
| Zangoose | 10% |
| Seviper | 10% |
| Sawk | 10% |
| Throh | 5% |
| Slakoth | 5% |
| Lickitung | 4% |
| Falinks | 4% |
| Turtwig | 1% |
| Impidimp | 1% |
| Aron | Rock Smash (60%) |
| Geodude | Rock Smash (30%) |
| Roggenrola | Rock Smash (5%) |
| Dwebble | Rock Smash (4%) |
| Tyrunt | Rock Smash (1%) |
| Pokémon Appearances in Water | |
| Pokémon | Conditions |
| Barboach | 60%, Good Rod (60%), Super Rod (40%) |
| Tympole | 30%, Good Rod (20%) |
| Whiscash | 5% |
| Shellos | 4% |
| Mudkip | 1% |
| Magikarp | Old Rod (70%) |
| Wishiwashi | Old Rod (30%) |
| Goldeen | Good Rod (20%) |
| Carvanha | Super Rod (40%) |
| Binacle | Super Rod (15%) |
| Barbaracle | Super Rod (4%) |
| Barraskewda | Super Rod (1%) |
| Items |
| Blazikenite (HIDDEN) |
| EnergyPowder |
| Lotad Doll |
| Persim Berries x6 |
| Protein |
| Rare Candy |
| Sceptilite (HIDDEN) |
| Swampertite (HIDDEN) |
| TM26 (Dig) |
Event 1: Fossil Maniac
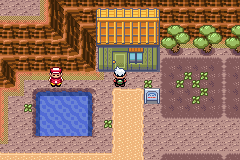
You can access Meteor Falls, where Magma is holding Prof. Cozmo, only via the rocky paths of Route 114. However, before you head for Meteor Falls, swing by the Fossil Maniac’s house, which is just beyond the route’s starting point.
Event 2: Lanette’s Doll Collection
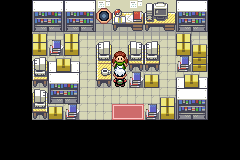
Don’t run straight to Meteor Falls just yet. Lanette lives along this route, you should definitely visit her. She is embarrassed about the state of her house—things are a wee bit messy—but she seems to function just fine in the chaos. But that doesn’t mean she wants everybody to know about the state of her house. In exchange for being hush-hush, Lanette gives you a Lotad Doll. That will certainly look nice in your Secret Base. (You have a Secret Base, don’t you?)
| TIP |
| There are several new wild Pokémon on Route 114, so be sure you start exploring with plenty of Poké Balls. |
Meteor Falls
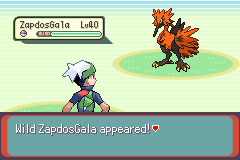
Meteor Falls is an area you only touch upon during your initial adventure, but once you have all the Badges needed to fully explore the cave system, return and explore the cave to its fullest. There are some good surprises in here, including a couple of finds that will help you in your quest to defeat the Elite Four.
| Pokémon Appearances on Land (Main) | |
| Pokémon | Conditions |
| Zubat | 20% |
| Geodude | 20% |
| Golett | 10% |
| Jigglypuff | 10% |
| Clefairy | 10% |
| Munna | 10% |
| Elgyem | 5% |
| Minior (Meteor) | 5% |
| Lunatone | 4% |
| Solrock | 4% |
| Drampa | 1% |
| Bagon | 1% |
| Pokémon Appearances in Water (Main) | |
| Pokémon | Conditions |
| Barboach | 60%, Good Rod (20%) |
| Horsea | 30%, Good Rod (60%), Super Rod (40%) |
| Whiscash | 5% |
| Gyarados | 4% |
| Tirtouga | 1%, Super Rod (15%) |
| Magikarp | Old Rod (70%) |
| Wishiwashi | Old Rod (30%) |
| Skrelp | Good Rod (20%), Super Rod (4%) |
| Gyarados | Super Rod (40%) |
| Seadra | Super Rod (1%) |
| Pokémon Appearances on Land (Room 2) | |
| Pokémon | Conditions |
| Golett | 20% |
| Munna | 20% |
| Elgyem | 10% |
| Jigglypuff | 10% |
| Clefairy | 10% |
| Golbat | 10% |
| Graveler | 5% |
| Minior (Meteor) | 5% |
| Lunatone | 4% |
| Solrock | 4% |
| Drampa | 1% |
| Druddigon | 1% |
| Pokémon Appearances in Water (Room 2) | |
| Pokémon | Conditions |
| Whiscash | 60% |
| Horsea | 30%, Good Rod (60%), Super Rod (40%) |
| Skrelp | 5%, Good Rod (20%), Super Rod (4%) |
| Barboach | 4%, Good Rod (20%), Super Rod (40%) |
| Omanyte | 1%, Super Rod (1%) |
| Magikarp | Old Rod (70%) |
| Wishiwashi | Old Rod (30%) |
| Seadra | Super Rod (15%) |
| Pokémon Appearances on Land (Room 3) | |
| Pokémon | Conditions |
| Munna | 20% |
| Elgyem | 20% |
| Jigglypuff | 10% |
| Clefairy | 10% |
| Lunatone | 10% |
| Solrock | 10% |
| Golbat | 5% |
| Graveler | 5% |
| Minior (Meteor) | 4% |
| Vibrava | 4% |
| Drampa | 1% |
| Duraludon | 1% |
| Pokémon Appearances in Water (Room 3) | |
| Pokémon | Conditions |
| Whiscash | 60%, Super Rod (4%) |
| Horsea | 30%, Good Rod (20%), Super Rod (40%) |
| Skrelp | 5%, Good Rod (20%), Super Rod (1%) |
| Barboach | 4%, Good Rod (60%) |
| Kabuto | 1%, Super Rod (40%) |
| Magikarp | Old Rod (70%) |
| Wishiwashi | Old Rod (30%) |
| Seadra | Super Rod (15%) |
| Pokémon Appearances on Land (Room 4) | |
| Pokémon | Conditions |
| Munna | 20% |
| Jigglypuff | 20% |
| Clefairy | 10% |
| Golbat | 10% |
| Graveler | 10% |
| Lunatone | 10% |
| Solrock | 5% |
| Vibrava | 5% |
| Drampa | 4% |
| Druddigon | 4% |
| Duraludon | 1% |
| Bagon | 1% |
| Pokémon Appearances in Water (Room 4) | |
| Pokémon | Conditions |
| Whiscash | 60%, Super Rod (40%) |
| Horsea | 30%, Good Rod (20%), Super Rod (44%) |
| Skrelp | 5%, Good Rod (60%), Super Rod (15%) |
| Barboach | 4%, Good Rod (20%) |
| Dratini | 1%, Super Rod (1%) |
| Magikarp | Old Rod (70%) |
| Wishiwashi | Old Rod (30%) |
| Items |
| Aerodactylite (HIDDEN) |
| Full Heal |
| Moon Stone |
| PP Up |
| Salamencite (HIDDEN) |
| TM49 (Dragon Claw) |
Event 1: Thwart Team Magma
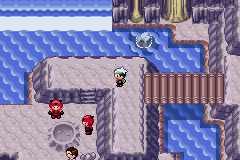
As you enter Meteor Falls, Team Magma is about to abscod with a priceless Meteorite—something you know is going to nefarious purposes. After the Magma villains run off to Mt. Chimney with their stolen prize, head down and speak to Prof. Cozmo to get more information on Team Magma’s plotting. After the conversation, head up to Mt. Chimney via the now-available Cable Car.
| TIP |
| Meteor Falls deserves some serious exploration—but you cannot do it just yet. Return to this place after you receive the Rain Badge and you can access the lower levels where you can find some good Items and rare Pokémon. |
Route 115
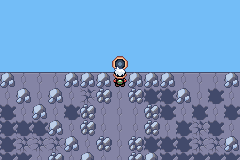
| Pokémon Appearances on Land | |
| Pokémon | Conditions |
| Milcery | 20% |
| Cottonee | 20% |
| Petilil | 10% |
| Cherubi | 10% |
| Cutiefly | 10% |
| Gossifleur | 10% |
| Bounsweet | 5% |
| Snubbull | 5% |
| Dedenne | 4% |
| Voltorb (Hisuian) | 4% |
| Chikorita | 1% |
| Comfey | 1% |
| Pokémon Appearances in Water | |
| Pokémon | Conditions |
| Arrokuda | 60%, Good Rod (20%) |
| Wingull | 30% |
| Finizen | 5% |
| Ducklett | 4% |
| Oshawott | 1% |
| Magikarp | Old Rod (70%) |
| Wishiwashi | Old Rod (30%) |
| Finneon | Good Rod (60%) |
| Goldeen | Good Rod (20%) |
| Binacle | Super Rod (40%) |
| Skrelp | Super Rod (40%) |
| Wailmer | Super Rod (15%) |
| Kingler | Super Rod (4%) |
| Crawdaunt | Super Rod (1%) |
| Items |
| Great Ball |
| Heal Powder |
| Heart Scale (HIDDEN) |
| Iron |
| PP Up |
| Super Potion |
Event 1: Exploration
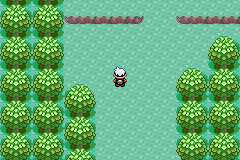
Route 115 is a big area and it’s almost impossible to see on a single visit unless you have the Balance Badge. If you do have it, you can use the water lane just off the coast to move up and down the route. From the beaches, you can explore the northernmost region of the route and pick up some Items.
Mt. Chimney
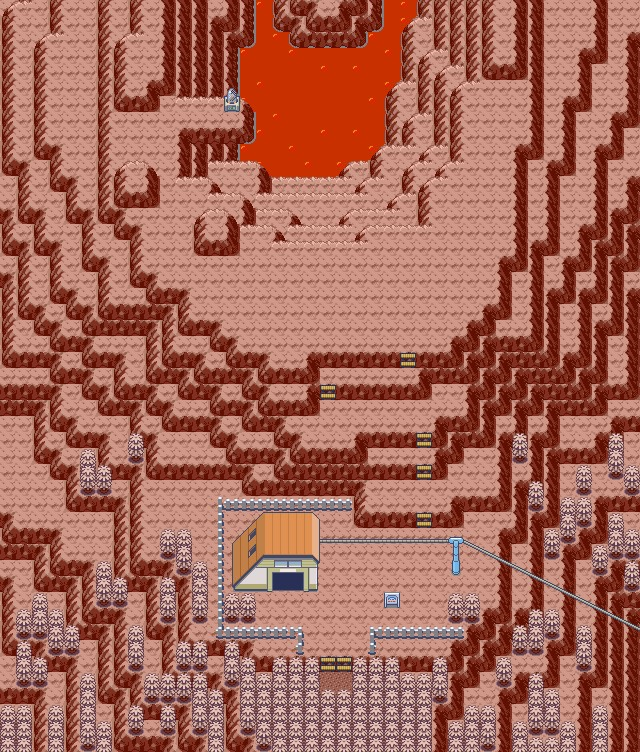
Mt. Chimney is the volcano that towers over all of Hoenn. Fortunately, the cone has been dormant for a long time. However, Team Magma is interested in the volcano, and that’s bad news. While you are unsure of what they are trying to accomplish on the summit, it’s definitely something that must be stopped. But the only way to reach the summit from the bottom (at least, for now) is the Cable Car.
| Items |
| Meteorite |
Event 1: Ride the Cable Car
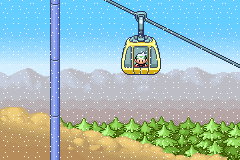
Now that Team Magma has acquired the Meteorite, no guards are posted at the Cable Car station. Ride the Cable Car to the summit of Mt. Chimney to catch up with Team Magma as well as get an update on what Team Aqua has been up to.
Event 2: Team Magma and Team Aqua Locked in Battle
When you arrive at the summit, you see Team Magma and Team Aqua battling each other. That Meteornite causes concern among Team Aqua. Pass the battles and head north along the summit until you catch up with Team Magma Leader Maxie. Maxie is about to dump the Meteorite into the volcano, so battle the leader to pause this plan. Maxie has powerful Pokémon, but by now, you should have a solid team yourself.
| TIP |
 Don’t forget to grab that Meteorite from the edge of the volcano and return it to Prof. Cozmo for your reward. Don’t forget to grab that Meteorite from the edge of the volcano and return it to Prof. Cozmo for your reward. |
Event 3: After Riding Team Magma Out

Things settle back into their normal routine once Team Magma has been run off of the summit. There will be a new batch of Trainers on the mountaintop you can challenge in battles. Make sure you also stop by the Lava Cookie Lady who is selling Lava Cookies for only ![]() 200 each next to the Cable Car station. These are a local delicacy and your Pokémon are sure to love them.
200 each next to the Cable Car station. These are a local delicacy and your Pokémon are sure to love them.
Jagged Pass
Jagged Pass leads down the side of Mt. Chimney. Unless you have the tools to get back up the face, it’s a one-way trip down. There’s something fishy about Jagged Pass, too. Team Magma seems to be concentrated in the area. Are they hiding something in the pass?
| Pokémon Appearances | |
| Pokémon | Conditions |
| Numel | 20% |
| Phanpy | 20% |
| Stufful | 10% |
| Spoink | 10% |
| Teddiursa | 10% |
| Mudbray | 10% |
| Growlithe (Hisuian) | 5% |
| Stantler | 5% |
| Aipom | 4% |
| Gligar | 4% |
| Chimchar | 1% |
| Hawlucha | 1% |
| Items |
| Burn Heal |
| Full Heal (HIDDEN) |
| Tyranitarite (HIDDEN) |
Event 1: Explore the Pass
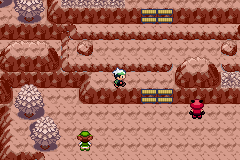
As mentioned, Jagged Pass is a one-way trip—unless you have the Acro Bike. The Acro Bike can pull wheelies that let you “hop” up the small stones on the side of the pass.
| CAUTION |
| Carefully step down the side of Mt. Chimney. Unless you have the Acro Bike, there is no way back up the Jagged Pass. You have to go all the way around to the Cable Car again, ride it up to the summit, and then walk back down Jagged Pass. |
Event 2: Access Team Magma Hideout
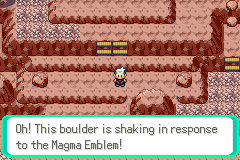
After you get the Magma Emblem, you can access the Team Magma Hideout. Just walk down the face of the pass until you hear a low rumble. The prescent of the Magma Emble causes the dorrway to the Hideout to reveal itself. Slip inside to take care of some unfinished business with Team Magma.
| NOTE |
| Just because a Pokémon appears commonly, that doesn’t mean it’s any less of an asset. Commonly caught Pokémon, if taken care of properly, can evolve into wonderful new forms that are quite effective in battles. |
Lavaridge Town
Because it’s located at the foot of Mt. Chimney, Lavaridge Town has a Hot Springs and hot sand resort where people come from all aorund to soak it up and unwind. The waters are known for their healing powers—perhaps you should slip in yourself and see what happens?
| Pokémart Merchandise (Left) | |
| Item | Price |
| TM65 (Leech Life) | 16000 |
| TM69 (Dragon Dance) | 10000 |
| TM70 (Power Gem) | 16000 |
| TM77 (Crunch) | 16000 |
| TM79 (Liquidation) | 20000 |
| Pokémart Merchandise (Right) | |
| Item | Price |
| Great Ball | 600 |
| Super Potion | 700 |
| Antidote | 200 |
| ParalyzeHeal | 200 |
| Awakening | 200 |
| Burn Heal | 200 |
| Revive | 2000 |
| Super Repel | 500 |
| X Speed | 1000 |
| Pokémon Herb Shop Merchandise | |
| Item | Price |
| EnergyPowder | 500 |
| Energy Root | 1200 |
| Heal Powder | 300 |
| Revival Herb | 2800 |
| Pokémon Appearances | |
| Pokémon | Conditions |
| Cosmog | Hatch from Egg given by townsperson |
| Items |
| Charcoal |
| Full Heal (HIDDEN) |
| Go-Goggles |
| Houndoominite (HIDDEN) |
| TM117 (Overheat) |
Event 1: Hot Springs
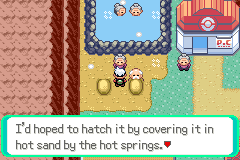
Stop by the Hot Springs when you first arrive in Lavaridge Town. Not just because of the reputation of the waters, but also to receive a Mystery Egg from one of the townspeople. She has tried nurturing the Egg in the warm sand, but apparently it needs a little more personal care than that.
Event 2: Visit the Pokémon Herb Shop

The Pokémon Herb Shop is unique to Lavaridge Town—you won’t find this little shop anywhere else in Hoenn. This store sells a small variety of Herbs that affect your Pokémon, such as restoring HP or reviving a fainted Pokémon. But there’s a catch to these Herbs,which are noticeably less expensive than their equivalents: Pokémon loathe their bitter taste. Giving these Herbs to your Pokémon may cause them to dislike you, and that can affect battle performance, so use with care.
Event 3: Gym Leader Battle #4—Flannery
| Flannery, Lavaridge Gym Leader | |||
| Pokémon Type: | Fire | ||
| Recommended Move Type: | Ground/Rock/Water | ||
| Gym Leader’s Pokémon | |||
| Pokémon | Level | Type | |
| Torkoal | Lv. 24 | Fire | |
| Fletchinder | Lv. 24 | Fire | Flying |
| Pignite | Lv. 26 | Fire | Fighting |
| Houndoom | Lv. 29 | Fire | Dark |
The Lavaridge Gym is full of haze, probably from all the Fire-type Pokémon within its walls. The Gym is separated into two levels, a ground floor and a basement. Flannery is on the ground floor, but there is no direct route from the front door to her, You must move from room to room, using the holes in the floor and ceiling to eventually reach her seat. Along the way, you have ample opportunity to practice battling Fire-type Pokémon with the Trainers guarding the holes. Once you reach Flannery herself, use your Water-type Moves to douse her Fire-type Pokémon. If you don’t have a Water-type Pokémon at a high enough level to match Flannery’s Pokémon, fall back on Ground- and Rock-type Moves, which also exploit a Fire-type Pokémon’s weakness.
| Items Won |
| Heat Badge: Allows you to use Flannery’s Torkoal to move big boulders out of your way.TM117 (Overheat) |
Event 4: Getting to Go-Goggles
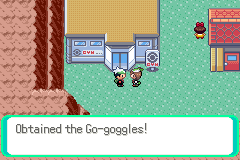
After you defeat Flanney and earn the Heat Badge, Prof. Birch’s child approaches you outside the Gym. So impressed with your Badges, they give you the Go-Goggles. These special specs allow you to see in a thick sandstorm, which means you can now explore the desert area of Route 111.
| TIP |
| Receiving the Go-Goggles means you can now explore Mirage Tower and some new Pokémon in the desert. But don’t forget that you now have the required number of Gym badges to challenge your father, Norman, back at the Petalburg Gym. Return to Petalburg and face off against your father to earn one of the most useful Badges in the game. It allows you to travel on water. |
New Mauville
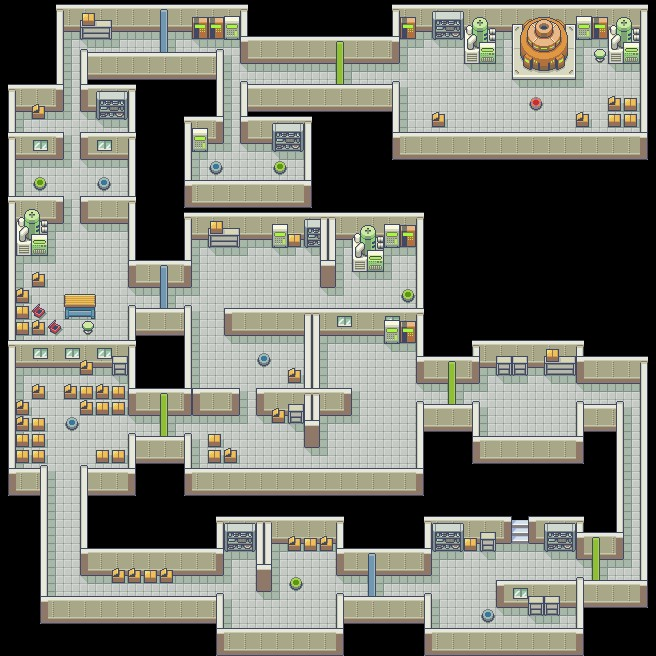
| Pokémon Appearances (Entrance) | |
| Pokémon | Conditions |
| Geodude (Alolan) | 20% |
| Voltorb | 20% |
| Magnemite | 10% |
| Plusle | 10% |
| Minun | 10% |
| Electrike | 10% |
| Togedemaru | 5% |
| Pikachu | 5% |
| Charjabug | 4% |
| Joltik | 4% |
| Tynamo | 1% |
| Porygon | 1% |
| Pokémon Appearances (Main Room) | |
| Pokémon | Conditions |
| Voltorb | 20% |
| Magnemite | 20% |
| Electrike | 10% |
| Plusle | 10% |
| Minun | 10% |
| Klink | 10% |
| Toxel | 5% |
| Togedemaru | 5% |
| Pikachu | 4% |
| Elekid | 4% |
| Tynamo | 1% |
| Rotom | 1% |
| Items |
| Ampharosite (HIDDEN) |
| Burn Drive |
| Chill Drive |
| Douse Drive |
| Shock Drive |
| ThunderStone |
Event 1: Color-Coded Doors
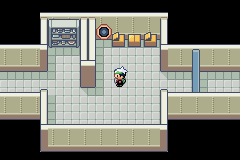
The route to the New Mauville electric generator is not a direct path. The hallways are locked down with a system of color-coded doors, and the doors swing open only if you step on like-colored floor switches. But beware, stepping on one switch either opens or shuts every door of that color. Put your foot down on the wrong switch and you may find yourself using an Escape Rope and starting all over again.
Event 2: Shut Down Generator
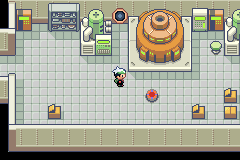
After slipping through the system of doors and battling wild Electric-type Pokémon, you finally reach the malfunctioning generator. Step on the small red switch in front of it to shut it down.
| TIP |
| With multiple potentially new wild Pokémon to catch inside New Mauville, why not bring along some Poké Balls and expand your Pokédex? |
Route 118
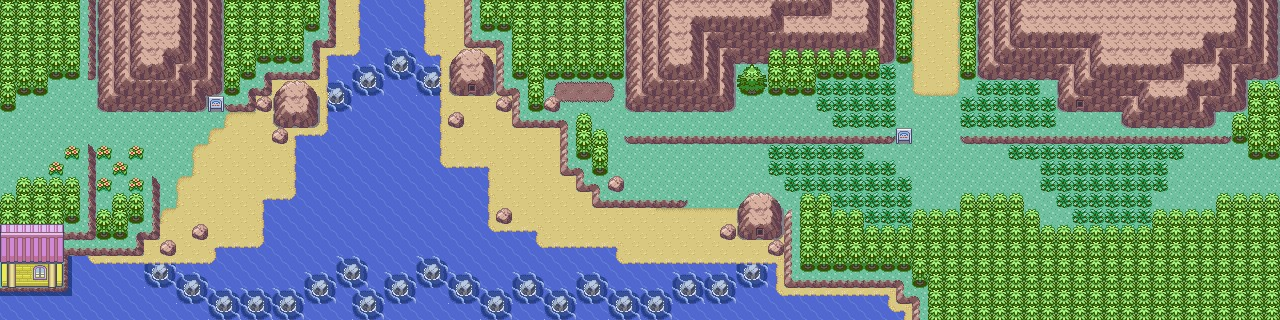
| Pokémon Appearances on Land | |
| Pokémon | Conditions |
| Swablu | 20% |
| Venonat | 20% |
| Yanma | 10% |
| Oricorio | 23% |
| Hoppip | 10% |
| Hatenna | 10% |
| Natu | 5% |
| Farfetch’d | 1% |
| Rowlet | 1% |
| Pokémon Appearances in Water | |
| Pokémon | Conditions |
| Arrokuda | 60%, Good Rod (20%) |
| Wingull | 30% |
| Wailmer | 5% |
| Ducklett | 4% |
| Sobble | 1% |
| Magikarp | Old Rod (70%) |
| Wishiwashi | Old Rod (30%) |
| Goldeen | Good Rod (60%) |
| Corphish | Good Rod (20%) |
| Krabby | Super Rod (40%) |
| Binacle | Super Rod (40%) |
| Skrelp | Super Rod (15%) |
| Kingler | Super Rod (4%) |
| Crawdaunt | Super Rod (1%) |
| Items |
| Good Rod |
| Heart Scale (HIDDEN) |
| Hyper Potion |
| Iron (HIDDEN) |
Event 1: Find the Good Rod
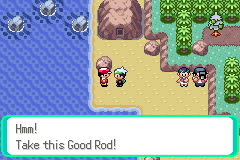
Cross the channel in the center of Route 118 to reach a Fisherman on the far shore. The avid angler is wild about his sport of choice and will give you a Good Rod for showing interest in it, too. The Good Rod is a significant upgrade over the Old Rod.
| NOTE |
| Now that you have the Good Rod, consider returning to previous watery routes to fish for wild Pokémon that would not respond to the Old Rod. |
Event 2: TV Idol
The media await you on the opposite shore. Gabby and Ty are ready with more than just cameras and microphones. They will engage you in another battle just so they can report on it. Take them on and then have a choice word ready for the after-battle interview.
Route 119
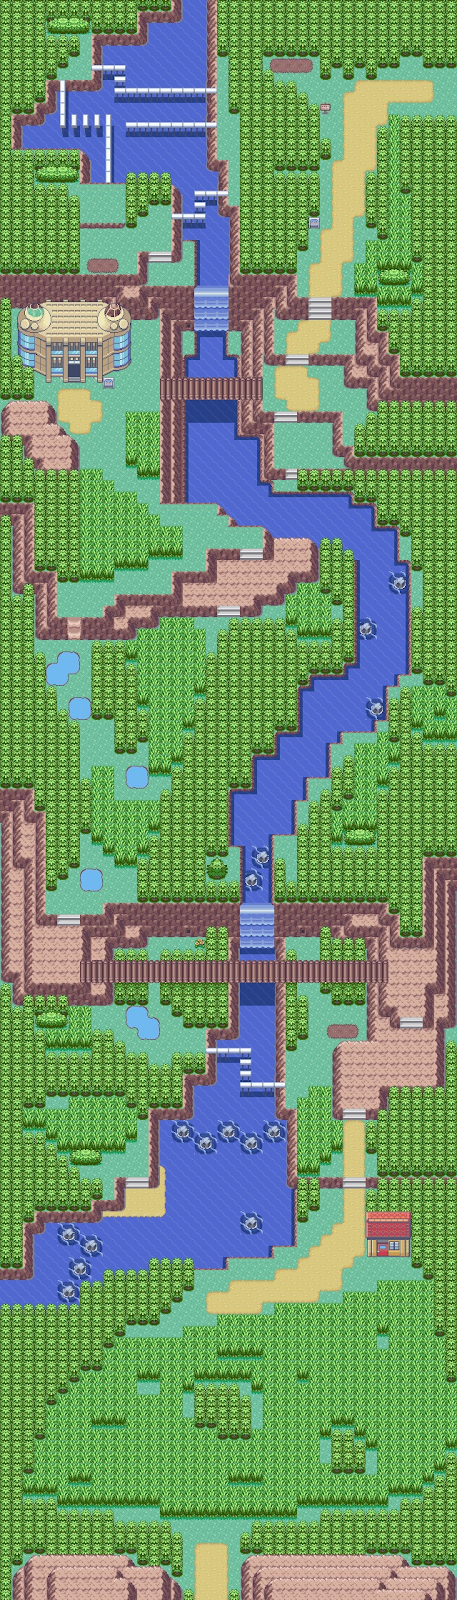
| Pokémon Appearances on Land | |
| Pokémon | Conditions |
| Deerling | 20% |
| Morelull | 20% |
| Exeggcute | 10% |
| Castform | 10% |
| Tangela | 10% |
| Sunkern | 10% |
| Wooper (Paldean) | 5% |
| Scyther | 5% |
| Tropius | 4% |
| Oranguru | 4% |
| Treecko | 1% |
| Goomy | 1% |
| Pokémon Appearances in Water | |
| Pokémon | Conditions |
| Feebas | 60% |
| Carvanha | 30% |
| Basculin | 9% |
| Totodile | 1% |
| Magikarp | Old Rod (70%) |
| Wishiwashi | Old Rod (30%) |
| Goldeen | Good Rod (60%) |
| Feebas | Good Rod (20%), Super Rod (40%) |
| Finneon | Good Rod (20%) |
| Milotic | Super Rod (40%) |
| Tympole | Super Rod (15%) |
| Poliwhirl | Super Rod (4%) |
| Quagsire | Super Rod (1%) |
| Items |
| Calcium (HIDDEN) |
| Elixir x2 |
| Hondew Berries x4 |
| Hyper Potion x2 |
| Leaf Stone |
| Leppa Berries x2 |
| Max Ether (HIDDEN) |
| Pomeg Berries x6 |
| Rare Candy |
| Sitrus Berries x2 |
| Super Repel |
| TM07 (Acrobatics) |
| Ultra Ball (HIDDEN) |
| Venusaurite (HIDDEN) |
| Zinc |
| NOTE |
| Without a doubt, you have by now noticed the proliferation of wild Magikarp and Wishiwashi in the waters of Hoenn. These wild Pokémon are not especially effective battler—so why collect one? Well, a little care and experience will reveal the Magikarp’s evolved form, Gyarados. And Wishiwashi can also become a beast once it reaches Lv. 20. |
Event 1: Tall Grass
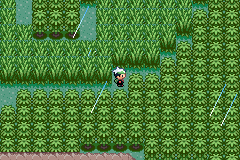
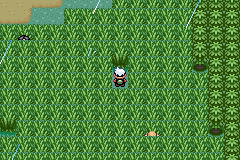
The short grass of Hoenn gives way to tall grass in Route 119. This thick, tall foliage is much harder to wade through—in fact, it’s so thick you can’t even ride a bike through it. The tall grass hides a lot, too. Trainers, Items, and wild Pokémon are all waiting for you in the thick of it.
However, you don’t have to use Repel to slink through the grass without encountering wild Pokémon. If one of your team members know the move Cut, you can trim the green around you, creating a clear path through the tall grass. However, this will not stop Trainers from engaging you.
| CAUTION |
| Notice the occasional tree or rock that doesn’t quite match those around it? Watch out—that’s a Ninja Boy. These Trainers attempt to hide behind painted cut-puts of nature and then jump out when unsuspecting adventurers wander by. |
Event 2: Weather Institute
The Weather Institute studies climate patterns across Hoenn, but right now the researchers inside are staving off the unwanted interests of Team Aqua. Is there something you can do to help?
Event 3: Battle with Prof. Birch’s Kid
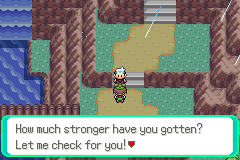
After you run Team Aqua out of the Weather Institute, you encounter Prof. Birch’s child on the way to Fortree City. They had plenty of time to raise Pokémon and wants to battle you to test their progress.
| TIP |
| After you have the Rain Badge, you can explore this route’s northernmost tip. Use the Acro Bike to cross the tiny bridge and pick up some Items as well as access a hard-to-reach Secret Base. |
| Secret Base Real Estate |
 Potential Secret Bases are hidden in the tall grass along Route 119. Look for bushes like this and then use your Explorer Kit to unlock them. Potential Secret Bases are hidden in the tall grass along Route 119. Look for bushes like this and then use your Explorer Kit to unlock them. |
Weather Institute
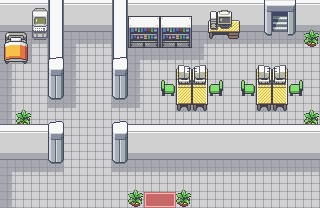

| Pokémon Appearances | |
| Pokémon | Conditions |
| Castform | Awarded by Weather Institute when Team Aqua is defeated |
| Lady in Green Dress | |
| Item | Price |
| Damp Rock | 8000 |
| Heat Rock | 8000 |
| Smooth Rock | 8000 |
| Icy Rock | 8000 |
Event 1: Rest Your Weary Head
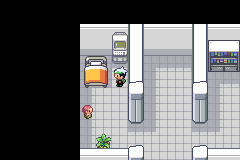
There is a comfy bed on the first floor of the Weather Institute where you can rest up before taking on the string of Team Aqua Grunts inside the Weather Institute. You can sleep in the bed as often as you like.
Event 2: Defeat Team Aqua
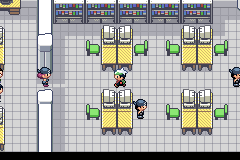

Team Aqua has taken over the Weather Institute, desperately in search of a special Pokémon that it believes could affect the climate and rainfall in Hoenn: Castform. Battle all of the Team Aqua Grunts to rid the Institute of them, and then speak to the scientists. They reward you with a Castform of your own.
| NOTE |
| On the way out of the Weather Institute, you overheat that Team Magma was last spotted heading to Mt. Pyre. |
| Legendary Spoiler Alert |
 After you defeat the Elite Four, return to the Weather Institute and speak to the same man who gave you the Castform. He has been tracking some strange weather patterns in Hoenn lately and his observations will have a very positive effect on your Pokédex. After you defeat the Elite Four, return to the Weather Institute and speak to the same man who gave you the Castform. He has been tracking some strange weather patterns in Hoenn lately and his observations will have a very positive effect on your Pokédex. |
Fortree City
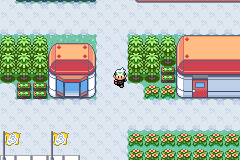
Fortree City is a small town nestled in tree groves. The houses are connected by a system of rope bridges that hang high above the ground. But even though the town is one with nature, it still boosts many modern conveniences, such as a Pokémart and Pokémon Center, as well as a Gym in the town’s center. Now, if there were just a way to actually get to it…
| Pokémart Merchandise (Left) | |
| Item | Price |
| TM81 (Aura Sphere) | 16000 |
| TM89 (Heavy Slam) | 10000 |
| TM90 (Encore) | 6000 |
| TM94 (Play Rough) | 20000 |
| TM95 (Amnesia) | 3000 |
| Pokémart Merchandise (Right) | |
| Item | Price |
| Great Ball | 600 |
| Ultra Ball | 800 |
| Super Potion | 700 |
| Hyper Potion | 1500 |
| Antidote | 200 |
| ParalyzeHeal | 200 |
| Awakening | 200 |
| Revive | 2000 |
| Super Repel | 500 |
| Wood Mail | 50 |
| Desk Store Merchandise | |
| Item | Price |
| Small Desk | 3000 |
| Pokémon Desk | 3000 |
| Heavy Desk | 6000 |
| Ragged Desk | 6000 |
| Comfort Desk | 6000 |
| Brick Desk | 9000 |
| Camp Desk | 9000 |
| Hard Desk | 9000 |
| Chair Store Merchandise | |
| Item | Price |
| Small Chair | 2000 |
| Pokémon Chair | 2000 |
| Heavy Chair | 2000 |
| Ragged Chair | 2000 |
| Comfort Chair | 2000 |
| Brick Chair | 2000 |
| Camp Chair | 2000 |
| Hard Chair | 2000 |
| Seed Boi | |
| Item | Price |
| ElectricSeed | 20000 |
| Psychic Seed | 20000 |
| Misty Seed | 20000 |
| Grassy Seed | 20000 |
| Pokémon Appearances | |
| Pokémon | Conditions |
| Toedscool | Trade for a Volbeat in town |
| Items |
| Garchompite (HIDDEN) |
| Mental Herb |
| TM66 (Fly) |
Event 1: Secret Base Shopping
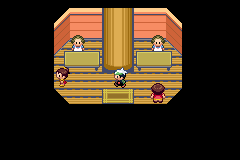
Two counter in Fortree City sell furniture for your Secret Base. You can buy a variety of Desks and Chairs from these counters, an excellent way to spruce up your home away from home.
Event 2: Tentacool?
A little boy in the northwest corner of Fortree City would like to get his hands on a Volbeat and is willing to trade a rare Toedscool for it.
Event 3: Hit the Gym
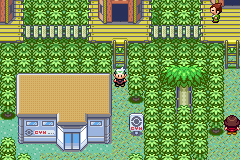
Unfortunately, you cannot access the Fortree Gym on your first visit to Fortree City. The path is blocked by an invisible force. The answer to this puzzle lies on Route 120 with a familiar face.
| TIP |
| After you receive the special Item, Devon Scope, which lets you see these invisible barriers, return to the Gym to challenge the Gym Leader. |
Event 4: Gym Leader Battle #6—Winona
| Winona, Fortree Gym Leader | |||
| Pokémon Type: | Flying | ||
| Recommended Type: | Electric/Ice/Rock | ||
| Gym Leader’s Pokémon | |||
| Pokémon | Level | Type | |
| Oricorio | Flying | Fire | |
| Togekiss | Flying | Fairy | |
| Gliscor | Flying | Ground | |
| Corviknight | Flying | Steel | |
| Pidgeot | Flying | Normal | |
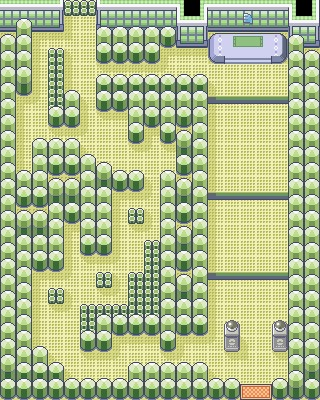
The path to Winona, Fortree Gym Leader, is a bit tricky. You must navigate a system of revolving gates, but sometimes the gates aren’t as user-fiendly as you may hope. Some gates revolves only once or twice, meaning you must sometimes cross back through a gate multiple times to finally get it in the correct position to pass. Add some pretty powerful Trainers to the route, and you may need to rest before battling Winona.
Winona uses Flying Pokémon, but all of her Pokémon have secondary types, too, such as Steel and Ground. Keep these dual-types in mind when sending your Pokémon into battle. If you have a strong Electric-type Pokémon, though, you can tap into the weakness that they all share and earn the Gym badge.
| Items Won |
| Feather Badge: Pokémon up to Lv. 70 will obey your commands: grants use of TM66 (Fly) in the field.TM66 (Fly) |
Route 120
| Pokémon Appearances on Land | |
| Pokémon | Conditions |
| Foongus | 20% |
| Fomantis | 20% |
| Oddish | 10% |
| Skiddo | 10% |
| Maschiff | 10% |
| Ferroseed | 10% |
| Carnivine | 5% |
| Tinkatink | 5% |
| Absol | 4% |
| Cyclizar | 4% |
| Chespin | 1% |
| Sprigatito | 1% |
| Pokémon Appearances in Water | |
| Pokémon | Conditions |
| Feebas | 60%, Good Rod (20%), Super Rod (15%) |
| Basculin (White) | 30% |
| Pelipper | 5% |
| Shellos | 4% |
| Froakie | 1% |
| Magikarp | Old Rod (70%) |
| Wishiwashi | Old Rod (30%) |
| Goldeen | Good Rod (60%) |
| Finneon | Good Rod (20%) |
| Palpitoad | Super Rod (40%) |
| Milotic | Super Rod (40%) |
| Poliwhirl | Super Rod (4%) |
| Clodsire | Super Rod (1%) |
| Items |
| Aspear Berries x6 |
| Charizardite Y (HIDDEN) |
| Devon Scope |
| Full Heal |
| Hyper Potion |
| Nest Ball |
| Nanab Berries x3 |
| Nugget |
| Pecha Berries x6 |
| Pinap Berries x3 |
| Razz Berries x2 |
| Rare Candy x2 (HIDDEN) |
| Revive |
| Revive (HIDDEN) |
| TM20 (Sunny Day) |
| Zinc (HIDDEN) |
Event 1: Devon Scope
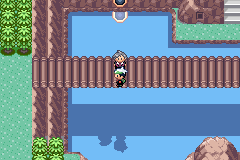
Something invisible is blocking your way to the Fortree Gym, but Steven is waiting on the bridge with just the thing you need to see your way through: the Devon Scope. The Devon Scope flushes out invisible Pokémon, like the Kecleon, so take it back to the Gym and use it to make your way through.
Event 2: Ancient Cave?
It is rumored that Route 120 is host to an Ancient Cave, but nobody can find the entrance to the ruins. There is an explorer in the correct spot, but without the Sealed Chamber to guide him, he will never spot the entrance. When you complete the mystery for yourself, return here to seek out one of the mystic Legendary Pokémon, Registeel.
Event 3: Fresh Berries
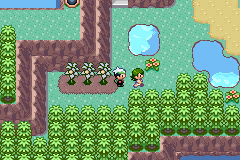
A girl in Route 120’s southern region will present you with a very rare berry if you talk to her. Take the berry and use the soft soil nearby to plant it. Try to grow a few trees’ worth of this berry so its special powers can flourish in Hoenn.
| NOTE |
| Gabby and Ty are in the area, searching for a good interview. If you want to be on TV again, engage them in battle. |
Route 121
| Pokémon Appearances on Land | |
| Pokémon | Conditions |
| Minccino | 20% |
| Espurr | 20% |
| Meowth (Alolan) | 10% |
| Gothita | 10% |
| Solosis | 10% |
| Ekans | 10% |
| Trubbish | 5% |
| Inkay | 5% |
| Indeedee | 8% |
| Grimer (Alolan) | 1% |
| Snivy | 1% |
| Pokémon Appearances in Water | |
| Pokémon | Conditions |
| Carvanha | 60% |
| Qwilfish (Hisuian) | 30% |
| Frillish | 9%, Good Rod (40%) |
| Tentacruel | 1% |
| Magikarp | Old Rod (70%) |
| Wishiwashi | Old Rod (30%) |
| Mareanie | Good Rod (60%), Super Rod (40%) |
| Qwilfish | Super Rod (40%) |
| Dhelmise | Super Rod (15%) |
| Corsola | Super Rod (4%) |
| Veluza | Super Rod (1%) |
| Items |
| Aspear Berries x2 |
| Carbos |
| Chesto Berries x2 |
| Full Heal (HIDDEN) |
| HP Up (HIDDEN) |
| Max Revive (HIDDEN) |
| Nanab Berries x6 |
| Nugget (HIDDEN) |
| Persim Berries x2 |
| Rawst Berries x2 |
| Revive |
| Zinc |
Event 1: Team Aqua’s Up to Something
As you head west through Route 121, you catch up with Team Aqua. They are on their way to Mt. Pyre. Follow them to find out what their plans are.
Event 2: Safari Zone
Route 121 hosts the entrance to the Safari Zone, a special game area where you can collect Pokémon not found elsewhere in the Hoenn region. It costs only ![]() 500 to test your skills in the Safari Zone, and in a feature exclusive to Pokémon Theta Emerald The Last Dance, a new area opens in the Safari Zone after you defeat the Elite Four. This new area offers even more wild Pokémon.
500 to test your skills in the Safari Zone, and in a feature exclusive to Pokémon Theta Emerald The Last Dance, a new area opens in the Safari Zone after you defeat the Elite Four. This new area offers even more wild Pokémon.
Safari Zone
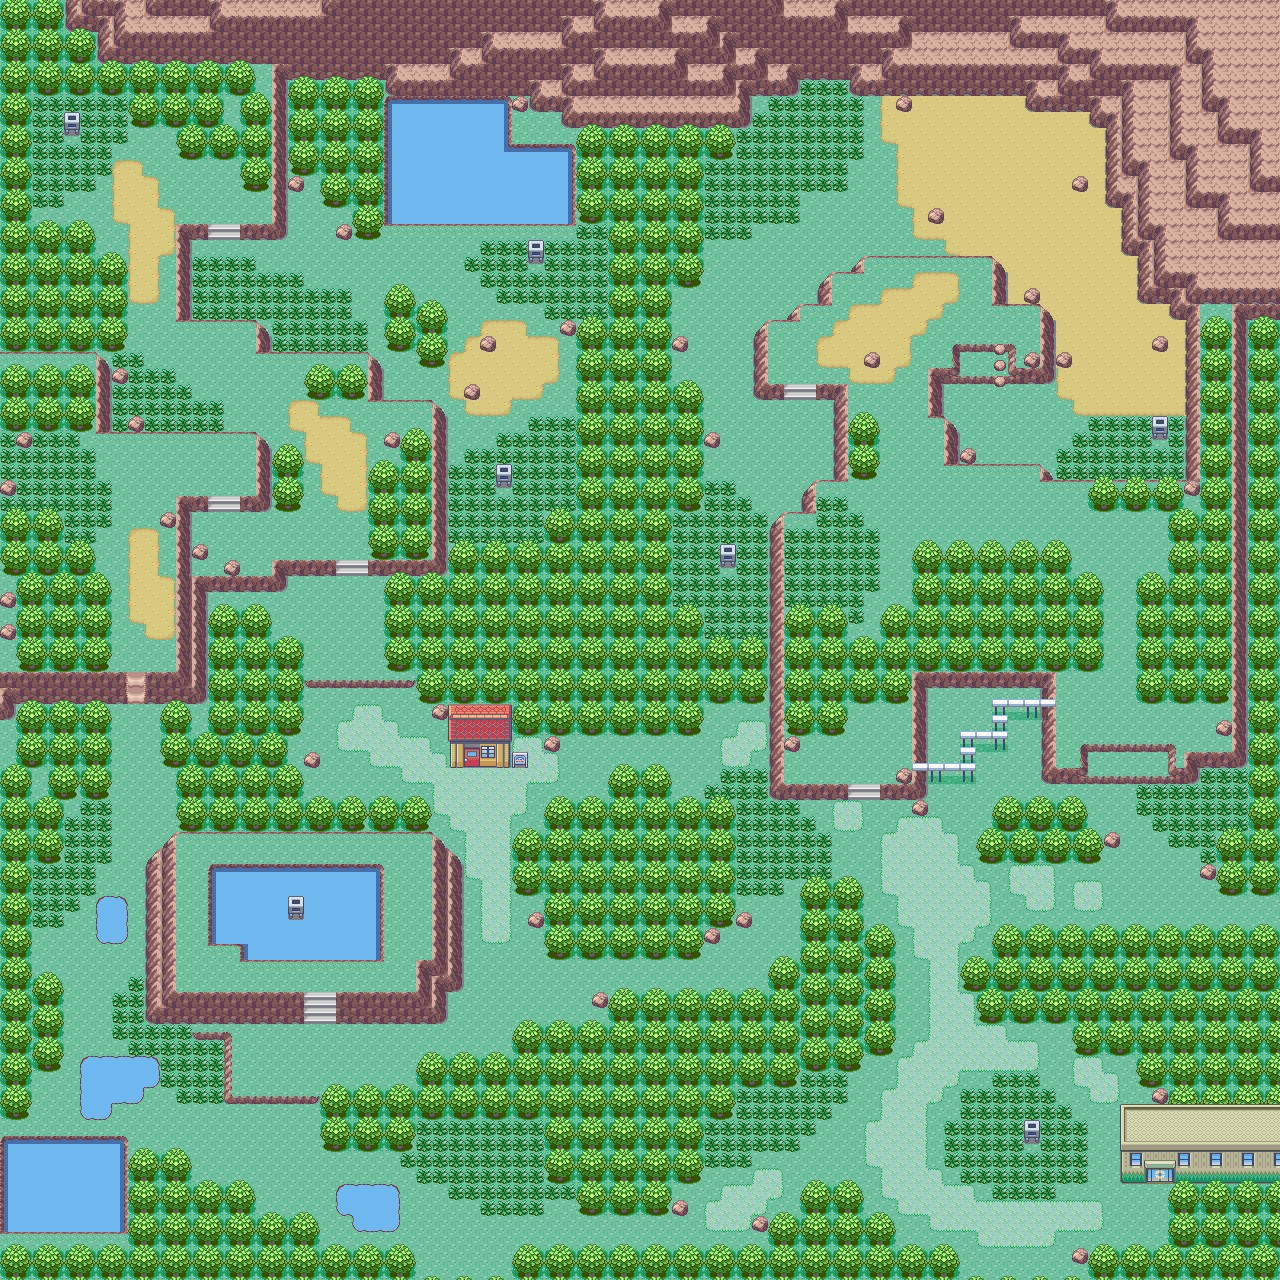
The Safari Zone is a special area in Hoenn where Trainers and Pokémon Masters can come and test their skills at catching Pokémon without traditional battling methods. Many of the Pokémon in the Safari Zone cannot be found anywhere else in Hoenn, so if there is one particular Pokémon you really want in your collection, you must visit the Safari Zone at least once.
| Pokémon Appearances on Land (Northwest) | |
| Pokémon | Conditions |
| Teddiursa | 20% |
| Mankey | 20% |
| Stunfisk (Galarian) | 10% |
| Stufful | 10% |
| Tadbulb | 10% |
| Flamigo | 10% |
| Aipom | 5% |
| Nidorino | 5% |
| Nidorina | 4% |
| Slakoth | 4% |
| Capsakid | 1% |
| Krokorok | 1% |
| Pokémon Appearances in Water (Northwest) | |
| Pokémon | Conditions |
| Marill | 60% |
| Wimpod | 30% |
| Psyduck | 5% |
| Araquanid | 5% |
| Wishiwashi | Old Rod (70%) |
| Magikarp | Old Rod (30%) |
| Goldeen | Good Rod (60%) |
| Corphish | Good Rod (20%), Super Rod (40%) |
| Clauncher | Good Rod (20%), Super Rod (15%) |
| Crawdaunt | Super Rod (40%) |
| Clawitzer | Super Rod (5%) |
| Pokémon Appearances on Land (Northeast) | |
| Pokémon | Conditions |
| Mudbray | 20% |
| Phanpy | 20% |
| Hippopotas | 10% |
| Gligar | 10% |
| Maractus | 10% |
| Shuckle | 10% |
| Silicobra | 5% |
| Cacnea | 5% |
| Rellor | 4% |
| Bunnelby | 4% |
| Klawf | 1% |
| Cubone | 1% |
| Lileep | Rock Smash (60%) |
| Geodude | Rock Smash (30%) |
| Dwebble | Rock Smash (5%) |
| Roggenrola | Rock Smash (4%) |
| Nosepass | Rock Smash (1%) |
| Pokémon Appearances on Land (Southwest) | ||
| Pokémon | Conditions | |
| Vulpix | 20% | |
| Chansey | 20% | |
| Doduo | 10% | |
| Kelceon | 10% | |
| Pansear | 10% | |
| Pansage | 10% | |
| Panpour | 5% | |
| Poochyena | 5% | |
| Shinx | 4% | |
| Komala | 4% | |
| Helioptile | 1% | |
| Ekans | 1% | |
| Pokémon Appearances in Water (Southwest) | |
| Pokémon | Conditions |
| Wimpod | 60% |
| Psyduck | 30% |
| Dewpider | 5% |
| Goldeen | 4%, Good Rod (60%) |
| Dratini | 1% |
| Magikarp | Old Rod (100%) |
| Feebas | Good Rod (40%), Super Rod (40%) |
| Poliwag | Super Rod (40%) |
| Seaking | Super Rod (15%) |
| Poliwhirl | Super Rod (5%) |
| Pokémon Appearances on Land (Southeast) | |
| Pokémon | Conditions |
| Growlithe | 20% |
| Purrloin | 20% |
| Miltank | 10% |
| Seviper | 10% |
| Litleo | 10% |
| Tauros | 10% |
| Passimian | 5% |
| Blitzle | 5% |
| Oranguru | 4% |
| Girafarig | 4% |
| Zangoose | 1% |
| Trumbeak | 1% |
| Items |
| Absolite (HIDDEN) |
| Max Revive |
| TM87 (Energy Ball) |
| TM111 (Wild Charge) |
| TM128 (Solar Beam) |
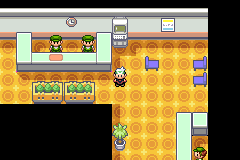
The Safari Zone entrance fee is ![]() 500. For this small amount, you receive 30 Safari Balls and the keys to the kingdom. Your movement is restricted only by whether or not you have the Bikes in your Bag. You cannot take any Safari Balls outside of the Safari Zone, though.
500. For this small amount, you receive 30 Safari Balls and the keys to the kingdom. Your movement is restricted only by whether or not you have the Bikes in your Bag. You cannot take any Safari Balls outside of the Safari Zone, though.

Once you enter the Safari Zone, start seeking out wild Pokémon in the grass and water. When you happen upon a Pokémon, you have four choices:
- Throw a Safari Ball and try to catch it.
- Get closer to the wild Pokémon.
- Offer the Pokémon a PokéBlock.
- Back away and look for another Pokémon.
The wild Pokémon of the Safari Zone can be pretty cagey. Almost anything can spooky them enough to run away. You can throw as many Safari Balls as you have at the Pokémon in an effort to catch it, but you may cause it to flee. You can also attempt to ingratiate yourself to the Pokémon by either sidling up to it (Go Near) or offering it a tasty PokéBlock.
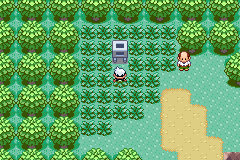
The PokéBlock is sometimes your best bet for capturing a rare Pokémon in the Safari Zone. You can try to encourage rare Pokémon out of hiding by placing a PokéBlock in one of several feeders throughout the Safari Zone. If you match up the PokéBlock with the nature of the Pokémon, there’s a good chance you’ll lure a desired wild Pokémon close enough to catch.
| TIP |
| A couple areas in the Safari Zone can be accessed only with the Acro Bike or the Mach Bike, such as the small area on the other side of the trick rail in the northeast corner. |
| NOTE |
| Check back with the Safari Zone after you defeat the Elite Four. A new area opens up directly above the Safari Zone entrance. This area is home to many more wild Pokémon not available in the original Safari Zone. For additional details on the additional Safari Zone, please see this guide’s Bonuses and Extra Content section. |
Lilycove City
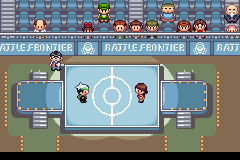
If Lilycove City isn’t one of the biggest metro centers in Hoenn, it’s at least rhe biggest hub of commerce in the land. The Lilycove Department Store is a multistory monument to the fine art of shopping. However, there’s certainly more to do in town than just spend your hard-won cash. Stop by the Pokémon Contest Hall to enter your Pokémon in move-based challenges or visit the Art Museum for a dose of culture. Maybe one day you’ll help cover the halls with beautiful artwork.
| Pokémon Appearances in Water | |
| Pokémon | Conditions |
| Tentacool | 60% |
| Wingull | 35% |
| Pelipper | 5% |
| Magikarp | Old Rod (70%) |
| Wishiwashi | Old Rod (30%) |
| Goldeen | Good Rod (60%) |
| Krabby | Good Rod (20%), Super Rod (4%) |
| Chinchou | Good Rod (20%), Super Rod (40%) |
| Kingler | Super Rod (40%) |
| Lanturn | Super Rod (15%) |
| Slowpoke | Super Rod (1%) |
| Items |
| Altarianite (HIDDEN) |
| Lucarionite (HIDDEN) |
| Pecha Berry |
| PokéBlock Case |
| PP Up (HIDDEN) |
| TM54 (Poison Jab) |
| TM56 (Rest) |
| Lilycove Department Store Merchandise | |
 There are 11 shopping opportunities at the Lilycove Department Store, the largest shopping experience in Hoenn. You can buy everything from recovery Items to Secret Base décor from the counters in this five-story mall. There are 11 shopping opportunities at the Lilycove Department Store, the largest shopping experience in Hoenn. You can buy everything from recovery Items to Secret Base décor from the counters in this five-story mall. | |
| Left Counter, 2F | |
| Item | Price |
| Poké Ball | 200 |
| Great Ball | 600 |
| Ultra Ball | 800 |
| Escape Rope | 550 |
| Full Heal | 400 |
| Antidote | 200 |
| ParalyzeHeal | 200 |
| Burn Heal | 200 |
| Ice Heal | 200 |
| Awakening | 200 |
| Fluffy | 100 |
| Right Counter, 2F | |
| Item | Price |
| Potion | 200 |
| Super Potion | 700 |
| Hyper Potion | 1500 |
| Max Potion | 2500 |
| Revive | 2000 |
| Repel | 350 |
| Super Repel | 500 |
| Max Repel | 700 |
| Wave Mail | 50 |
| Mech Mail | 50 |
| Weird Ball Guy, 2F | |
| Item | Price |
| Poké Ball | 200 |
| Great Ball | 600 |
| Ultra Ball | 800 |
| Net Ball | 1000 |
| Dive Ball | 1000 |
| Nest Ball | 1000 |
| Repeat Ball | 1000 |
| Timer Ball | 1000 |
| Luxury Ball | 3000 |
| Premier Ball | 10 |
| Level Ball | 300 |
| Lure Ball | 300 |
| Moon Ball | 300 |
| Friend Ball | 300 |
| Love Ball | 300 |
| Heavy Ball | 300 |
| Fast Ball | 300 |
| Dusk Ball | 1000 |
| Quick Ball | 1000 |
| Heal Ball | 300 |
| Cherish Ball | 1000 |
| Dream Ball | 1000 |
| Beast Ball | 1000 |
| Left Counter, 3F | |
| Item | Price |
| Protein | 10000 |
| Calcium | 10000 |
| Iron | 10000 |
| Zinc | 10000 |
| Carbos | 10000 |
| HP Up | 10000 |
| Right Counter, 3F | |
| Item | Price |
| X Speed | 1000 |
| X Sp. Atk | 350 |
| X Attack | 1000 |
| X Defense | 550 |
| Dire Hit | 1000 |
| Guard Spec. | 1500 |
| X Accuracy | 1000 |
| Left Counter, 4F | |
| Item | Price |
| TM02 (Protect) | 800 |
| TM41 (Sleep Talk) | 800 |
| TM45 (Reflect) | 1600 |
| TM46 (Light Screen) | 1600 |
| TM72 (Substitute) | 10000 |
| Right Counter, 4F | |
| Item | Price |
| TM108 (Fire Blast) | 24000 |
| TM110 (Blizzard) | 24000 |
| TM114 (Stone Edge) | 24000 |
| TM115 (Giga Impact) | 28000 |
| TM118 (Focus Blast) | 24000 |
| TM123 (Hyper Beam) | 28000 |
| TM126 (Thunder) | 24000 |
| Left Bottom Counter, 5F | |
| Item | Price |
| Ball Poster | 1000 |
| Green Poster | 1000 |
| Red Poster | 1000 |
| Blue Poster | 1000 |
| Cute Poster | 1000 |
| Pika Poster | 1500 |
| Long Poster | 1500 |
| Sea Poster | 1500 |
| Right Bottom Counter, 5F | |
| Item | Price |
| Surf Mat | 4000 |
| Thunder Mat | 4000 |
| Fire Blast Mat | 4000 |
| Powder Snow Mat | 4000 |
| Attract Mat | 4000 |
| Fissure Mat | 4000 |
| Spikes Mat | 4000 |
| Glitter Mat | 2000 |
| Jump Mat | 2000 |
| Spin Mat | 2000 |
| Left Top Counter, 5F | |
| Item | Price |
| Pichu Doll | 3000 |
| Pikachu | 3000 |
| Marill Doll | 3000 |
| Jigglypuff Doll | 3000 |
| Duskull Doll | 3000 |
| Wynaut Doll | 3000 |
| Baltoy Doll | 3000 |
| Kecleon Doll | 3000 |
| Azurill Doll | 3000 |
| Skitty Doll | 3000 |
| Swablu Doll | 3000 |
| Gulpin Doll | 3000 |
| Right Top Counter, 5F | |
| Item | Price |
| Pika Cushion | 2000 |
| Round Cushion | 2000 |
| Zigzag Cushion | 2000 |
| Spin Cushion | 2000 |
| Diamond Cushion | 2000 |
| Ball Cushion | 2000 |
| Grass Cushion | 2000 |
| Fire Cushion | 2000 |
| Water Cushion | 2000 |
Event 1: Battle at the Department Store

When you first enter Lilycove City, head up to the Department Store and face off against Prof. Birch’s child again. As promised, they have been practicing and offers a greater challenge this time—especially since the team has grown to a full team. If you’ve been leveling up your Pokémon evenly, you should be able to emerge from this battle victorious.
Event 2: Shopping Spree
Now hit the Deparment Store and start spending all that cash you’ve won from your Trainer battles. There are five floors of commerce in this single building, including a rooftop complete with a vending Machine. (Socre a few drinks from the vending Machine before you leave—Pokémon love the sweet recovery Items.)
After you’ve shopped a little, head back down to the first floor and get your Lottery Ticket from the front desk. The clerk will compare your Lottery Ticket’s numbers to the winning set of numbers. If you match at least two of the numbers, you win a prize. The more numbers you match, the better your prize. If you’re really lucky, you could win an awesome Master Ball—one of the most coveted Poké Balls in all of Hoenn.
In addition to the Lottery, the Deparment Store also holds special sales. Check the televisions in other towns to find out when these deals will be offered. Return to the store when a sale is on and you’ll be able to decorate your Secret Base on the cheap.
Event 3: Pokémon Contest Hall
The Pokémon Contest Hall is where Trainers from across Hoenn gather to enter their Pokémon in special Pokémon Contests. These aren’t like regular battles. Instead, your Pokémon’s traits and moves are judged on various merits. Is your Pokémon cool? Beautiful? The best way to improve your chances in these contests is to use the Berry Blenders in the lobby to create tasty PokéBlocks.
| TIP |
| Visit the house to the left of the Pokémon Contest Hall to receive PokéBlock-making tips from the PokéBlock Master. Listen to her carefully and you’ll be a better PokéBlock-maker for it. |
Event 4: Pokémon Trainer Fan Club

This club loves to gather and talk about all things Trainer-related. They always recognize the best talent in Hoenn, and if you manage to beat all of the Gym Leaders or even defeat the Elite Four, they are sure to sing your praises.
Event 5: Museum Visit
The Art Museum next to the Department Store is full of priceless works of art, but there is always room for more. The Curator takes you upstairs to show you the new display space and asks you to help him cover the walls with new paintings. If you ever happens across a cool painting while exploring Hoenn, mention the Art Museum and perhaps the work will soon hang in its hallowed halls.
Event 6: Team Aqua Hideout

Team Aqua has settled down in Lilycove City and is using the sea cave to the east as their Hideout. Team Aqua Grunts are currently teaching a legion of Wailmer new moves in the east bay, effectively cutting off access to the town from Route 124. Unfortunately, there isn’t much you can do to displace Team Aqua right now, but as soon as you have the tools to evict them, come back and help the people of Lilycove City.
Route 122 and Mt. Pyre
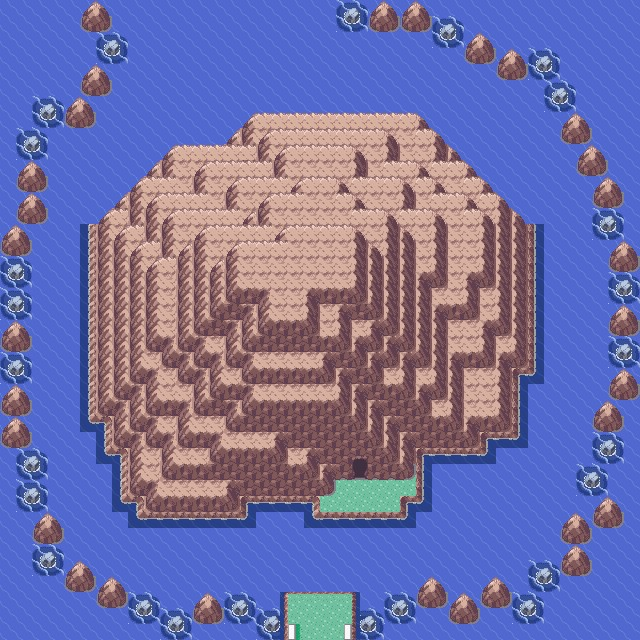
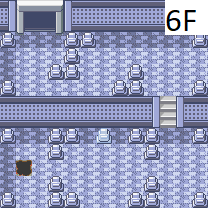
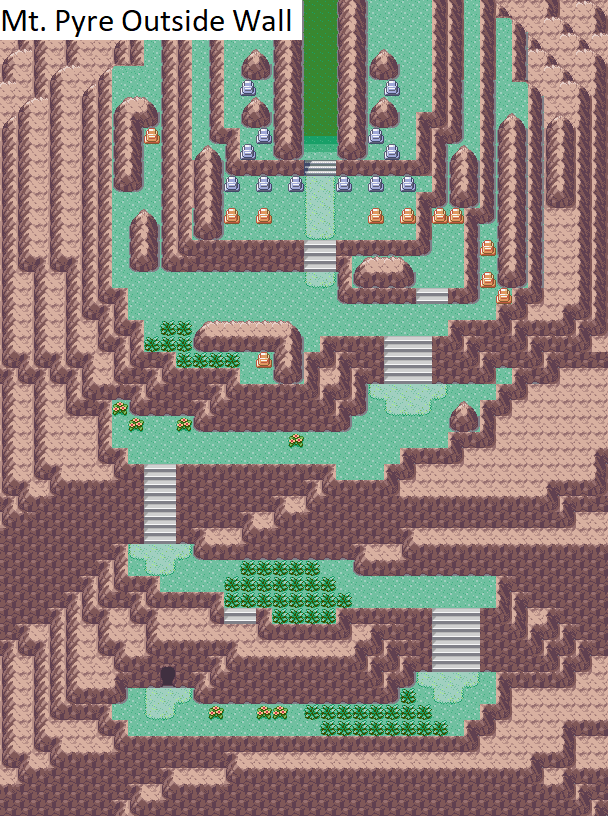
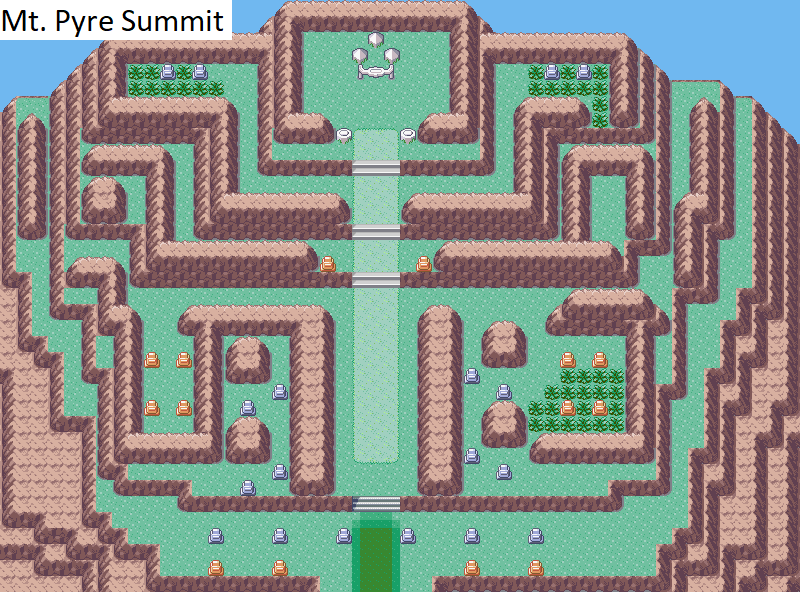
| Pokémon Appearances in Water (Route 122) | |
| Pokémon | Conditions |
| Carvanha | 60% |
| Qwilfish (Hisuian) | 30% |
| Frillish | 9% |
| Tentacruel | 1% |
| Magikarp | Old Rod (70%) |
| Wishiwashi | Old Rod (30%) |
| Mareanie | Good Rod (60%), Super Rod (40%) |
| Frillish | Good Rod (40%) |
| Qwilfish | Super Rod (40%) |
| Veluza | Super Rod (15%) |
| Corsola (Galarian) | Super Rod (4%) |
| Dhelmise | Super Rod (1%) |
| Pokémon Appearances in Mt. Pyre (Floor 1) | |
| Pokémon | Conditions |
| Gastly | 20% |
| Duskull | 20% |
| Shuppet | 10% |
| Litwick | 10% |
| Golett | 10% |
| Yamask | 10% |
| Sinistea | 5% |
| Misdreavus | 5% |
| Honedge | 4% |
| Greavard | 4% |
| Haunter | 1% |
| Doublade | 1% |
| Pokémon Appearances in Mt. Pyre (Floor 2) | |
| Pokémon | Conditions |
| Gastly | 20% |
| Duskull | 20% |
| Shuppet | 10% |
| Litwick | 10% |
| Golett | 10% |
| Yamask | 10% |
| Sinistea | 5% |
| Misdreavus | 5% |
| Honedge | 4% |
| Greavard | 4% |
| Lampent | 1% |
| Doublade | 1% |
| Pokémon Appearances in Mt. Pyre (Floors 3 & 4) | |
| Pokémon | Conditions |
| Gastly | 20% |
| Duskull | 20% |
| Shuppet | 10% |
| Litwick | 10% |
| Golett | 10% |
| Yamask | 10% |
| Sinistea | 5% |
| Misdreavus | 5% |
| Honedge | 4% |
| Greavard | 4% |
| Dusclops | 1% |
| Doublade | 1% |
| Pokémon Appearances in Mt. Pyre (Floor 5) | |
| Pokémon | Conditions |
| Gastly | 20% |
| Duskull | 20% |
| Shuppet | 10% |
| Litwick | 10% |
| Golett | 10% |
| Yamask | 10% |
| Sinistea | 5% |
| Misdreavus | 5% |
| Honedge | 4% |
| Greavard | 4% |
| Doublade | 1% |
| Mimikyu | 1% |
| Pokémon Appearances in Mt. Pyre (Floor 6) | |
| Pokémon | Conditions |
| Gastly | 20% |
| Duskull | 20% |
| Shuppet | 10% |
| Litwick | 10% |
| Golett | 10% |
| Yamask | 10% |
| Sinistea | 5% |
| Misdreavus | 5% |
| Honedge | 4% |
| Greavard | 4% |
| Doublade | 1% |
| Spiritomb | 1% |
| Pokémon Appearances on Land (Mountain Wall) | |
| Pokémon | Conditions |
| Pumpkaboo | 20% |
| Phantump | 20% |
| Drifloon | 10% |
| Rattata (Alolan) | 10% |
| Zigzagoon (Galarian) | 10% |
| Murkrow | 10% |
| Houndour | 5% |
| Chimecho | 5% |
| Zorua (Hisuian) | 4% |
| Flittle | 4% |
| Marowak (Alolan) | 1% |
| Impidimp | 1% |
| Pokémon Appearances on Land (Mountain Summit) | |
| Pokémon | Conditions |
| Pumpkaboo | 20% |
| Phantump | 20% |
| Drifloon | 10% |
| Rattata (Alolan) | 10% |
| Zigzagoon (Galarian) | 10% |
| Murkrow | 10% |
| Houndour | 5% |
| Chimecho | 5% |
| Zorua (Hisuian) | 4% |
| Flittle | 4% |
| Marowak (Alolan) | 1% |
| Dreepy | 1% |
| Items |
| Banettite (HIDDEN) |
| Cleanse Tag |
| Diamond Shard |
| Lax Incense |
| Magma Emblem |
| Max Ether (HIDDEN) |
| Medichamite (HIDDEN) |
| Pearl Globe |
| Rare Candy (HIDDEN) |
| Sea Incense |
| Super Repel |
| TM67 (Skill Swap) |
| TM76 (Will-O-Wisp) |
| TM82 (Shadow Ball) |
| Ultra Ball |
| Zinc (HIDDEN) |
Event 1: Enter the Mausoleum

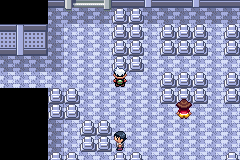
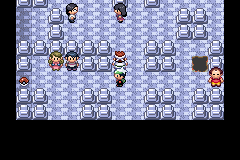
There are two routes you can take at Mt. Pyre. From the first floor, you have two choices.You can immediately head outside and scale the face of the mountain to challenge Team Aqua at the summit. Or, you can explore the six floors of the mausoleum inside and collect both some very good Items and some rare Pokémon.
Event 2: Summit Challenge
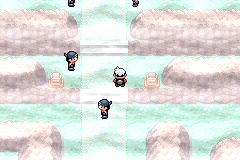
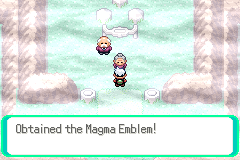
When you’re finished exploring the interior of the mountain, start ascending the outer mountain wall. A mist settles over the path the closer you get to the top. You must challenge Team Aqua at the summit, eventually coming into contact with Team Aqua Leader Archie. It seems he has stolen a precious Blue Orb from a summit shrine and Team Magma Leader Maxie has absconded with a Red Orb.
Only only can come from these two Leaders having the Orbs, so it’s up to you to stop them. But where? The old couple at the top of the mountain gives you an Item they found dropped after the scene, the Magma Emblem. With this token, you can enter the Team Magma Hideout on the Jagged Pass.
Route 123
| Pokémon Appearances on Land | |
| Pokémon | Conditions |
| Glameow | 20% |
| Stunky | 20% |
| Furfrou | 10% |
| Tauros | 10% |
| Paldean Tauros | 12% |
| Miltank | 10% |
| Chatot | 5% |
| Audino | 5% |
| Bulbasaur | 4% |
| Snorlax | 4% |
| Pokémon Appearances in Water | |
| Pokémon | Conditions |
| Surskit | 60% |
| Dewpider | 30% |
| Wimpod | 5% |
| Masquerain | 4% |
| Araquanid | 1% |
| Magikarp | Old Rod (70%) |
| Wishiwashi | Old Rod (30%) |
| Corphish | Good Rod (60%) |
| Goldeen | Good Rod (20%) |
| Poliwag | Good Rod (20%) |
| Basculin | Super Rod (80%) |
| Clauncher | Super Rod (15%) |
| Poliwhirl | Super Rod (4%) |
| Clawitzer | Super Rod (1%) |
| Items |
| Abomasite (HIDDEN) |
| Elixir |
| Gracidea |
| Grepa Berries x8 |
| Gyaradosite (HIDDEN) |
| Hyper Potion (HIDDEN) |
| Lum Berry |
| Pecha Berries x2 |
| Pomeg Berries x8 |
| PP Up |
| PP Up (HIDDEN) |
| Qualot Berries x8 |
| Rare Candy (HIDDEN) |
| Rawst Berries x2 |
| Sitrus Berries x2 |
| Tamato Berries x2 |
| TM50 (Dazzling Gleam) |
| TM80 (Giga Drain) |
| Ultra Ball |
Event 1: See the Berry Master
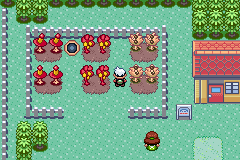
The chief feature of Route 123 is the Berry Master’s House, the destination in Hoenn for the discerning berry fan. You can find some very rare berries at the house. The place is also rich with fertile soil, so consider turning this into your own private orchard. Be sure to step inside and chat for a spell.
Event 2: Getting TM80 (Giga Drain)
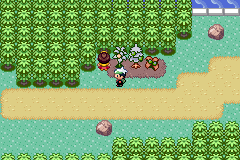
Be sure you chat with this young woman on Route 123. She’s crazy about Grass-type Pokémon and if you happen to have one in your party, she gives you TM80 (Giga Drain). This is a great move to teach your Grass-type Pokémon.
Magma Hideout
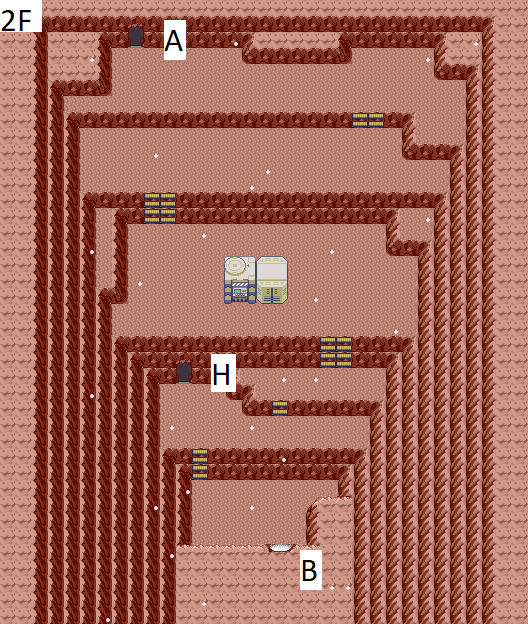
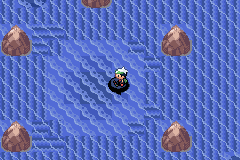
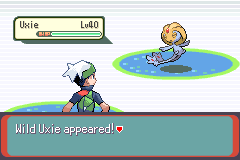
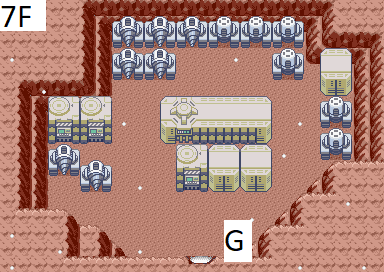
Buried deep in Mt. Chimney, the Team Magma Hideout is where the land-loving crew stores its drilling equipment and plots its deeds.
| Pokémon Appearances (1F-2F) | |
| Pokémon | Conditions |
| Numel | 20% |
| Slugma | 20% |
| Rolycoly | 10% |
| Salandit | 10% |
| Sizzlipede | 10% |
| Darumaka | 10% |
| Houndour | 5% |
| Torkoal | 5% |
| Heatmor | 4% |
| Magmar | 4% |
| Turtonator | 1% |
| Larvesta | 1% |
| Pokémon Appearances (3F) | |
| Pokémon | Conditions |
| Numel | 20% |
| Slugma | 20% |
| Rolycoly | 10% |
| Salandit | 10% |
| Charcadet | 10% |
| Darumaka | 10% |
| Houndour | 5% |
| Torkoal | 5% |
| Heatmor | 4% |
| Magmar | 4% |
| Turtonator | 1% |
| Larvesta | 1% |
| Pokémon Appearances (4F) | |
| Pokémon | Conditions |
| Numel | 20% |
| Slugma | 20% |
| Charcadet | 10% |
| Salandit | 10% |
| Sizzlipede | 10% |
| Darumaka | 10% |
| Houndour | 5% |
| Torkoal | 5% |
| Heatmor | 4% |
| Magmar | 4% |
| Cyndaquil | 1% |
| Larvesta | 1% |
| Pokémon Appearances (5F) | |
| Pokémon | Conditions |
| Numel | 20% |
| Slugma | 20% |
| Rolycoly | 10% |
| Salandit | 10% |
| Sizzlipede | 10% |
| Darumaka | 10% |
| Houndour | 5% |
| Torkoal | 5% |
| Heatmor | 4% |
| Magmar | 4% |
| Cyndaquil | 1% |
| Larvesta | 1% |
| Pokémon Appearances (6F) | |
| Pokémon | Conditions |
| Numel | 20% |
| Slugma | 20% |
| Rolycoly | 10% |
| Salandit | 10% |
| Sizzlipede | 10% |
| Darumaka | 10% |
| Houndour | 5% |
| Torkoal | 5% |
| Heatmor | 4% |
| Magmar | 4% |
| Charcadet | 1% |
| Larvesta | 1% |
| Pokémon Appearances (7F) | |
| Pokémon | Conditions |
| Numel | 20% |
| Slugma | 20% |
| Rolycoly | 10% |
| Charcadet | 10% |
| Sizzlipede | 10% |
| Darumaka | 10% |
| Houndour | 5% |
| Torkoal | 5% |
| Heatmor | 4% |
| Magmar | 4% |
| Turtonator | 1% |
| Larvesta | 1% |
| Pokémon Appearances (8F) | |
| Pokémon | Conditions |
| Numel | 20% |
| Slugma | 20% |
| Rolycoly | 10% |
| Salandit | 10% |
| Sizzlipede | 10% |
| Charcadet | 10% |
| Houndour | 5% |
| Torkoal | 5% |
| Heatmor | 4% |
| Magmar | 4% |
| Turtonator | 1% |
| Larvesta | 1% |
| Items |
| Cameruptite |
| Full Restore |
| Max Elixir |
| Max Revive |
| Nugget |
| PP Max |
| Rare Candy |
Event 1: Explore the Place
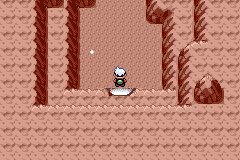
So, this is the author of the guide here. I wanted to let you know that the guide I’m basing this on doesn’t mention anything about the Magma Hideout, except for the wild Pokémon and Items. No events or anything. In fact, it lists the events for the Aqua Hideout, with no info on what items or wild Pokémon are there in said hideout. I don’t why or how this was okay, even though it got Nintendo’s official seal of approval, but whatever lol. The only advice I give for this section is just explore the area, grabbing all the items and Pokémon you want. Okay, back to your regularly scheduled guide.
Aqua Hideout
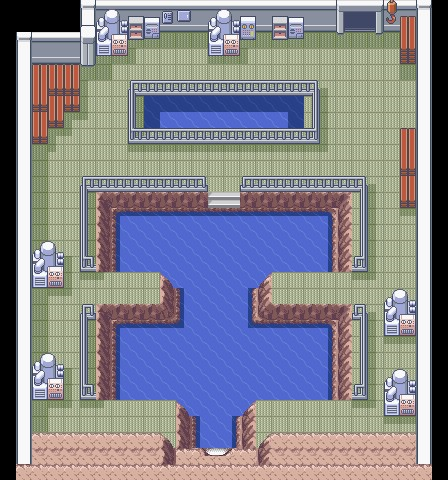
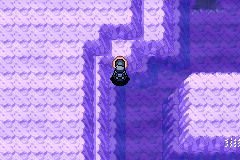
| Items |
| Master Ball |
| Max Elixir |
| Sharpedonite |
| TM64 (Dark Pulse) |
| NOTE |
 You cannot visit the Team Aqua Hideout unless you first stop at Slateport City and see the press conference at the Harbor where Team Aqua steals Capt. Stern’s submersible. You cannot visit the Team Aqua Hideout unless you first stop at Slateport City and see the press conference at the Harbor where Team Aqua steals Capt. Stern’s submersible. |
Event 1: Stop, Thief!
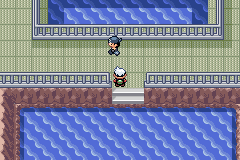
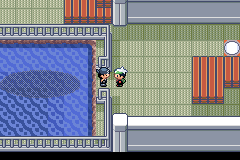
Team Aqua’s Hideout has only a few rooms, but they are connected through a clever system of warps that send you to almost every corner of the place before you can finally catch up with the stolen submersible. Unfortunately, a battle delays you just long enough for Team Aqua to escape with the sub.
Event 2: Grab the Master Ball
Before you leave the Team Aqua Hideout, warp all the way to the Team Leader’s room in the facility. The room contains a much-coveted Master Ball, but also an Electrode disguised as a Poké Ball. You want that Master Ball, so battle the Electrode and don’t leave until the Master Ball is safely in your Bag.
Route 124
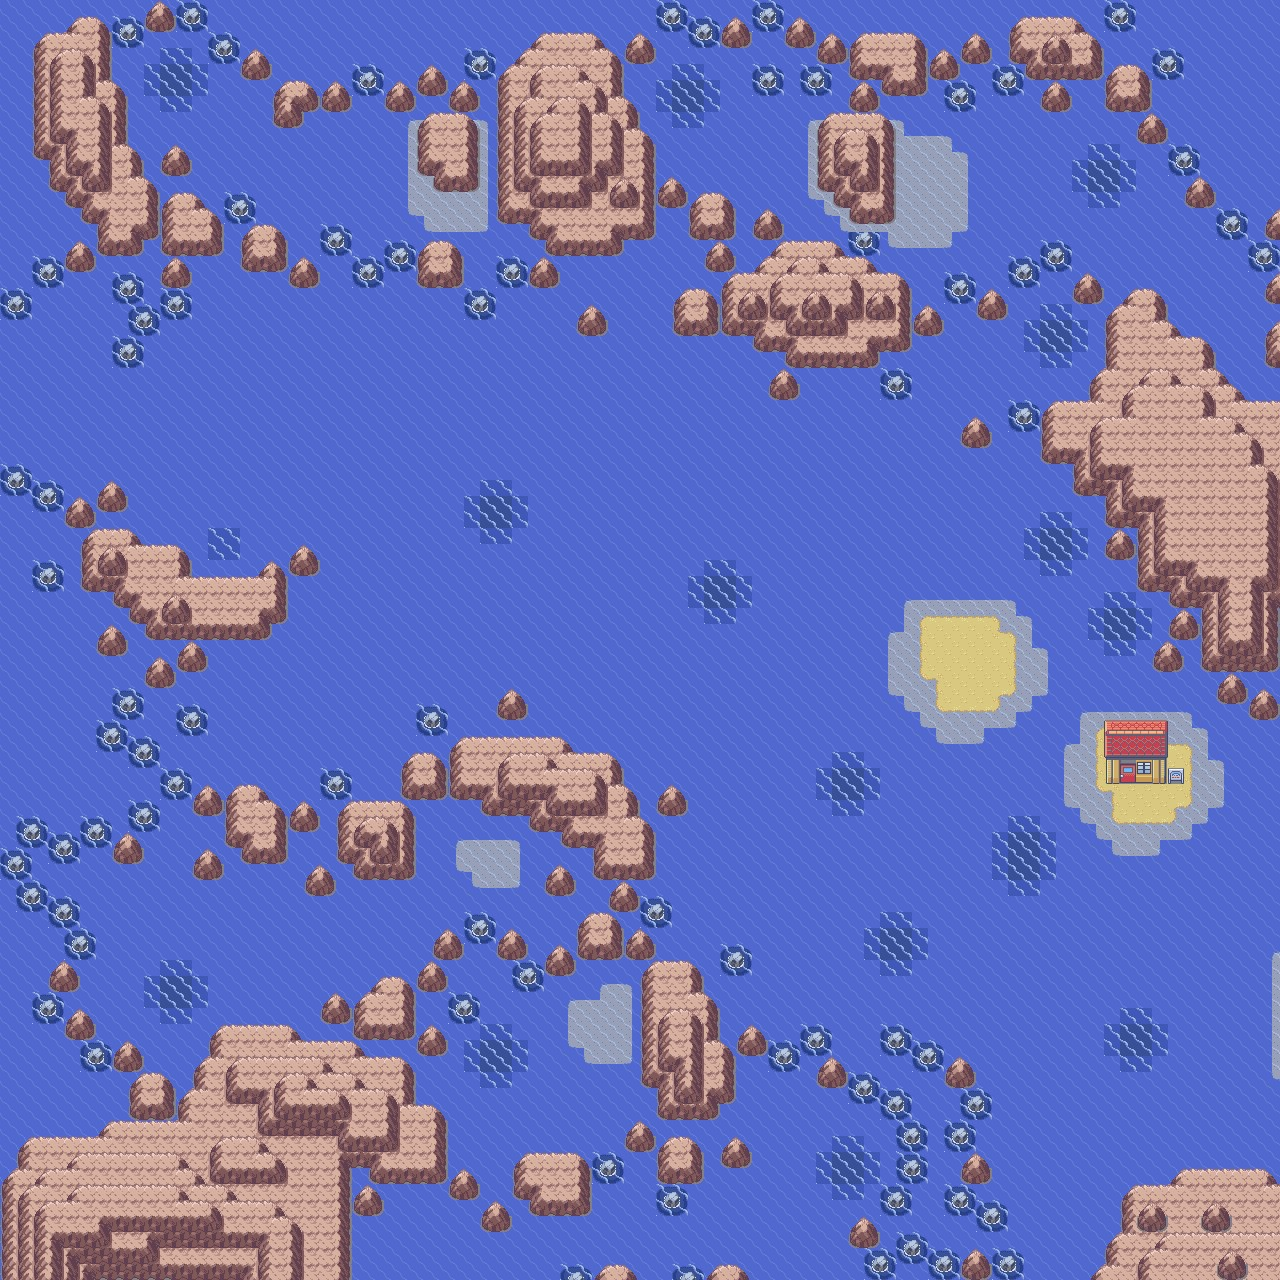
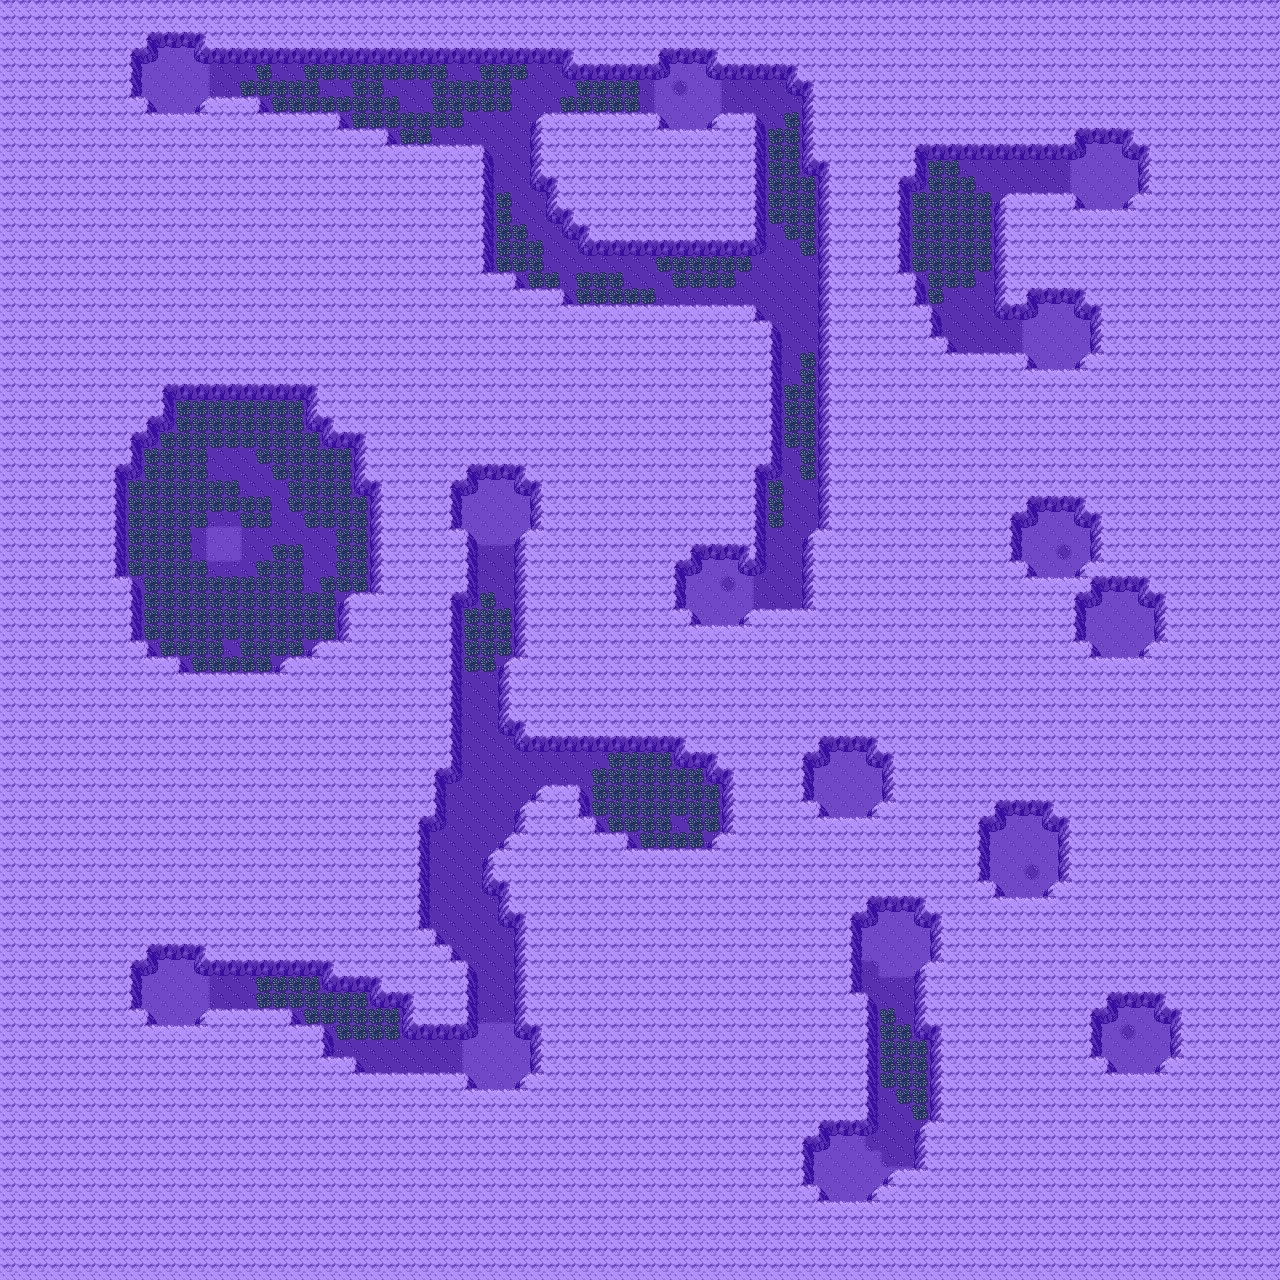
| Pokémon Appearances in Water | |
| Pokémon | Conditions |
| Wingull | 60% |
| Ducklett | 30% |
| Mantine | 5% |
| Sharpedo | 4% |
| Wailord | 1% |
| Pokémon Appearances Underwater | |
| Pokémon | Conditions |
| Clamperl | 65% |
| Chinchou | 30% |
| Relicanth | 5% |
| Items |
| Big Pearl (HIDDEN) |
| Blue Shard |
| Calcium (HIDDEN) |
| Carbos (HIDDEN) |
| Heart Scale x2 (HIDDEN) |
| Pinsirite (HIDDEN) |
| Red Shard |
| Sky Plate (HIDDEN) |
| Yellow Shard |
Event 1: Treasure Hunter
There lives a solitary man on a small island in Route 124, the Treasure Hunter. Stop by the Hunter’s House to strike a deal with him. If you bring him special, colored Shards from deep beneath the surface, he will give you some of the treasures he’s uncovered over the years. Just bring your booty back to the house for the trade.
| Shard Item | |
| Shard | Exchange Item |
| Blue Shard | Water Stone |
| Green Shard | Leaf Stone |
| Red Shard | Fire Stone |
| Yellow Shard | ThunderStone |
Event 2: Dive Deep
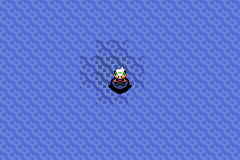
You cannot dive for sunken treasure just yet, though. Not until you get the Mind Badge in Mossdeep City can you sink beneath the waves for a look into the briny blue. When you can Dive, look for dark patches of water on the surface. Activate Tate & Liza’s Starmie and your Pokémon slips below the surface. When you want to rise to the surface, seek out a light patch of water that indicates light coming from above.
Mossdeep City
Mossdeep City is another island metropolis to the east of Hoenn’s main landmass. The island is home to Hoenn’s Space Center, the rocket science facility that furthers space exploration. A rocket launch is scheduled to take place soon, but somebody desires the rocket fuel needed to put the vehicle into orbit. Better head to the Space Center and check it out.
| Pokémart Merchandise (Left) | |
| Item | Price |
| TM98 (Pollen Puff) | 20000 |
| TM99 (Baton Pass) | 6000 |
| TM101 (Reversal) | 6000 |
| TM107 (Nasty Plot) | 10000 |
| TM109 (Hydro Pump) | 24000 |
| Pokémart Merchandise (Right) | |
| Item | Price |
| Ultra Ball | 800 |
| Net Ball | 1000 |
| Dive Ball | 1000 |
| Hyper Potion | 1500 |
| Full Heal | 400 |
| Revive | 2000 |
| Max Repel | 700 |
| X Attack | 1000 |
| X Defense | 550 |
| Scientist in Space Center | |
| Item | Price |
| Fight Memory | 1000 |
| FlyingMemory | 1000 |
| PoisonMemory | 1000 |
| GroundMemory | 1000 |
| Rock Memory | 1000 |
| Bug Memory | 1000 |
| Ghost Memory | 1000 |
| Steel Memory | 1000 |
| Fire Memory | 1000 |
| Water Memory | 1000 |
| Grass Memory | 1000 |
| Elec Memory | 1000 |
| Psy Memory | 1000 |
| Ice Memory | 1000 |
| DragonMemory | 1000 |
| Dark Memory | 1000 |
| Fairy Memory | 1000 |
| Pokémon Appearances in Town | |
| Pokémon | Conditions |
| Beldum | Find this in Steven’s House after defeating him at Meteor Falls (after becoming Pokémon League Champion) |
| Pokémon Appearances in Water | |
| Pokémon | Conditions |
| Tentacool | 60% |
| Wingull | 35% |
| Pelipper | 5% |
| Magikarp | Old Rod (70%) |
| Wishiwashi | Old Rod (30%) |
| Goldeen | Good Rod (60%) |
| Poliwag | Good Rod (20%), Super Rod (15%) |
| Carvanha | Good Rod (20%) |
| Jellicent | Super Rod (80%) |
| Crawdaunt | Super Rod (4%) |
| Sharpedo | Super Rod (1%) |
| Items |
| King’s Rock |
| Net Ball |
| Sun Stone |
| Super Rod |
| TM96 (Calm Mind) |
Event 1: Get the Super Rod
Stop by the Fisherman’s House next to the Space Center, the large green building on the east side of the island town. He gives you the Super Rod, the best fishing pole in all of Hoenn. Now you can head back to the blue and catch some potent Water-type Pokémon.
Event 2: Tour Mossdeep City
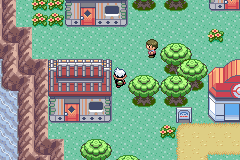
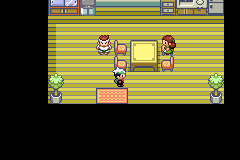
Mossdeep’s citizens are extremely chatty and generous. Visit with everybody, and stop by as many homes as possible to get all the free Items being handed out, such as the King’s Rock.
Event 3: Gym Leader Battle #7—Tate and Liza
| Tate and Liza, Mossdeep Gym Leaders | ||||
| Pokémon Type: | Psychic | |||
| Recommended Move Type: | Bug/Dark/Ghost | |||
| Gym Leaders’ Pokémon | ||||
| Pokémon | Level | Type | ||
| Bronzong | 41 | Psychic | Steel | |
| Indeedee | 41 | Psychic | Normal | |
| Gardevoir | 42 | Psychic | Fairy | |
| Alakazam | 42 | Psychic | ||
The Mossdeep Gym is made up of a system of rooms connected by small warp pads. But figuring out which warp pad gets you to the Gym Leader isn’t the hard part. Rather, navigating the system of button activated conveyor belts is the bigger headache. Not only do you need to clear obstructions such as statues via the belts, but you may also accidentally move a Trainer into your eye-line if you aren’t careful.
Once you reach the twin Gym Leaders, Tate and Liza, you need to have either a very strong Dark- or Ghost-type Pokémon to undo the potency of their Psychic-type Pokémon.
Event 4: Battle Team Magma at Space Center
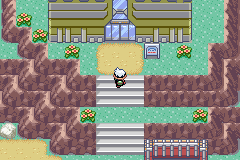

The Space Center in Mossdeep City was abou to launch a rocket into space, but Team Magma is trying to thwart the countdown. Apparently, Team Magma Leader Maxie has serious designs on the rocket fuel and will stop at nothing to get it. You must clear out the Space Center’s ground floor before heading upstairs.
On the second floor, you meet up with Steven. Steven decides to team up with you to stop Maxie and Tabitha from taking the rocket fuel. This is your first real 2-on-2 Battle with another Trainer. You must learn to rely on Steven’s judgment during the battle while minding your own three Pokémon. When the battle is over, Team Magma retreats and Steven thanks you.
Route 125
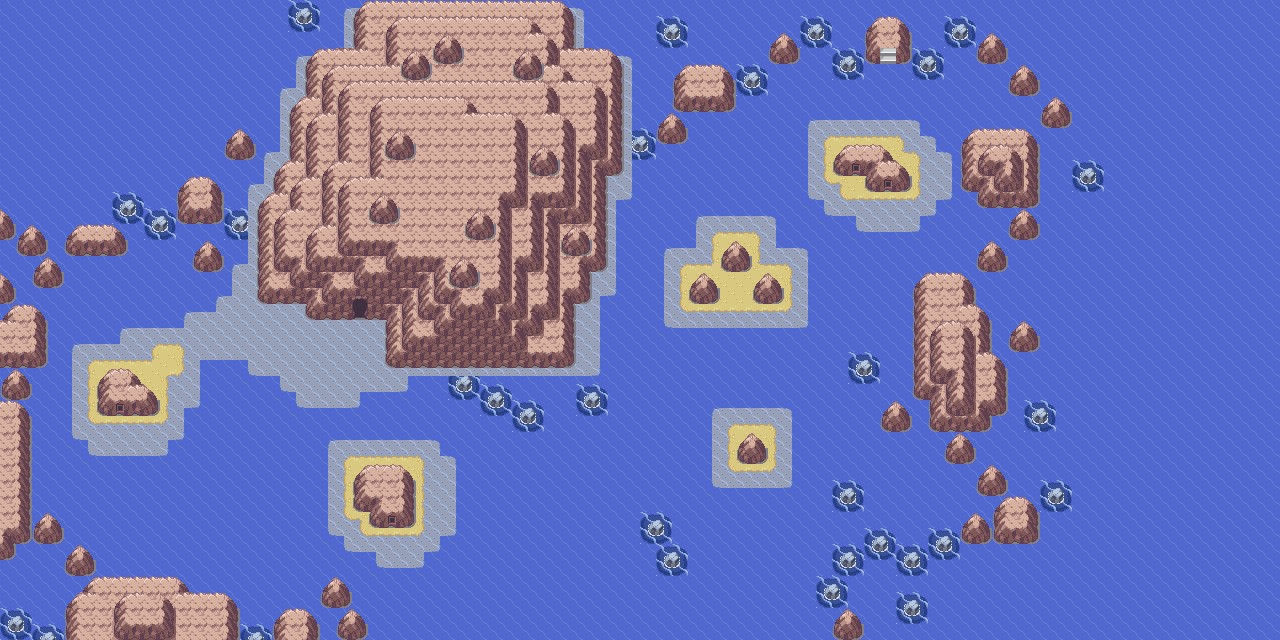
| Pokémon Appearances in Water | |
| Pokémon | Conditions |
| Seel | 60%, Good Rod (20%), Super Rod (15%) |
| Spheal | 30%, Good Rod (60%), Super Rod (40%) |
| Dondozo | 5% |
| Popplio | 4% |
| Lapras | 1% |
| Magikarp | Old Rod (70%) |
| Wishiwashi | Old Rod (30%) |
| Shellder | Good Rod (20%), Super Rod (40%) |
| Cloyster | Super Rod (4%) |
| Alomomola | Super Rod (1%) |
| Items |
| TM63 (Flash Cannon) |
Event 1: Shoal Cave

North of Mossdeep City, you find Route 125 and the Shoal Cave. This cave is seriously affected by the tides. At high tide, a good deal of the cave is hard to explore, but low tide exposes almost everything. A man inside the cave can make a Shell Bell. He is happy to craft one for you, but first he needs the materials.
| NOTE |
| For more on what to do in the Shoal Cave, see this guide’s Bonuses and Extra Content section. |
Route 126
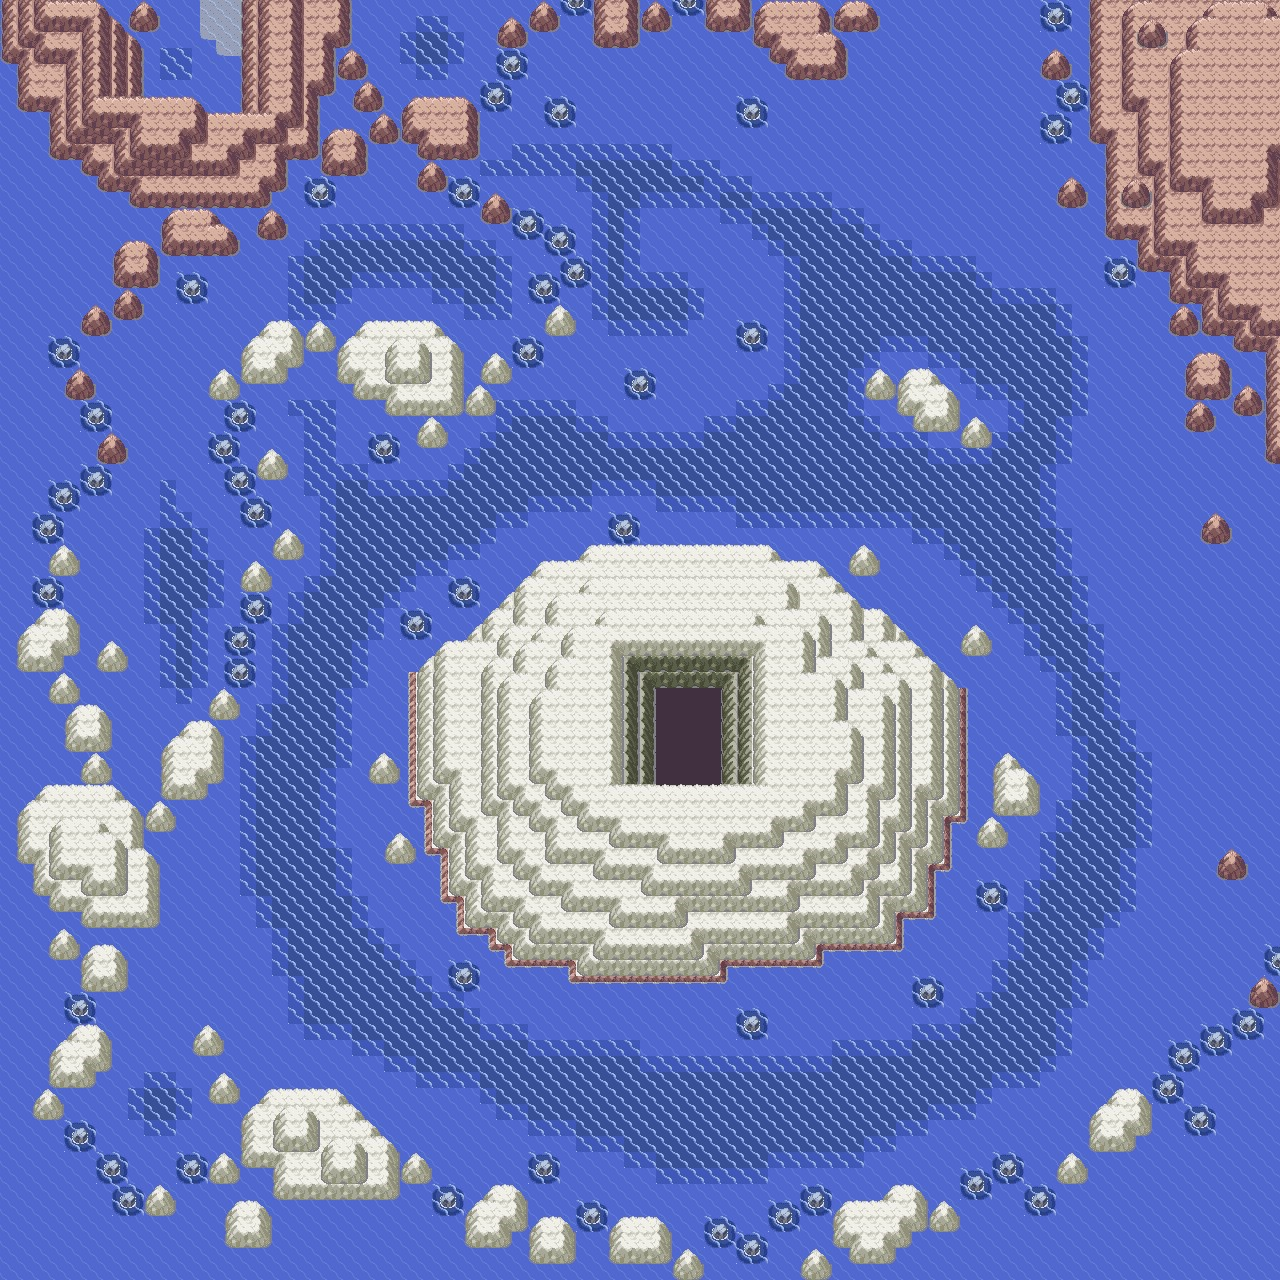

| Pokémon Appearances in Water | |
| Pokémon | Conditions |
| Goldeen | 60% |
| Ducklett | 30% |
| Qwilfish | 5% |
| Lumineon | 4% |
| Wailord | 1% |
| Magikarp | Old Rod (70%) |
| Wishiwashi | Old Rod (30%) |
| Clamperl | Good Rod (60%), Super Rod (1%) |
| Mareanie | Good Rod (20%), Super Rod (40%) |
| Skrelp | Good Rod (20%), Super Rod (40%) |
| Corsola (Galarian) | Super Rod (15%) |
| Dragalge | Super Rod (4%) |
| Pokémon Appearances Underwater | |
| Pokémon | Conditions |
| Clamperl | 65% |
| Chinchou | 30% |
| Relicanth | 5% |
| Items |
| Big Pearl (HIDDEN) |
| Green Shard |
| Pearl (HIDDEN) |
| Stardust (HIDDEN) |
| Heart Scale (HIDDEN) |
| Iron (HIDDEN) |
| Mind Plate (HIDDEN) |
| Ultra Ball (HIDDEN) |
| Yellow Shard (HIDDEN) |
Event 1: Deepsea Diving
The ocean floor beneath Route 126 is littered with sunken treasures. Either use the Itemfinder to locate them or look for shallow indentations in the sand to spot a possible treasure location.
Event 2: Sootopolis Entry
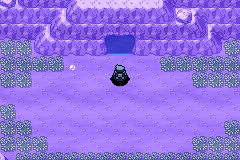
The underwater entrance to Sootopolis is below the waves of Route 126, but you don’t need to drop down here yet. (However, there is a Pokémart and Pokémon Center in the city if you need them.) Most of the city is shut down, so concentrate your attention on Route 127 for now. However, when you are asked to report to Sootopolis City, this is where you will dive to find it.
Route 127 and Route 128
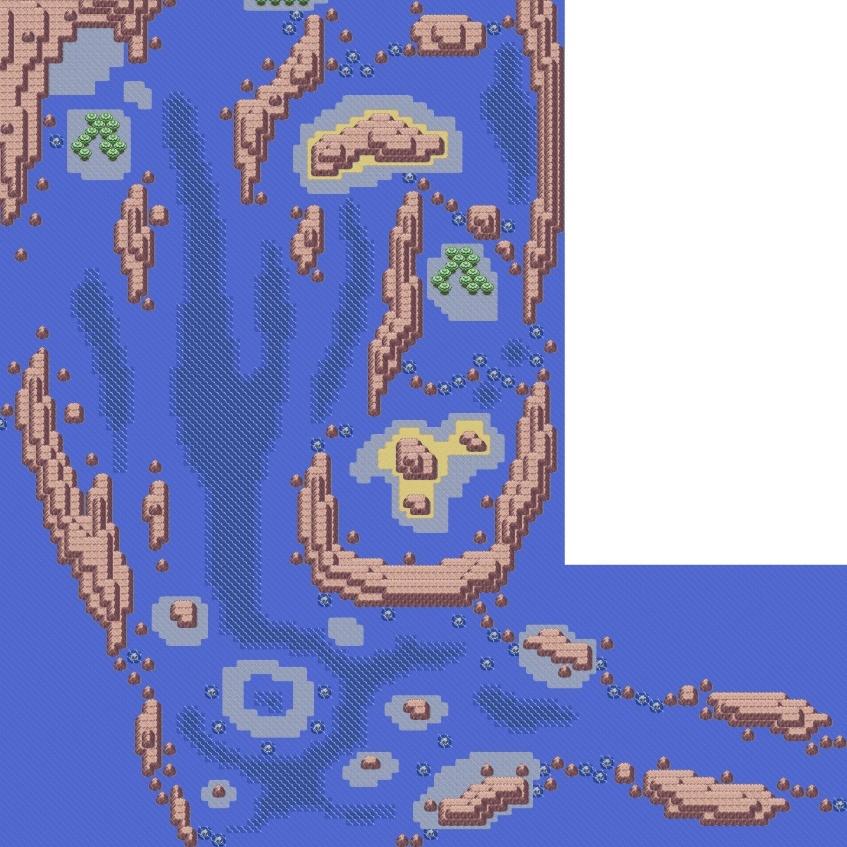

| Pokémon Appearances in Water (Route 127) | |
| Pokémon | Conditions |
| Wingull | 60% |
| Finneon | 30% |
| Qwilfish | 5% |
| Tatsugiri | 4% |
| Wailord | 1% |
| Magikarp | Old Rod (70%) |
| Wishwashi | Old Rod (30%) |
| Staryu | Good Rod (60%), Super Rod (40%) |
| Luvdisc | Good Rod (20%) |
| Remoraid | Good Rod (20%), Super Rod (4%) |
| Lumineon | Super Rod (40%) |
| Starmie | Super Rod (15%) |
| Octillery | Super Rod (1%) |
| Pokémon Appearances in Water (Route 128) | |
| Pokémon | Conditions |
| Wingull | 60% |
| Carvanha | 30% |
| Mantine | 5% |
| Sharpedo | 4% |
| Wailord | 1% |
| Magikarp | Old Rod (70%) |
| Wishwashi | Old Rod (30%) |
| Goldeen | Good Rod (60%) |
| Arrokuda | Good Rod (20%), Super Rod (40%) |
| Luvdisc | Good Rod (20%), Super Rod (40%) |
| Bruxish | Super Rod (15%) |
| Alomomola | Super Rod (4%) |
| Barraskewda | Super Rod (1%) |
| Items |
| Adamant Orb (HIDDEN) |
| Carbos |
| Draco Plate (HIDDEN) |
| Dread Plate (HIDDEN) |
| Insect Plate (HIDDEN) |
| Heart Scale x3 (HIDDEN) |
| Heracronite (HIDDEN) |
| Pixie Plate (HIDDEN) |
| Rare Candy |
| Spooky Plate (HIDDEN) |
| Stone Plate (HIDDEN) |
| Zinc |
Event 1: Chase Down the Submersible
Deep beneath the waves of Route 127 and Route 128, the seafloor is a carved-up canvas full of deep trenches. But you must brave the depths to catch up with Team Aqua, as the submersible was last seen in these parts. After you are done fishing and battling wild Pokémon on the surface of the water, use Tate & Liza’s Starmie to slip below and follow the troughs south to the entrance of the Seafloor Cavern.
Seafloor Cavern
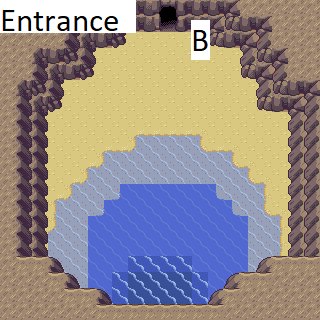
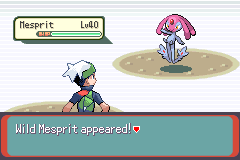
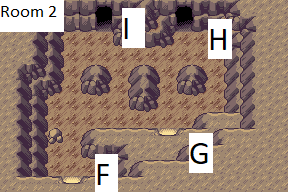
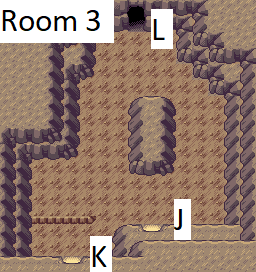
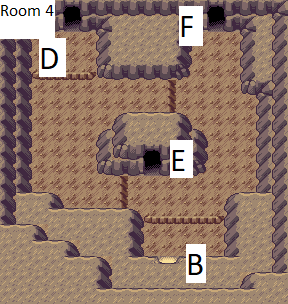
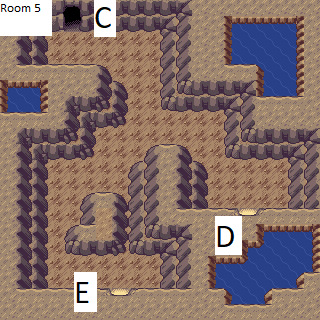
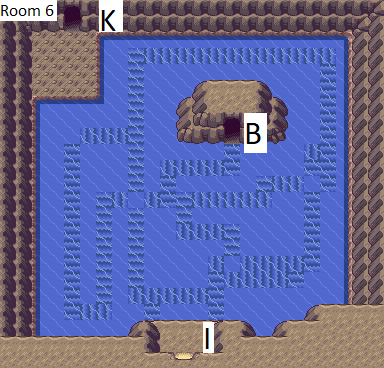
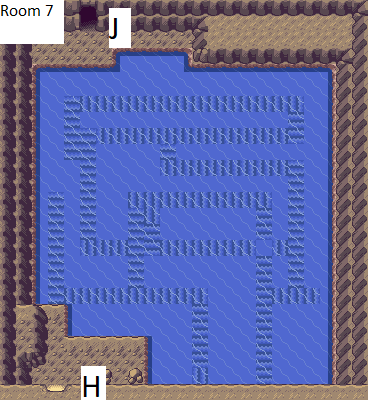
| Pokémon Appearances in Water (Entrance) | |
| Pokémon | Conditions |
| Shellos (East) | 60% |
| Carvanha | 30%, Good Rod (60%), Super Rod (15%) |
| Palpitoad | 5% |
| Sharpedo | 4%, Super Rod (40%) |
| Gastrodon (East) | 1% |
| Magikarp | Old Rod (70%) |
| Wishiwashi | Old Rod (30%) |
| Chinchou | Good Rod (20%) |
| Barboach | Good Rod (20%), Super Rod (40%) |
| Whiscash | Super Rod (4%) |
| Relicanth | Super Rod (1%) |
| Pokémon Appearances on Land | |
| Pokémon | Conditions |
| Woobat | 20% |
| Wooper | 20% |
| Chewtle | 10% |
| Clobbopus | 10% |
| Drilbur | 10% |
| Bronzor | 10% |
| Golbat | 5% |
| Graveler | 5% |
| Boldore | 4% |
| Krokorok | 4% |
| Palpitoad | 1% |
| Deino | 1% |
| Pokémon Appearances in Water (Room 6-Room 7) | ||
| Pokémon | Conditions | |
| Tympole | 60%, Good Rod (20%), Super Rod (15%) | |
| Shellos (East) | 30% | |
| Bronzor | 5% | |
| Golbat | 4% | |
| Gastrodon (East) | 1% | |
| Magikarp | Old Rod (70%) | |
| Wishiwashi | Old Rod (30%) | |
| Barboach | Good Rod (60%) | |
| Binacle | Good Rod (20%), Super Rod (40%) | |
| Chewtle | Super Rod (40%) | |
| Drednaw | Super Rod (4%) | |
| Palpitoad | Super Rod (1%) | |
| Items |
| TM113 (Earthquake) |
Event 1: Strength is the Key
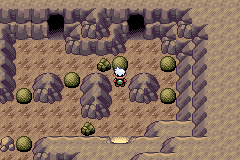
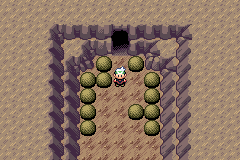
Several rooms lead to the deepest section of the Seafloor Cavern—many of them, however, are blocked by huge boulders that only Flannery’s Torkoal can move out of the way. Some of the rooms require you to move the boulders in specific patterns to clear a path to the exit. Should you accidentally block the doorway with a missed move, leave the room the way in which you came. The boulders will reset to their original position and you can try again.
Event 2: Battle Team Aqua Leader Archie
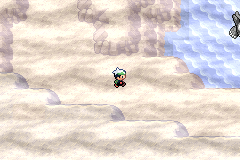
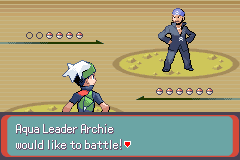
You catch up with Team Aqua Leader Archie at the bottom of the Seafloor Cavern—but he is hardly alone. He stands before a slumbering Kyogre, the Legendary Water-type Pokémon. You must battle Archie before he can awaken Kyogre. The battle will be tough. Archie has some powerful Water-type Pokémon, such as Mega Sharpedo, but an Electric-type Pokémon will go far in this challenge.
Even if you defeat Archie, it’s too late to stop him from using the Blue Orb. But as Team Magma Leader Maxie discovered, the Orb has an unintended effect. Kyogre stirs, but then it flies away. Now both Kyogre and Groudon are loose—what have these two Leaders done to Hoenn?
| TIP |
 When you return to the surface, you discover that the climate has gone haywire. The sky is split with hot intense sun and a horrible torrent of rain. Head to Sootopolis City to see if you can make sense of this disaster. When you return to the surface, you discover that the climate has gone haywire. The sky is split with hot intense sun and a horrible torrent of rain. Head to Sootopolis City to see if you can make sense of this disaster. |
Sootopolis City
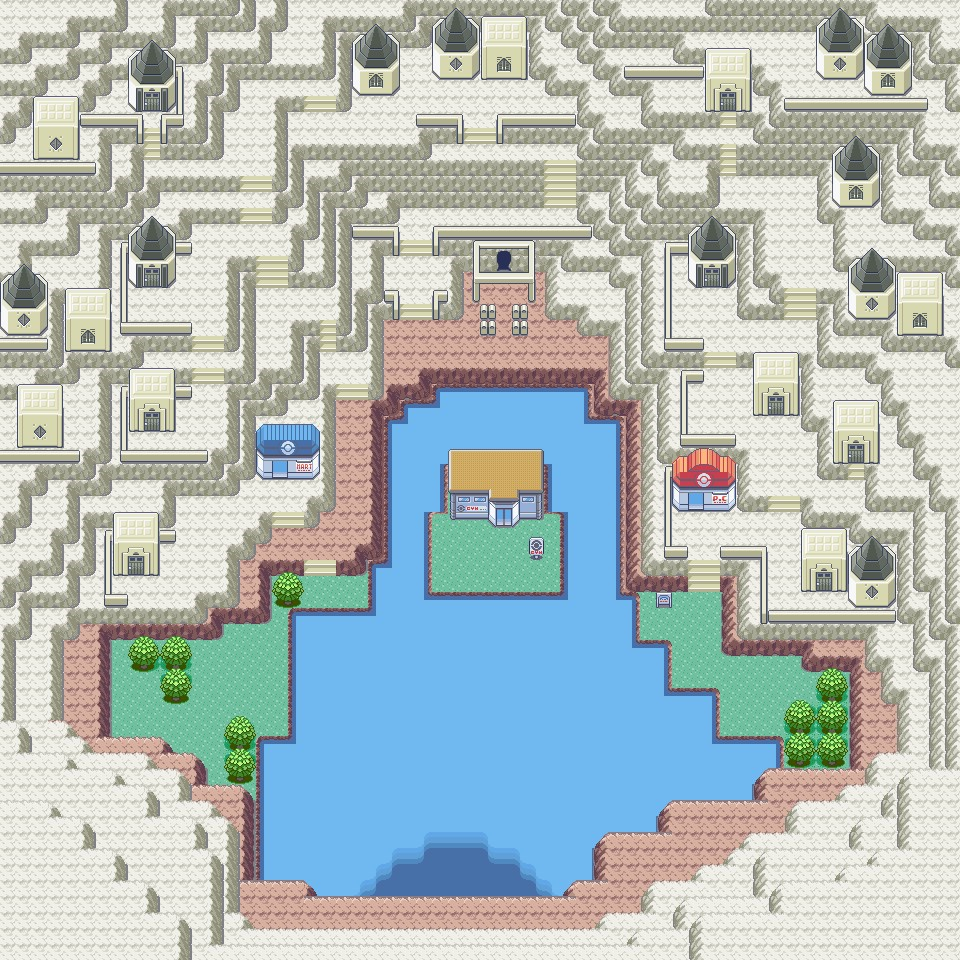
Deep underwater to the east of Hoenn’s mainland is Sootopolis City. Accessible only by diving beneath the waves, the city is host to the Cave of Origin, a mystical place where the secrets of Legendary Pokémon await a talented Trainer. Are you that Trainer?
| Pokémart Merchandise (Left) | |
| Item | Price |
| TM103 (Electric Terrain) | 6000 |
| TM104 (Grassy Terrain) | 6000 |
| TM105 (Psychic Terrain) | 6000 |
| TM106 (Misty Terrain) | 6000 |
| TM119 (Leaf Storm) | 24000 |
| Pokémart Merchandise (Right) | |
| Item | Price |
| Ultra Ball | 800 |
| Hyper Potion | 1500 |
| Max Potion | 2500 |
| Full Heal | 400 |
| Revive | 2000 |
| Max Repel | 700 |
| X Attack | 1000 |
| X Defense | 550 |
| Shadow Mail | 50 |
| Items |
| Sablenite (HIDDEN) |
| TM29 (Brick Break) |
| TM48 (Waterfall) |
| Wailmer Doll |
Event 1: Legendary Battle
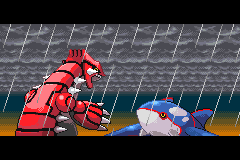
After Kyogre has been released, return to Sootopolis City to see what Team Magma and Team Aqua have done. Kyogre and Groudon are in the center of the city, engaged in a ferocious battle that threatens to teat the world asunder. The foul weather is a drect result of their conflict. Is there perhaps a third Legendary Pokémon that can calm the waters and break these two apart?
After you calm the battle, tour the city and speak to the kind citizens. They give you a powerful TM as well a great Secret Base knick-knack.
Event 2: See the Cave of Origin

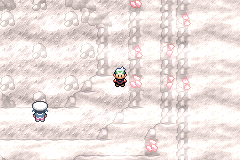
After witnessing the terrible battle in the bay, head for Steven and speak to him. He leads you to the entrance of the Cave of Origin. Inside, you are to speak with Wallace, the former Gym Leader of Sootopolis City and an expert on Legendary Pokémon.
Wallace will ask you a question about what could possible be done about the great conflict between Groudon and Kyogre. Perhaps there is something at the Sky Pillar that could end their fight?
Event 3: Visit the Gym
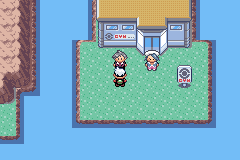
After the crisis in the bay has subsided, be sure to head for the Sootopolis Gym. The Gym was previously closed, but now that Kyogre and Groudon have been dispersed, you can challenge the Gym Leader for the eighth and final Gym badge.
Event 4: Gym Leader Battle #8—Juan
| Juan, Sootopolis Gym Leader | |||
| Pokémon Type: | Water | ||
| Recommended Move Type: | Electric/Grass | ||
| Gym Leader’s Pokémon | |||
| Pokémon | Level | Type | |
| Golisopod | 41 | Water | Bug |
| Gastrodon (East) | 41 | Water | Ground |
| Milotic | 43 | Water | |
| Jellicent | 43 | Water | Ghost |
| Blastoise | 46 | Water | |
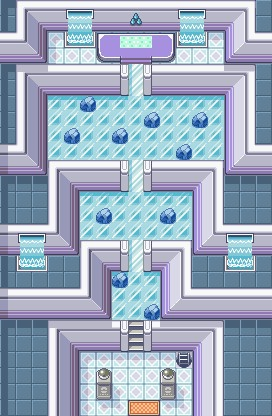
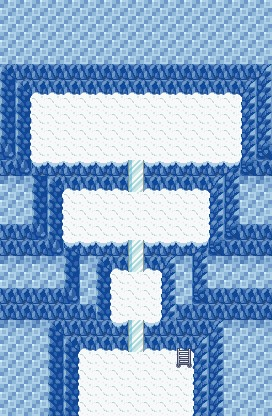
Wallace has abdicated his Gym to a new Gym Leader, Juan. The former Gym Leader has left the facility in capable hands, as Juan is a master of Water-type Pokémon. He has assembled a strong team, but if you have a powerful Electric- or Grass-type Pokémon in your ranks, you should be able to dismantle Juan in a matter of several turns.
The big catch is getting to Juan, though. The Gym floor is made of ice and all it takes is two steps on the same space to fall through to the basement level, which is full of Trainers. They key to reaching Juan at the top of the Gym is to step on each tile only once—but you must step on every tile at least once to open the staircase leading to the next area.
| NOTE |
| After defeating Juan and earning the eighth Gym badge you are ready to take on the Elite Four! |
Routes 129, 130, and 131

| Pokémon Appearances in Water (Route 129) | |
| Pokémon | Conditions |
| Wailmer | 60% |
| Carvanha | 30%, Good Rod (20%), Super Rod (15%) |
| Ducklett | 5% |
| Tentacruel | 4% |
| Wailord | 1%, Super Rod (1%) |
| Magikarp | Old Rod (70%) |
| Wishiwashi | Old Rod (30%) |
| Tentacool | Good Rod (60%), Super Rod (40%) |
| Luvdisc | Good Rod (20%) |
| Wailmer | Super Rod (40%) |
| Sharpedo | Super Rod (4%) |
| Pokémon Appearances in Water (Route 130) | |
| Pokémon | Conditions |
| Buizel | 60% |
| Seaking | 30% |
| Ducklett | 5% |
| Floatzel | 4% |
| Wailord | 1% |
| Magikarp | Old Rod (70%) |
| Wishiwashi | Old Rod (30%) |
| Slowpoke | Good Rod (60%), Super Rod (40%) |
| Krabby | Good Rod (20%), Super Rod (40%) |
| Luvdisc | Good Rod (20%) |
| Veluza | Super Rod (15%) |
| Slowpoke (Galarian) | Super Rod (4%) |
| Kingler | Super Rod (1%) |
| Pokémon Appearances in Water (Route 131) | |
| Pokémon | Conditions |
| Tentacool | 60% |
| Carvanha | 30%, Good Rod (60%), Super Rod (40%) |
| Wailmer | 5% |
| Gyarados | 4%, Super Rod (4%) |
| Wailord | 1%, Super Rod (15%) |
| Magikarp | Old Rod (70%) |
| Wishiwashi | Old Rod (30%) |
| Tentacool | Good Rod (20%) |
| Wailmer | Good Rod (20%), Super Rod (40%) |
| Sharpedo | Super Rod (1%) |
| Items |
| Earth Plate (HIDDEN) |
| Fist Plate (HIDDEN) |
| Griseous Orb (HIDDEN) |
| Icicle Plate (HIDDEN) |
| Lustrous Orb (HIDDEN) |
| Meadow Plate (HIDDEN) |
| Splash Plate (HIDDEN) |
| Toxic Plate (HIDDEN) |
| Zap Plate (HIDDEN) |
Event 1: Water Route
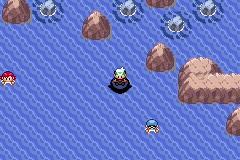
Use the water along Route 129, 130, and 131 to reach two pivotal locations in Hoenn, the Sky Pillar and Pacifidlog Town. The waters are full of swimming Trainers, so this is an excellent place to gain valuable experience and cash.
Pacifidlog Town
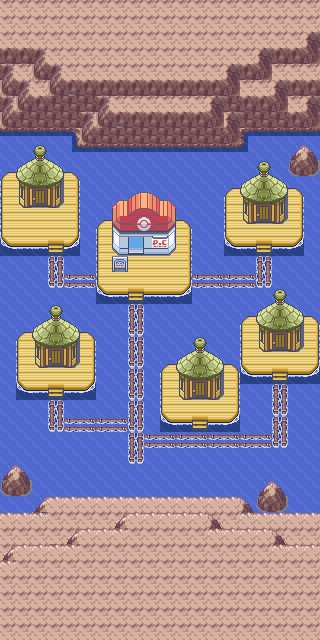
Pacifidlog Town is a tiny city built above a Corsola colony. The floating township is the travel hub between Sootopolis City and the Hoenn mainland. Several rumors in town tell of powerful Pokémon lying in wait for the perfect Trainer to wake them and a mysterious island somewhere off the coast of Hoenn.
| Pokémon Appearances in Town | |
| Pokémon | Conditions |
| Greninja (Battle Bond) | Trade for a Bagon |
| Pokémon Appearances in Water | |
| Pokémon | Conditions |
| Tentacool | 60% |
| Wingull | 35% |
| Pelipper | 5% |
| Magikarp | Old Rod (70%) |
| Wishiwashi | Old Rod (30%) |
| Luvdisc | Good Rod (60%) |
| Horsea | Good Rod (20%) |
| Staryu | Good Rod (20%) |
| Starmie | Super Rod (40%) |
| Seadra | Super Rod (40%) |
| Kingdra | Super Rod (15%) |
| Alomomola | Super Rod (4%) |
| Corsola | Super Rod (1%) |
| Items |
| Kangaskhanite (HIDDEN) |
| TM16 (Fling) |
| TM25 (Psyshock) |
| NOTE |
| Pacifidlog Town is small, so it doesn’t have its own Pokémart. If you need to restock on Items, use TM66 (Fly) to return to one of the other cities, such as Lilycove City. |
Event 1: Seeing Mirages?
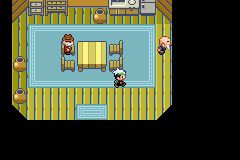
A man who lives on the east end of Pacifidlog has a special gift. Only he can see the elusive Mirage Island off of Route 130. However, the island appears only if the conditions are right—and the gentleman is tight-lipped about exact details. However, when he mentions he can see the island, use Kangaskhan and head to Route 130 and explore.
Event 2: Trade for a Greninja?
If you have a Bagon you are willing to part with, talk to the girl in the small house south of the Pokémon Center. She has a Greninja she would love to trade for a Bagon, which is not an easy Pokémon for her to find.
| NOTE |
| The town is abuzz with a new remor. There are three Legendary Pokémon made of steel, rock, and ice in Hoenn—and the key to discovering these Pokémon is nearby. |
Sky Pillar
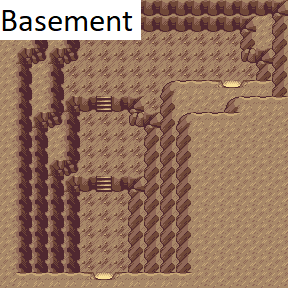
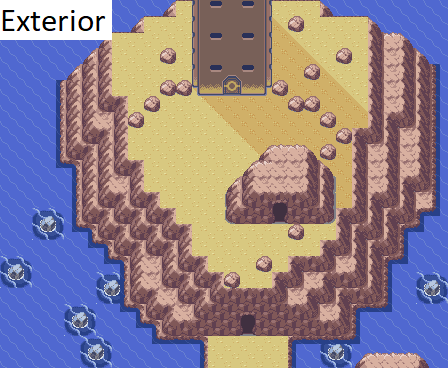
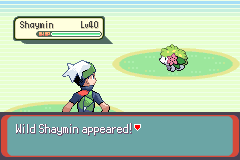
The Sky Pillar is a mysterious tower jutting above the sea. The foreboding place is home of the most powerful Legendary Pokémon in Hoenn. Perhaps this slumbering creature is the key to saving the world?
| Pokémon Appearances on 1F, 3F | |
| Pokémon | Conditions |
| Unown | 99% |
| Aerodactyl | 1% |
| Pokémon Appearances on 5F | |
| Pokémon | Conditions |
| Unown | 99% |
| Jangmo-o | 1% |
Ascend Sky Pillar
Wallace is waiting for you at the Sky Pillar. He directs you inside, where you are charged with finding—and waking—the mighty Rayquaza. Hopefully the Legendary Pokémon can stop Groudon and Kyogre.

During this first visit to the Sky Pillar, the ground is clear. There are no fragile floor tiles. You need to get past the wild Pokémon (and there are a lot) and reach Rayquaza on the top floor. When you reach the top, Rayquaza slumbers. Approach Rayquaza, and it will rise up and fly away, off to confront the other two warring Legendary Pokémon.
| CAUTION |
| The first time you ascend the Sky Pillar to wake Rayquaza, you cannot catch it. On your second visit to the Sky Pillar, you can attempt to catch the Legendary Pokémon. However, you have only one chance to do this. If you defeat Rayquaza, it vanishes. If your Pokémon faint, it disappears. Save your game before you enter the 6th floor of the Sky Pillar—and bring all of the Ultra Balls you can afford. |
Routes 132, 133, and 134

| Pokémon Appearances in Water (Route 132) | |
| Pokémon | Conditions |
| Wingull | 60% |
| Tentacool | 30% |
| Qwilfish | 5% |
| Gyarados | 4%, Super Rod (15%) |
| Wailord | 1% |
| Magikarp | Old Rod (70%) |
| Wishiwashi | Old Rod (30%) |
| Luvdisc | Good Rod (60%) |
| Skrelp | Good Rod (20%), Super Rod (40%) |
| Arrokuda | Good Rod (20%), Super Rod (40%) |
| Veluza | Super Rod (4%) |
| Barraskewda | Super Rod (1%) |
| Pokémon Appearances in Water (Route 133) | |
| Pokémon | Conditions |
| Tentacool | 60% |
| Qwilfish | 30% |
| Mantine | 5% |
| Tentacruel | 4% |
| Wailord | 1% |
| Magikarp | Old Rod (70%) |
| Wishiwashi | Old Rod (30%) |
| Luvdisc | Good Rod (60%) |
| Staryu | Good Rod (20%), Super Rod (15%) |
| Shellder | Good Rod (20%), Super Rod (4%) |
| Cloyster | Super Rod (40%) |
| Alomomola | Super Rod (40%) |
| Starmie | Super Rod (1%) |
| Pokémon Appearances in Water (Route 134) | |
| Pokémon | Conditions |
| Wailmer | 60% |
| Wingull | 30% |
| Qwilfish | 5% |
| Gyarados | 4%, Super Rod (1%) |
| Wailord | 1% |
| Magikarp | Old Rod (70%) |
| Wishiwashi | Old Rod (30%) |
| Luvdisc | Good Rod (60%) |
| Mareanie | Good Rod (20%), Super Rod (15%) |
| Binacle | Good Rod (20%), Super Rod (4%) |
| Bruxish | Super Rod (40%) |
| Relicanth | Super Rod (40%) |
| Items |
| Big Pearl |
| Carbos |
| Max Revive |
| Protein |
| Rare Candy |
| Star Piece |
| TM57 (Rock Slide) |
Event 1: Watch Out for the Currents
The waterway along Routes 132-134 is full of fast-moving water that can carry you from one side to the other in moments if you’re caught in the rush. After you start west on these routes, it’s impossible to get to Pacifidlog Town without using TM66 (Fly) or heading back around Hoenn. The routes are full of Trainers, too, so it’s easy to be swept from battle to battle.
Event 2: The Sealed Chamber
Route 134 hosts the Sealed Chamber, a mysterious set of ruins deep beneath the waves. To reach it, stay south along the routes or else you will be swept right by the diving spot. When you do reach the special patch of dark water, use Starmie to slip beneath the waves and solve the riddles.
| TIP |
| For more information on the Sealed Chamber and the secrets within, see the Bonus Quests, Legendary Pokémon, and the Battle Frontier section. |
Ever Grande City
Ever Grande City is home to the Pokémon League, where Pokémon Trainers aspire to take on the Elite Four. The Elite Four are the greatest Pokémon Trainers in Hoenn—do you have the skill and talent to take them on and prove yourself to be a true champion?
| Items |
| Mewtwonite Y (HIDDEN) |
| Pokémart Merchandise (Left) | |
| Item | Price |
| Ultra Ball | 800 |
| Hyper Potion | 1500 |
| Max Potion | 2500 |
| Full Restore | 3000 |
| Full Heal | 400 |
| Revive | 2000 |
| Max Repel | 700 |
| Pokémart Merchandise (Middle) | |
| Item | Price |
| TM120 (Hurricane) | 24000 |
| TM122 (Bug Buzz) | 20000 |
| TM124 (Brave Bird) | 24000 |
| TM125 (Flare Blitz) | 24000 |
| TM127 (Close Combat) | 24000 |
| Pokémart Merchandise (Right) | |
| Item | Price |
| Choice Specs | 50000 |
| Choice Scarf | 50000 |
| Flame Orb | 15000 |
| Toxic Orb | 15000 |
| Absorb Bulb | 5000 |
| Cell Battery | 5000 |
| Luminous Moss | 5000 |
| Snowball | 5000 |
| Wide Lens | 20000 |
| Muscle Band | 8000 |
| Wise Glasses | 8000 |
| Expert Belt | 30000 |
| Light Clay | 20000 |
| Life Orb | 50000 |
| Power Herb | 30000 |
| Focus Sash | 50000 |
| Zoom Lens | 10000 |
| Metronome | 15000 |
| Iron Ball | 20000 |
| Lagging Tail | 20000 |
| Destiny Knot | 20000 |
| Black Sludge | 10000 |
| Grip Claw | 10000 |
| Sticky Barb | 10000 |
| Shed Shell | 20000 |
| Big Root | 10000 |
| Eviolite | 50000 |
| Float Stone | 5000 |
| Rocky Helmet | 50000 |
| Air Balloon | 15000 |
| Red Card | 30000 |
| Ring Target | 10000 |
| Binding Band | 20000 |
| Eject Button | 30000 |
| Weak. Policy | 50000 |
| Assault Vest | 50000 |
| Safe Goggles | 20000 |
| Terr. Extend | 15000 |
| Protect Pads | 15000 |
| Throat Spray | 20000 |
| Eject Pack | 30000 |
| Strong Boots | 20000 |
| Error Policy | 30000 |
| Room Service | 20000 |
| U. Umbrella | 15000 |
| AbilityGuard | 20000 |
| Clear Amulet | 30000 |
| Punch Glove | 15000 |
| Covert Cloak | 20000 |
| Loaded Dice | 20000 |
| Boost Energy | 20000 |
| Pokémon Appearances in Water | |
| Pokémon | Conditions |
| Tentacool | 60% |
| Wingull | 35% |
| Pelipper | 5% |
| Magikarp | Old Rod (70%) |
| Wishiwashi | Old Rod (30%) |
| Luvdisc | Good Rod (60%) |
| Arrokuda | Good Rod (20%), Super Rod (15%) |
| Poliwag | Good Rod (20%), Super Rod (40%) |
| Poliwhirl | Super Rod (40%) |
| Barraskewda | Super Rod (4%) |
| Alomomola | Super Rod (1%) |
Event 1: Up the Waterfall
The entrance to Ever Grande City and the Pokémon League is up the waterfall, so use Golisopod to ascend the rushing water. Without it, there is no way to access the Elite Four challenge.
Event 2: Last-Chance Shopping
Before battling the Elite Four, stop at the Pokémon Center/Pokémart within the Pokémon League and rest up. Do any last-minute Pokémon shifting necessary for the battles ahead. And if you need to stock up on some Items, such as Full Heals, use this final storefront to do so. Victory Road may be the road less traveled, but that’s because it’s full of wild Pokémon.
Victory Road
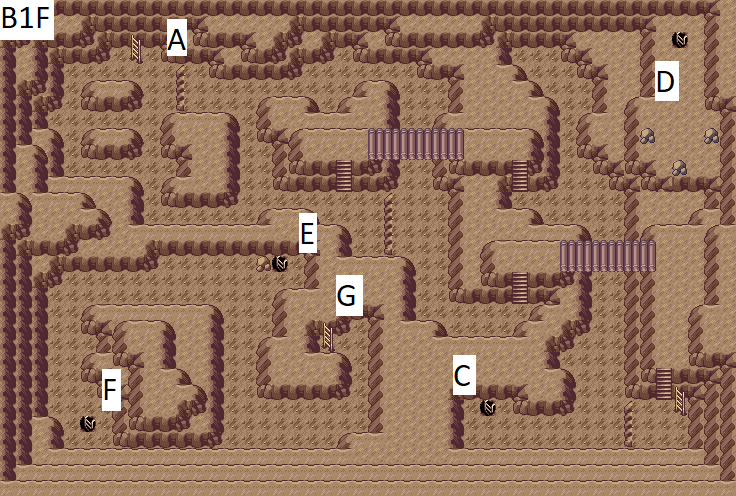
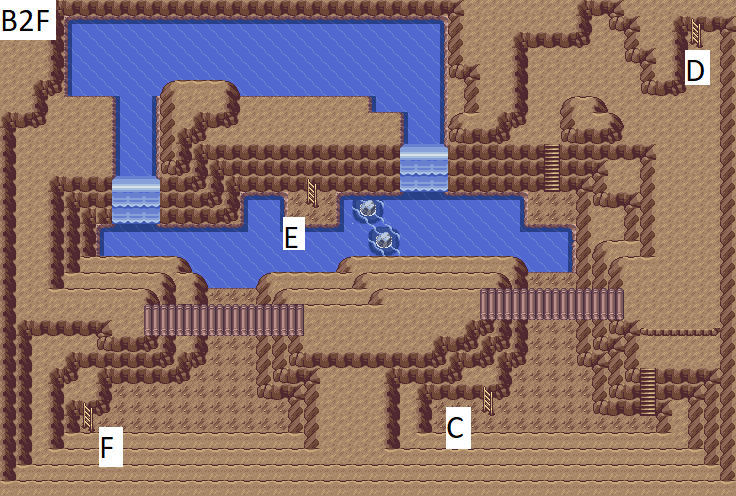
| Pokémon Appearances on 1F-B1F | |
| Pokémon | Conditions |
| Golbat | 20% |
| Graveler | 20%, Rock Smash (5%) |
| Boldore | 10%, Rock Smash (60%) |
| Lairon | 10% |
| Machoke | 10% |
| Gurdurr | 10% |
| Kadabra | 5% |
| Krokorok | 5% |
| Hariyama | 4% |
| Onix | 4% |
| Rhydon | 1% |
| Axew | 1% |
| Nosepass | Rock Smash (30%) |
| Archen | Rock Smash (4%) |
| Dwebble | Rock Smash (1%) |
| Pokémon Appearances on 3F | |
| Pokémon | Conditions |
| Glimmora | 20% |
| Garganacl | 20% |
| Boldore | 10% |
| Lairon | 10% |
| Machoke | 10% |
| Gurdurr | 10% |
| Kadabra | 5% |
| Krokorok | 5% |
| Hariyama | 4% |
| Onix | 4% |
| Rhydon | 1% |
| Axew | 1% |
| Pokémon Appearances in Water | |
| Pokémon | Conditions |
| Bronzor | 60% |
| Golbat | 30% |
| Gastrodon (East) | 5% |
| Drednaw | 4%, Super Rod (4%) |
| Noibat | 1% |
| Magikarp | Old Rod (70%) |
| Wishiwashi | Old Rod (30%) |
| Skrelp | Good Rod (60%), Super Rod (40%) |
| Horsea | Good Rod (20%) |
| Binacle | Good Rod (20%) |
| Dracovish | Super Rod (40%) |
| Gyarados | Super Rod (15%) |
| Seadra | Super Rod (1%) |
| Items |
| Elixir (HIDDEN) |
| Full Restore |
| Max Elixir |
| Max Repel (HIDDEN) |
| TM74 (X-Scissor) |
| TM88 (Psychic) |
| TM92 (Flamethrower) |
| Ultra Ball (HIDDEN) |
Event 1: Battle Wally
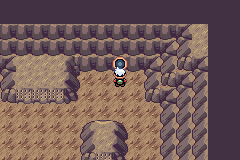
Wally challenges you one last time, but he has grown as a Trainer. The little guy has a full team under his tutelage, many above Lv. 40! This battle is the perfect warm-up before heading into the Pokémon League and challenging the Elite Four.
The Elite Four
Welcome to the big challenge: Defeating the Elite Four at the Pokémon League. This is what Trainers dream of doing, and now you have your chance to stand beside some of the greatest Pokémon Masters in history and prove yourself worthy of keeping their company. The Elite Four are talented Trainers, but they have different Pokémon in their teams, and they use different tactics. Some play aggresively, others are defensive—hoping to draw out your aggressive moves and expose a weakness.
The Pokémon of the Elite Four represent several types, from Ice to Dragon, from Dark to Ghost. It takes a well-balanced team to work your way up the ranks, as you move you use to exploit one Elite Four’s weaknesses stands to do nothing in the next battle. You also need to have a team of significantly leveled up Pokémon. The lowest level Pokémon in the Elite Four challenge is Lv. 46. You should be at least in the high 40s. The higher your levels, the better chance you have at withstanding the contest. Don’t be afraid to turn back, level up some more, then return.
Also give your Pokémon any advantageous Held Items, such as Quick Claw, Charcoal, or a Chesto Berry. And fill your Bag with recovery Items, such as Max Potions and Full Heals. Never enter this challenge without at least a few Revives, especially if you plan on relying on a couple of choice Pokémon to bear the brunt of the work. After you assemble the team you think best stands a chance against the Elite Four, step inside the inner sanctum of the Pokémon League and take the challenge of a lifetime.
Elite Four Battle #1: Sidney
| Pokémon | |||
| Name | Level | Type | |
| Bisharp | Lv. 46 | Dark | Steel |
| Muk (Alolan) | Lv. 46 | Dark | Poison |
| Mandibuzz | Lv. 46 | Dark | Flying |
| Krookodile | Lv. 48 | Dark | Ground |
| Tyranitar | Lv. 48 | Dark | Rock |
| Absol | Lv. 49 | Dark | |
Sidney’s Dark-type Pokémon present a formidable challenge unless you have the right kind of Pokémon to offset the onslaught. Fighting-type Moves work best against this team, but if you have no solid Fighting-type Moves to use, use Ground- and Ice-type Moves to at least counteract the secondary type of Sidney’s Pokémon. For example, a good shot of TM113 (Earthquake) will do heavy damage to Tyranitar’s ample HP. Considering that Sidney’s team is the lowest level you will encounter in the Elite Four challenge, use it as a measuring stick of your abilities. If you struggle during this contest, you may need to forfeit the competition for now and head into Hoenn to gain more experience.
Elite Four Battle #2: Phoebe
| Pokémon | |||
| Name | Level | Type | |
| Mimikyu | Lv. 48 | Ghost | Fairy |
| Dusclops | Lv. 48 | Ghost | |
| Gengar | Lv. 49 | Ghost | Poison |
| Aegislash | Lv. 49 | Ghost | Steel |
| Chandelure | Lv. 50 | Ghost | Fire |
| Sableye | Lv. 51 | Ghost | Dark |
Ghost-Type Pokémon are a challenge if you do not have a high-level Ghost-type Pokémon to counteract their spooky moves. Dark-type Moves also work well against the majority of this group, save for Sableye. At Lv. 51, this Sableye bears only one weakness to Fairy-type moves. Without that, the contest may turn into a battle of attrition, where you keep laying on same-type moves and using recovery Items, hoping that you can pull off a Critical Hit that turns the tables in your favor.
Elite Four Battle #3: Glacia
| Pokémon | |||
| Name | Level | Type | |
| Ninetales (Alolan) | Lv. 52 | Ice | Fairy |
| Froslass | Lv. 50 | Ice | Ghost |
| Cloyster | Lv. 50 | Ice | Water |
| Mamoswine | Lv. 52 | Ice | Ground |
| Weavile | Lv. 52 | Ice | Dark |
| Glalie | Lv. 53 | Ice | |
Fire-type Moves would normally ruin an Ice-oriented team, but one of Glacia’s Pokémon have a secondary Water-type, which undo the effectiveness of the attack. If you have strong Fighting- or Rock-type Moves, use them, but your best weapon in this contest is an Electric-type Pokémon, such as Minun.
Elite Four Battle #4: Dark
| Pokémon | |||
| Name | Level | Type | |
| Dragonite | Lv. 52 | Dragon | Flying |
| Garchomp | Lv. 52 | Dragon | Ground |
| Dragalge | Lv. 53 | Dragon | Poison |
| Dragapult | Lv. 53 | Dragon | Ghost |
| Hydreigon | Lv. 54 | Dragon | Dark |
| Salamence | Lv. 55 | Dragon | Flying |
The contest is made up of Dragon-type Pokémon, which are difficult to beat unless you have some strong Ice- and Fairy-type Moves. Heavy Ice attacks do double the damage on Garchomp, because its secondary type is Ground. Fairy can also help bring down the Dark- and Dragon-type Pokémon Hydreigon.
Champion Battle: Wallace
| Pokémon | |||
| Name | Level | Type | |
| Politoed | 57 | Water | |
| Ludicolo | 55 | Water | Grass |
| Dracovish | 56 | Water | Dragon |
| Kingdra | 56 | Water | Dragon |
| Greninja | 56 | Water | Dark |
| Swampert | 58 | Water | Ground |
Wallace has some high-level Pokémon, but almost all of them share a common weakness: Electric-type Moves. If you have at least one Pokémon with some strong Electric-type Moves, it will be easy to undo this team. However, if your Electric-type Moves are out of PP, you will have difficulty. Keep an Elixir on hand to restore PP in case you run out mid-battle.
| Congratulations, Pokémon Master! |
| After you defeat the Elite Four, you are recognized as the greatest Pokémon Trainer in all of Hoenn, the true Pokémon Master. However, this is not the end of the game. After the end credits roll and you save the game, you end up home in Littleroot Town. Your family gives you a ticket to the S.S. Tidal, which will take you to the Battle Frontier—and island where Pokémon Trainers do nothing but battle and prove their mastery. Surely you’ll do well here, Pokémon Master. In addition to the Battle Frontier, there are still many things you can do in Hoenn. There are many Legendary Pokémon you can catch, so stock up on Ultra Balls and get out there. |
Legendary Pokémon, Bonus Quests, and the Battle Frontier
There are lots of adventures and battle challenges left in Hoenn after you defeat the Elite Four at the Pokémon League. There are additional locations to visit, Pokémon Contests to enter, and Legendary Pokémon to find and catch. And if that wasn’t enough, there is the brand-new Battle Frontier—an island off Hoenn’s coast where Trainers go to compete in a series of challenges. Imagine a whole theme park dedicated to the art of Pokémon battles, and you have a good idea of what’s in store for you at the Battle Frontier.
Legendary Pokémon
A host of Legendary Pokémon are still hiding in Hoenn after you settle the great battle between Kyogre and Groudon. Sometimes, finding these Pokémon is the easy part. It takes a strong, talented, and patient Trainer to battle these Legendary Pokémon long enough to wear them down to the point that they succumb to a Poké Ball. Here are sound tactics for finding and catching these Legendary Pokémon—it’s worth the work, because they are a blast to use!
Getting Groudon
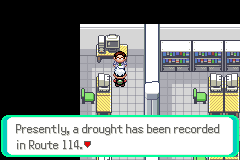
After the game restarts, Groudon crawls back into hiding. But the effects of its presence on Hoenn linger—and that’s the key to finding it. After the game restarts, visit the Weather Institute and talk to the researcher on the second floor, all the way to the left.
He tells you that a particular region in Hoenn is experiencing a severe drought. It must be due to an incredible heat source. While the weatherman doesn’t come right out and say it, you know what’s causing it—Groudon. The researcher tells you which route is experiencing the dry weather.
| NOTE |
| Groudon can appear in four different routes. If you dawdle while heading to that route, you risk the Legendary Pokémon relocating somewhere else. You must then go back to the Weather Institute and talk to the researcher again to discover the new route affected by the climate change. |
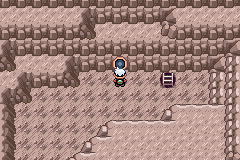
Groudon appears in the Terra Cave, a small, misty subterranean chamber that consists of an antechamber, then a sleeping room. Terra Cave appears on Routes 114-116, and 118. The trick is to find the entrance to the Terra Cave in time. The entrance can appear in several places, but here’s a hint: it always appears in the rocky face of a mountain or cliffside.
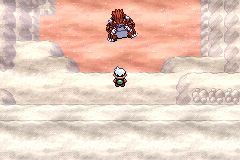
After you find the Terra Cave, dig in and approach the sleeping Pokémon. Challenge the Legendary Pokémon and let the battle begin. Make sure you have lots of Ultra Balls, as you will expend a great deal of them while trying to catch this top-tier Pokémon. Groudon is at Lv. 70
| CAUTION |
| You have only one shot each to catch Groudon, Kyogre, and Rayquaza. Save right before you battle them because if you mistakenly make them faint or lose the battle, they vanish from Hoenn forever. If you lose the battle (or inadvertently win), reset without saving and battle again. |
Finding Kyogre
After you capture Groudon, report to the Weather Institute. The researcher reports heavy rainfall in one of four routes in Hoenn. This is the sign of Kyogre, so hurry to the affected route.
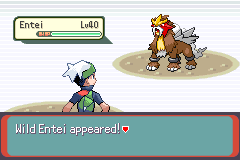
Kyogre is slumbering beneath the waves in the Marine Cave. Marine Cave appears on Routes 105, 125, 127, and 129. The Marine Cave only appears beneath the waves, so make sure you have Kangaskhan and Starmie to help you. Look for a patch of dark water in the rainy region and Dive down.
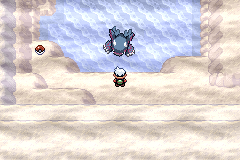
Like Groudon, Kyogre sleeps in a simple two-room chamber. Slip into the mist-filled cave to spy Kyogre resting at the end. Approach the Legendary Pokémon and challenge it. Kyogre is at Lv. 70.
Catching Rayquaza
You know where Rayquaza sleeps—you’ve woken the Legendary Pokémon once. However, to catch Rayquaza you must return to the Sky Pillar. The catch is, the place is tougher to ascend than the first time. Path-obstructing rocks and fragile tiles litter the clean, clear floors. Use the Mach Bike to zip across the crumbling floors before you fall through.
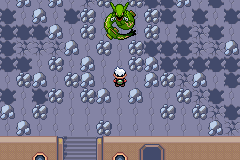
Rayquaza rests on the top level of the Sky Pillar. Make sure you have lots of Ultra Balls and recovery Items, because this is going to be a difficult. Rayquaza is at Lv. 70.
Chasing Latias and Latios
The Legendary Latias and Latios appear after you have undertaken the Elite Four challenge and emerged victorious. When you begin the game after the credits roll, your mother calls you to the television to watch a snippet of a news story about strange Pokémon seen flying overhead. She asks you if you caught the color of the Flying-type Pokémon.
Depending on the color you choose—red or blue—you will have a chance to catch either Latias or Latios.
It is tough to catch Latias or Latios. The trick is to find them. They give no warning as to where they frequent, other than they only appear outdoors and while you are walking through grass. Latias or Latios never appear while you are indoors, whether it is a cave or building. And every time you enter a structure, they move to another spot on the map. It’s a matter of luck and timing to have that first pivotal encounter.
| NOTE |
| If you have the |
After you manage to encounter one of these Pokémon, though, you can track it. The Latias or Latios will run from your first battle. That’s OK, because you can then refer to the map in your PokéNav to see where it went. Head for that route and tromp through the grass to flush it out.
Buy a good number of Great and Ultra Balls before you stalk these Pokémon. Also, adjust your team so the lead Pokémon is at Lv. 40 or below. Make sure this Pokémon has a good Speed rating, and if you have a Quick Claw, give it to the Pokémon for a Held Item. This increases your chances of getting the first move, and if you have a Sleep-inducing move, that makes this difficult hunt easier.
Latias or Latios move around the map with great regularity, but they have a small pattern. They stick with connected routes. So, find a series of connected routes, preferably one with a cabin or small house, and start your hunt there. Pop inand out of the small building until the Legendary Pokémon is in your region. Run through the grass ot catch up with the elusive Pokémon.
When you encounter Latias or Latios, cast that Sleep-inducing move. If it is successful, your chances of catching the Pokémon skyrocket. If the move fails, though, the Pokémon will flee and you will have to start the process all over again.
After you do get the Legendary Pokémon in a battle, work the HP down to a manageable level. Don’t throw Poké Balls until the HP gauge is red. When the gauge is red, go for a Sleep move, then throw a powerful Poké Ball. If you Pokémon is asleep, you have a good chance of catching it. Should the Poké Ball fail, don’t worry. Latias or Latios retain whatever damage you did to them into the next battle. Go for the Sleep-inducing move again and throw Poké Balls.
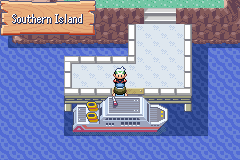
But, what about the other Pokémon? Well, the good news is that the other one will be way easier to catch on Southern Island, because it is a simple wild battle with it. However, it is a little strong, Lv. 50, so be cautious.
| Items |
| Latiasite (HIDDEN) |
| Latiosite (HIDDEN) |
Regice, Regirock, Registeel, Regieleki, and Regidrago Await!
There are five Legendary Golem Pokémon in Hoenn, but they hid before going into a deep sleep. They key by locating these Pokémon—Regice, Regirock, Registeel, Regieleki, and Regidrago—is to solve the Sealed Chamber mystert, which is in Route 134.
The currents are quick in this route, so stay close to the bottom of the water or you may end up watching the entrance to the Sealed Chamber breeze by.

The entrance to the Sealed Chamber is surrounded by six rocks in the southern area of Route 134.
After you reach the entrance, use Tate & Liza’s Starmie to slip below the surface and swim through a narrow channel. You soon reach a tablet on the channel’s wall. The glyphs on the tablet are the Braille alphabet. We have included a chart of Braille which you can use to decipher the tablet’s intructions. (Here’s a hint: Light shines from above the tablet.)
Inside the Sealed Chamber, you must navigate two rooms. The first room features a series of rocks with the Braille alphabet inscribed on them—a key for deciphering the clues in the next room. Head to the keystone at the top of the first chamber, read the instructions, and follow them. This opens another chamber.
The second chamber includes the instructions for opening the way to all five Legendary Golem Pokémon. Read these instructions and take notes so when you head to the surface, you can go to the location of each Legendary Pokémon and open their secret doors.
Route 105: Island Cave, cave of Regice
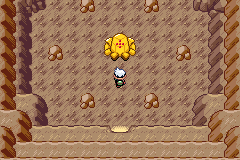
Route 111: Desert Ruins, cave of Regirock
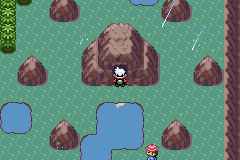
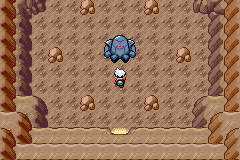
Route 120: Ancient Tomb, tomb of Registeel
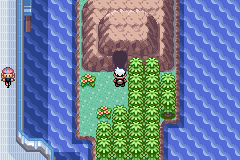
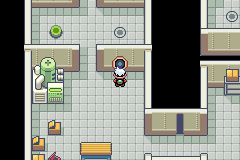
Route 110: New Mauville, area of Regieleki
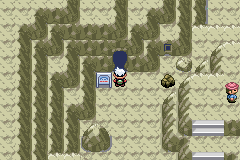
Route 114: Meteor Falls, area of Regidrago
After catching all of the Regis, you could continue, or should you? You remember seeing that portal at the Sealed Chamber, the area where you unlocked the Regis’ areas? If you bring all of the Regis, and interact with that portal, you will find the king of them, Regigigas
Route 134: Sealed Chamber, area of Regigigas
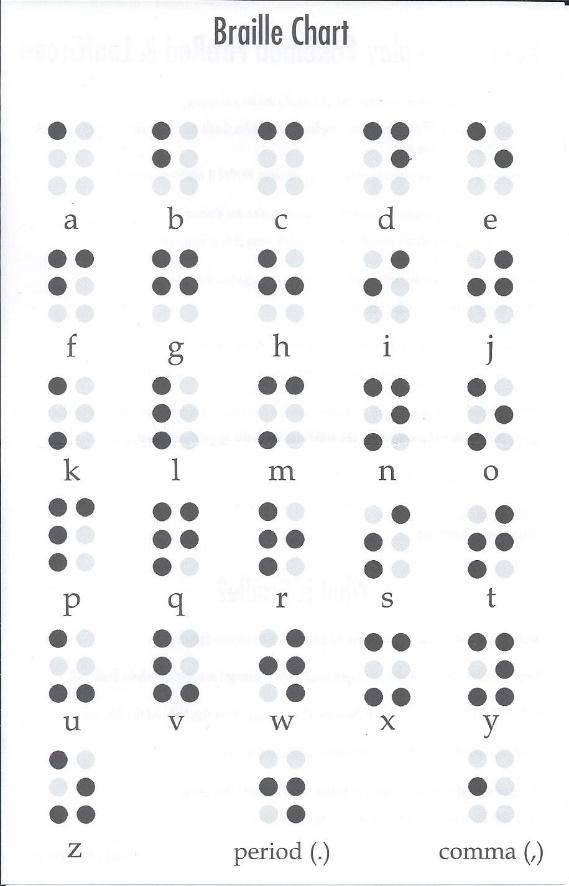
Everyone Else LOL
There are a few dozen legendaries across this game, so they are just gonna be condensed into this section.
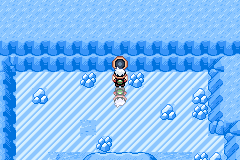
Articuno: Shoal Cave

Galarian Articuno: Route 113
Zapdos: New Mauville
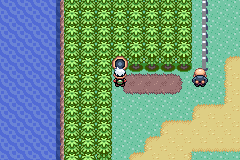
Galarian Zapdos: Route 110
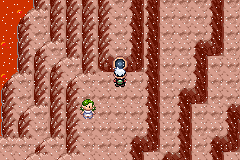

Moltres: Mt. Chimney
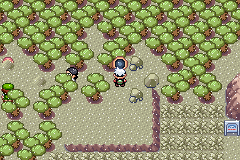
Galarian Moltres: Route 113
Mewtwo: Victory Road
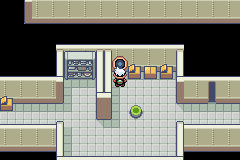
Mew: Faraway Island (Accessed only by getting the Old Sea Map)
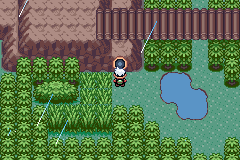
Raikou: Route 119
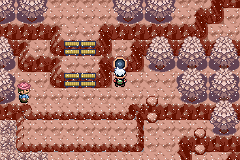
Entei: Jagged Pass
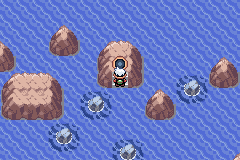
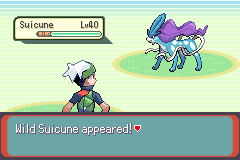
Suicune: Route 130
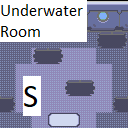
Lugia: Navel Rock (Accessed only by getting the MysticTicket)
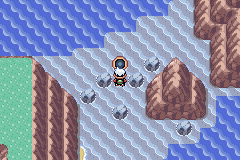
Ho-Oh: Navel Rock (Accessed only by getting the MysticTicket)
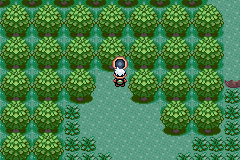
Celebi: Petalburg Woods

Jirachi: Mossdeep City
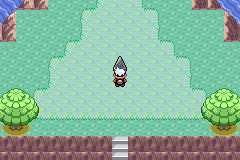
Deoxys: Birth Island (To solve the puzzle and make Deoxys appear, the player must do the following:
Approach the triangle from below and press A.
- Press ← 5×, ↓ once, then A.
- Press → 5×, ↑ 5×, then A.
- Press → 5×, ↓ 5×, then A.
- Press ↑ 3×, ← 7×, then A.
- Press → 5×, then A.
- Press ← 3×, ↓ 2×, then A.
- Press ↓ once, ← 4×, then A.
- Press → 7×, then A.
- Press ← 4×, ↓ once, then A.
- Press ↑ 4×, then A.)
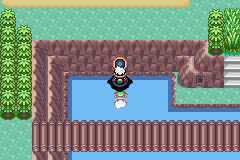
Uxie: Route 120
Mesprit: Route 120
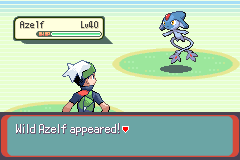
Azelf: Route 120
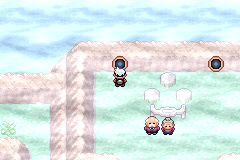
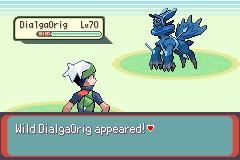
Dialga: Mt. Pyre Summit
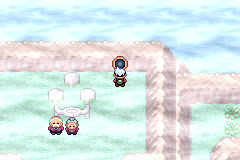
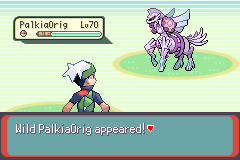
Palkia: Mt. Pyre Summit
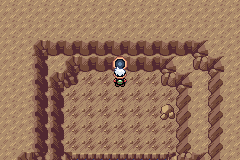
Heatran: Scorched Slab
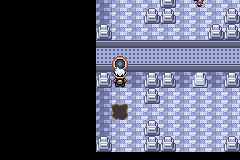
Giratina: Mt. Pyre
Cresselia: Meteor Falls
Manaphy: Route 126 underwater
Darkrai: Route 111
Shaymin: Route 104
Arceus: Sky Pillar

Victini: Slateport City
Cobalion: Route 115

Terrakion: Route 111
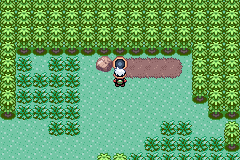
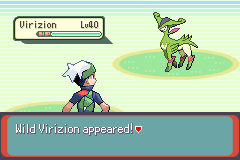
Virizion: Route 123
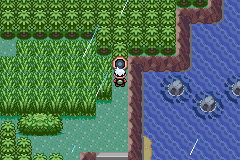
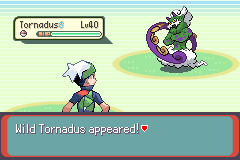
Tornadus: Route 119
Thundurus: Route 119
Reshiram: Sky Pillar
Zekrom: Sky Pillar

Landorus: Route 123
Kyurem: Shoal Cave
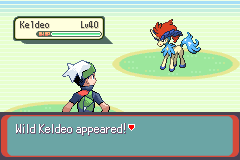
Keldeo: Safari Zone
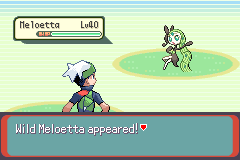
Meloetta: Lilycove City
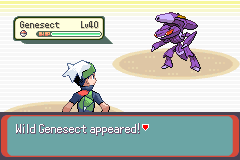
Genesect: Lilycove City
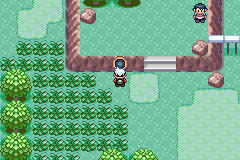
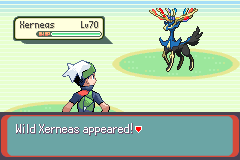
Xerneas: Safari Zone
Yveltal: Mt. Pyre Summit
Zygarde: Artisan Cave
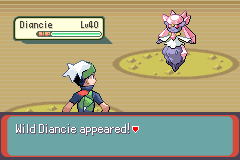
Diancie: Granite Cave
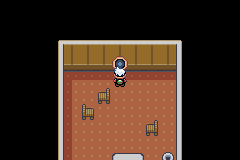
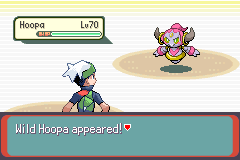
Hoopa: Abandoned Ship
Volcanion: Lavaridge Town
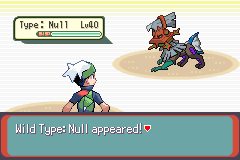
Type: Null: Mossdeep Space Center
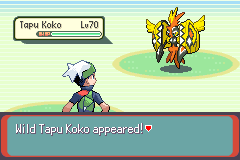
Tapu Koko: Mauville City
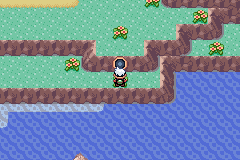
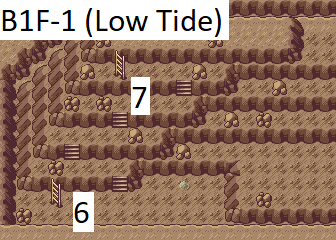
Tapu Lele: Mossdeep City
Tapu Bulu: Verdanturf Town
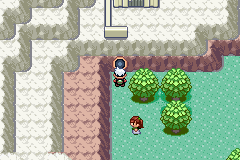
Tapu Fini: Sootopolis City
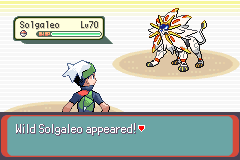

Solgaleo/Lunala: Faraway Island
Nihilego: Sealed Chamber underwater
Buzzwole: Route 120

Pheromosa: Route 111
Xurkitree: New Mauville
Celesteela: Mossdeep City
Kartana: Route 102
Guzzlord: Abandoned Ship
Necrozma: Birth Island
Magearna: Lanette’s House
Marshadow: Mt. Pyre
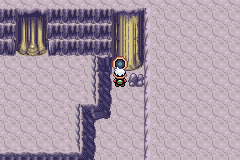
Poipole: Meteor Falls
Stakataka: Cave of Origin
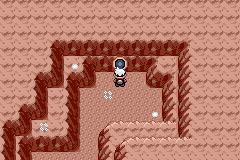
Blacephalon: Fiery Path
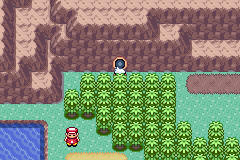
Zeraora: Route 103
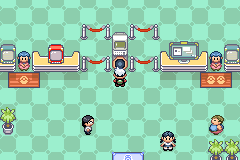
Zacian: Battle Dome
Zamazenta: Battle Palace

Eternatus: Artisan Cave
Kubfu: Route 116
Zarude: Petalburg Woods
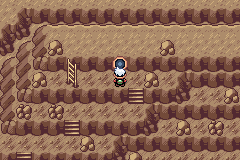
Glastrier: Shoal Cave
Spectrier: Mt. Pyre
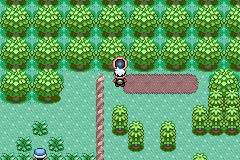
Calyrex: Route 116
Enamorus: Pokémon League
Koraidon: Route 106 (In the portal with the other past Paradox mons)
Miraidon: Route 125 (In the portal with the other future Paradox mons)
Bonus Quests
Five extra locations in Hoenn are worth exploring after you complete the main adventure. Even though these missions are not required to find the game, you can earn valuable experience points, ![]() , and cool Items for completing them.
, and cool Items for completing them.
The Abandoned Ship
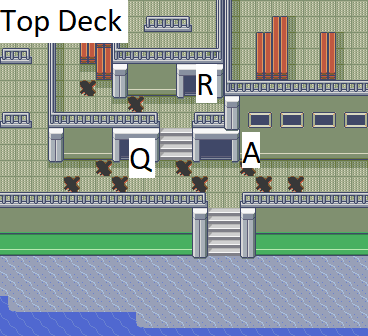
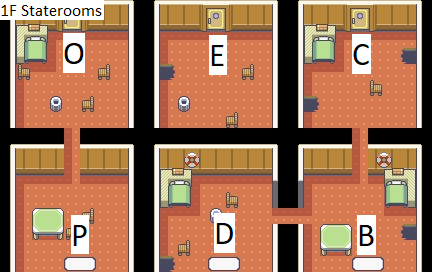
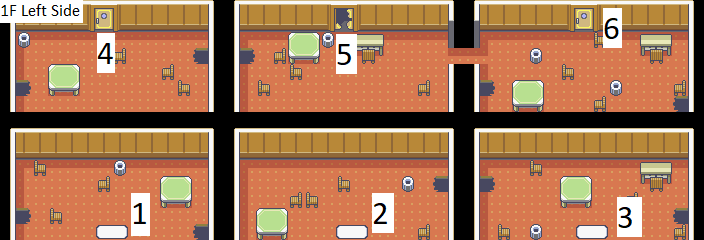
When you zoomed through Route 108 on Mr. Briney’s boat, you may have noticed the beached ferry along the waterway’s north side. That’s the Abandoned Ship. When you have both the Balance Badge and Mind Badge, you can explore this half-sunkern vessel. Capt. Stern wants a Scanner that was onboard the ship before it sank. Perhaps if you wind through the ship’s rooms and uncover the Scanner, he will give you a worthy reward?
| Pokémon Appearances in Water | |
| Pokémon | Conditions |
| Tentacool | 99% |
| Tentacruel | 1% |
| Magikarp | Old Rod (70%) |
| Wishiwashi | Old Rod (30%) |
| Goldeen | Good Rod (60%) |
| Staryu | Good Rod (20%) |
| Shellder | Good Rod (20%) |
| Dhelmise | Super Rod (40%) |
| Corsola (Galarian) | Super Rod (40%) |
| Octillery | Super Rod (15%) |
| Huntail | Super Rod (4%) |
| Gorebyss | Super Rod (1%) |
| Items |
| Beedrillite (HIDDEN) |
| Dive Ball |
| Escape Rope |
| Harbor Mail |
| Luxury Ball |
| Revive |
| Room 1 Key (HIDDEN) |
| Room 2 Key (HIDDEN) |
| Room 4 Key (HIDDEN) |
| Room 6 Key (HIDDEN) |
| Scanner |
| Storage Key |
| TM21 (Rain Dance) |
| TM102 (Ice Beam) |
| Water Stone |
S.S. Tidal
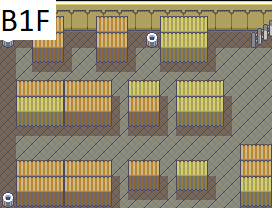
| Items |
| Blastoisinite (HIDDEN) |
| Leftovers (HIDDEN) |
After you defeat the Elite Four, your family rewards you with a ticket for the S.S. Tidal, Capt. Stern’s ferry. This ferry is a quick way to get between Slateport City and Lilycove City—and it is the only way to reach the new Battle Frontier. Board the vessel, and while you wait for it to make its crossing, explore the staterooms for rare Items (especially those Leftovers) and challenge on-board Trainers.
| NOTE |
| Battle Frontier is not an destination the first time you board the ship. Scott, the man in the sunglasses, is on the ship, and he invites you to Battle Frontier. After he leaves, the choice is available on your next voyage. |
Shoal Cave
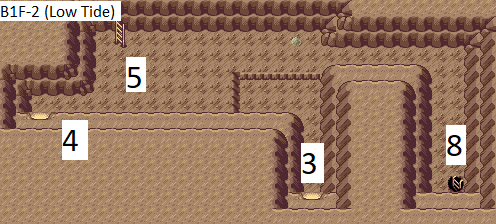
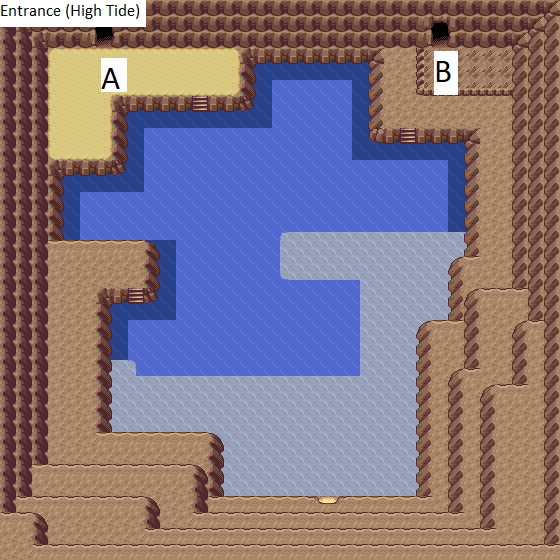
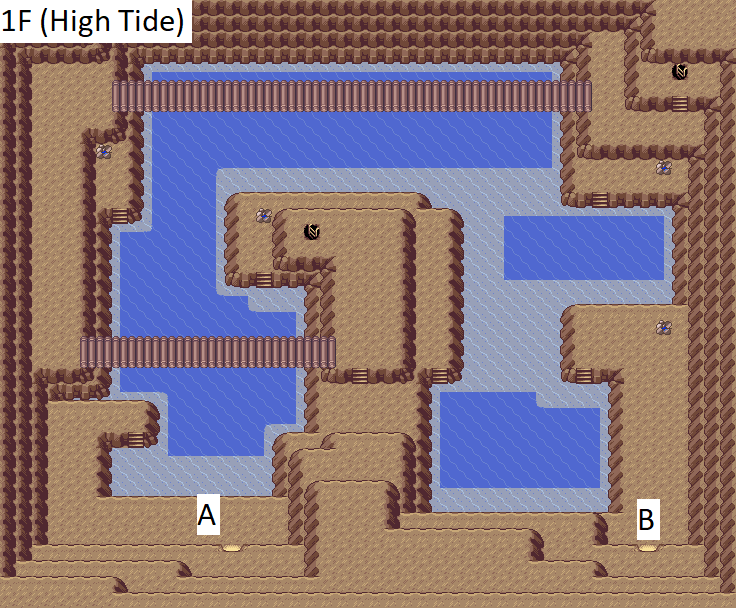
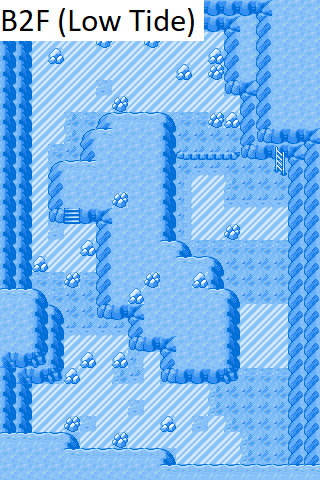
Shoal Cave is north of Mossdeep City, carved into the side of a rocky mount rising from the ocean. The tides affect the cave. During high tide, you cannot explore most of the cave because it is full of water. But during the two low tides each day, you can fully inspect the multiple chambers of the cave.
| Tide Watch | |
| Time of Day | Tide |
| 3 AM-9 AM | Low Tide |
| 9 AM-3 PM | High Tide |
| 3 PM- 9 PM | Low Tide |
| 9 PM-3 AM | High Tide |
| Pokémon Appearances on Land (Entrance) | |
| Pokémon | Conditions |
| Swinub | 20% |
| Sandshrew (Alolan) | 20% |
| Darumaka (Galarian) | 10% |
| Vulpix (Alolan) | 10% |
| Snorunt | 10% |
| Cubchoo | 10% |
| Vanillite | 5% |
| Bergmite | 5% |
| Delibird | 4% |
| Jynx | 4% |
| Sneasel | 1% |
| Amaura | 1% |
| Pokémon Appearances in Water | |
| Pokémon | Conditions |
| Spheal | 60%, Good Rod (60%), Super Rod (40%) |
| Seel | 30%, Good Rod (20%), Super Rod (15%) |
| Sealeo | 5%, Super Rod (4%) |
| Piplup | 4% |
| Lapras | 1% |
| Magikarp | Old Rod (70%) |
| Wishiwashi | Old Rod (30%) |
| Shellder | Good Rod (20%), Super Rod (40%) |
| Arctovish | Super Rod (1%) |
| Pokémon Appearances on Land (1F) | |
| Pokémon | Conditions |
| Swinub | 20% |
| Sandshrew (Alolan) | 20% |
| Darumaka (Galarian) | 10% |
| Snorunt | 10% |
| Cubchoo | 10% |
| Vanillite | 10% |
| Bergmite | 5% |
| Delibird | 5% |
| Jynx | 4% |
| Sneasel | 4% |
| Mr. Mime (Galarian) | 1% |
| Cryogonal | 1% |
| Pokémon Appearances on Land (B1F-1, B1F-2) | |
| Pokémon | Conditions |
| Eiscue | 20% |
| Sandshrew (Alolan) | 20% |
| Darumaka (Galarian) | 10% |
| Snorunt | 10% |
| Cubchoo | 10% |
| Vanillite | 10% |
| Bergmite | 5% |
| Jynx | 5% |
| Sneasel | 4% |
| Mr. Mime (Galarian) | 4% |
| Cryogonal | 1% |
| Arctozolt | 1% |
| Pokémon Appearances on Land (B2F) | |
| Pokémon | Conditions |
| Eiscue | 20% |
| Sandshrew (Alolan) | 20% |
| Darumaka (Galarian) | 10% |
| Snorunt | 10% |
| Cetoddle | 10% |
| Vanillite | 10% |
| Bergmite | 5% |
| Jynx | 5% |
| Sneasel | 4% |
| Mr. Mime (Galarian) | 4% |
| Cryogonal | 1% |
| Frigibax | 1% |
| Items |
| Big Pearl |
| DNA Splicers |
| Focus Band |
| Glalitite (HIDDEN) |
| NeverMeltIce |
| Rare Candy |
| Shell Bell |
| Shoal Salt x4 |
| Shoal Shell x4 |
| Slowbronite (HIDDEN) |
| TM23 (Hail) |
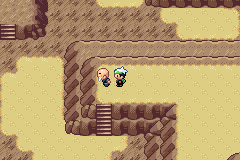
The man inside the cave on the first floor is willing to make Shell Bells for you, but only if you can collect four Shoal Salts or four Shoal Shells from the cave. You can recover one or the other during the different tides, so you must visit the cave at least twice if you want to collect the materials for more than one Shell Bell.
Mirage Island
A man in Pacifidlog Town can see a faraway island—but is it real? This place, Mirage Island, is invisible to the naked eye under most conditions, but from time to time, the man reports seeing it. If he tells you Mirage Island is visible, you can trsvel to it from Route 130.
Mirage Island is a great place to catch Pokémon and pick Kelpsy Berries.
Trainer Hill
Trainer Hill is on Route 111’s right side, and it’s open for battle throughout the game. When you prove yourself to be a true Pokémon Master, the doors to Trainer Hill open.
Trainer Hill offers a special time-attack battle mode. When you enter a contest, a timer starts keeping track of how long it takes you to battle to the top of the building. There are four types of contests: Normal, Variety, Unique, and Expert—each with escalating difficulty.
The Pokémon used by Trainers within match your highest level Pokémon. Enter with a Lv. 48 in your team and every Trainer you battle will challenge you with Lv. 48 Pokémon of their own. There is no experience or cash awarded in this contest, so enter for the fun of battling.
Battle with Steven
In Pokémon Ruby and Pokémon Sapphire, Steven was the final challenger in the Elite Four contest. However, in Emerald, it’s Wallace at the top of the Pokémon league. What happened to Steven?
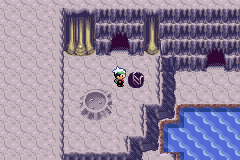
The impressive Trainer is in Meteor Falls, in a new cave that opens in the northwest corner after you defeat the Elite Four. However, if you thought the Elite Four were tough, wait until you battle Steven. Follow this new cave to the end to find Steven in the corner. He’s friendly to you, but don’t expect that friendliness to translate to the battlefield. He’s merciless, and if you want to win, you must be, too.
| Steven’s Pokémon | |||
| Name | Level | Type | |
| Aerodactyl | 80 | Rock | Flying |
| Tyranitar | 80 | Rock | Dark |
| Lucario | 80 | Fighting | Steel |
| Aggron | 80 | Steel | Rock |
| Steelix | 80 | Steel | Ground |
| Metagross | 80 | Steel | Psychic |
Safari Zone
After you defeat the Elite Four, two new areas open in the Safari Zone. You can find additional Pokémon in this new area that aren’t in the original Safari Zone, so return to this park to round out your collection. Access the new areas via a small pathway above the entrance to the Safari Zone after passing through the gates and paying the admission fees.
| Pokémon Appearances on Land (South) | |
| Pokémon | Conditions |
| Nickit | 20% |
| Bouffalant | 20% |
| Smoliv | 10% |
| Crabrawler | 10% |
| Cufant | 10% |
| Ponyta (Galarian) | 10% |
| Exeggutor (Alolan) | 5% |
| Pancham | 5% |
| Zorua | 4% |
| Yamper | 4% |
| Rattata (Alolan) | 2% |
| Pokémon Appearances in Water (South) | |
| Pokémon | Conditions |
| Wailmer | 60% |
| Wattrel | 30% |
| Wingull | 5% |
| Pelipper | 4% |
| Mantine | 1% |
| Magikarp | Old Rod (70%) |
| Wishiwashi | Old Rod (30%) |
| Goldeen | Good Rod (60%) |
| Arrokuda | Good Rod (20%) |
| Horsea | Good Rod (20%), Super Rod (40%) |
| Carvanha | Super Rod (40%) |
| Seadra | Super Rod (15%) |
| Octillery | Super Rod (5%) |
| Pokémon Appearances (North) | |
| Pokémon | Conditions |
| Vullaby | 20% |
| Rockruff | 20% |
| Stantler | 10% |
| Staravia | 10% |
| Riolu | 10% |
| Orthworm | 10% |
| Kangaskhan | 5% |
| Bramblin | 5% |
| Corvisquire | 4% |
| Fletchinder | 4% |
| Farfetch’d Galarian | 1% |
| Bombirdier | 1% |
| Cranidos | Rock Smash (60%) |
| Nosepass | Rock Smash (30%) |
| Dwebble | Rock Smash (5%) |
| Roggenrola | Rock Smash (4%) |
| Geodude | Rock Smash (1%) |
Desert Underpass
Remember the Fossil Maniac back on Route 114? He ended up opening a cave when he was looking for fossils! Head to Route 114 after defeating the Elite Four and slide into the small tunnel opening. Follow the underground tunnel all the way to the end (it’s a long walk, but plenty of Dittos) and you will find a portal, containing Meltan!
| Items |
| Rusted Sword |
| RustedShield |
Battle Frontier
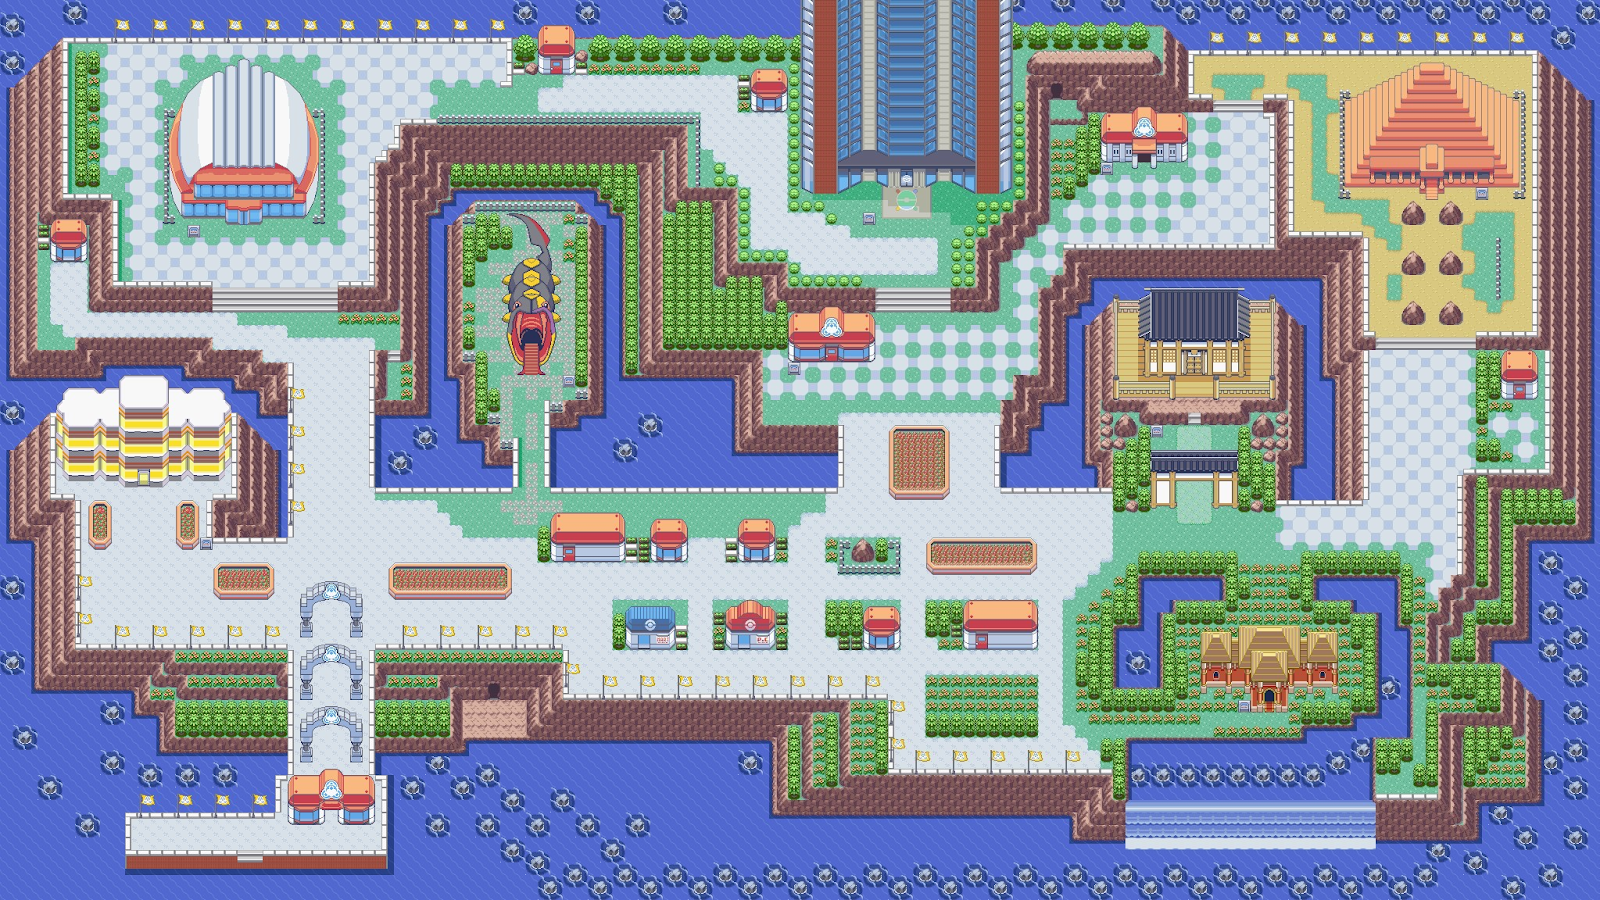
Welcome to the Battle Frontier, a new area in Hoenn exclusive to Pokémon Theta Emerald The Last Dance. The Battle Frontier is an island off the coast of the mainland dedicated to the fine art of Pokémon battles. Seven contests in the Battle Frontier test your skills as a Trainer. The Battle Tents in Hoenn have acquainted you with some of the battles you can expect in the Battle Frontier, but only a full tour of the park reveals what’s in store for you when the S.S. Tidal docks at its harbor.
| Items |
| Audinite (HIDDEN) |
| Diancite (HIDDEN) |
| Gengarite (HIDDEN) |
| Prison Bottle |
The seven battle areas at the Battle Frontier are:
- Battle Tower
- Battle Dome
- Battle Palace
- Battle Arena
- Battle Factory
- Battle Pike
- Battle Pyramid
The following section details the kind of battles you can expect at each of these areas, as well as what kind of challenge you can expect from the champions of each of these areas.
Beginning the Challenge
When you first enter the Battle Frontier, you walk through a corridor full of information desks. Your questions about the island can be answered here.
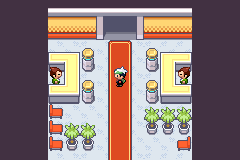
You are issued a Frontier Pass. This card grants you full access to the park. This is also where you can display your Symbols, the Battle Frontier equivalents of Gym badges. There are seven Symbols, each awarded only after you defeat each Frontier Battle area’s leader. These powerful Trainers are known as the Frontier Brains, and they offer you a challenge more intense than the Elite Four. Your Frontier Pass has room to store a single battle, except for battles at the Battle Pike and Battle Pyramid.
Each area has two entry categories: Lv. 50 and Open Level. Lv. 50 matches are open only to Pokémon Lv. 50 or below. All Pokémon you face in Lv. 50 matches, however, are Lv. 50 Pokémon themselves. Open level matches are open to any of your Pokémon over Lv. 60, and your opponent matches the highest level Pokémon you enter. So, if you enter two Pokémon at Lv. 61 and one at Lv. 64, your opponent’s Pokémon will be Lv. 64.
Winning battles in the Battle Frontier will not award any cash or experience. You cannot level up your Pokémon at the Battle Frontier. Instead, winners receive Battle Point (BP). You can exchange BP for prizes at the Exchange Service Corner in the Battle Frontier. After you acquaint yourself with the basics of the Battle Frontier, head inside and make a name for yourself.
| NOTE |
| There are two kinds of Symbols you can win at each Battle Frontier area. The first is the Silver Symbol. After you have the Silver Symbol in an area, you can try for the Gold. |
| NOTE |
| Many battle areas have two entry options: Single 1-on-1 Battles and Double, which are 2-on-2 Battles. |
Great Scott!
Remember that man in the sunglasses that was trailing you throughout your adventure? That’s Scott, the proprietor of Battle Frontier, the island paradise where Trainers are treated like royalty. Scott invites only the best of the best to Battle Frontier, and because you proved yourself so worthy of admiration in Hoenn, he extends an invitation to his land to you.
Scott’s personal residence is along Battle Frontier’s north shore. When you get a chance, stop in and talk to Scott. He will give up 3 BP for the little chat.
In-Town Amenities
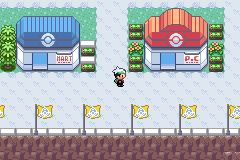
While you cannot earn ![]() in the Battle Frontier, you are welcome to spend it. There is a Pokémart beyond the park’s entrance gate, just next to a Pokémon Center. You can use the Pokémon Center to rest your Pokémon, access stored Items, and switch out your team. However, each battle area has a PC in its lobby where you can also perform the same functions.
in the Battle Frontier, you are welcome to spend it. There is a Pokémart beyond the park’s entrance gate, just next to a Pokémon Center. You can use the Pokémon Center to rest your Pokémon, access stored Items, and switch out your team. However, each battle area has a PC in its lobby where you can also perform the same functions.
| Pokémart Merchandise (Left) | |
| Item | Price |
| TM06 (Low Kick) | 800 |
| TM12 (Icy Wind) | 1600 |
| TM30 (Zen Headbutt) | 10000 |
| TM33 (Foul Play) | 6000 |
| TM38 (Fire Punch) | 10000 |
| TM39 (ThunderPunch) | 10000 |
| TM40 (Ice Punch) | 10000 |
| TM42 (Seed Bomb) | 16000 |
| TM44 (Drain Punch) | 16000 |
| TM68 (Iron Head) | 16000 |
| TM71 (Gunk Shot) | 10000 |
| TM73 (Iron Defense) | 3000 |
| TM75 (Drill Run) | 16000 |
| TM78 (Trick) | 10000 |
| TM84 (Stealth Rock) | 10000 |
| TM85 (Hyper Voice) | 16000 |
| TM86 (Heat Wave) | 20000 |
| TM97 (Helping Hand) | 800 |
| TM100 (Earth Power) | 20000 |
| TM116 (Outrage) | 24000 |
| Pokémart Merchandise (Right) | |
| Item | Price |
| Ultra Ball | 800 |
| Hyper Potion | 1500 |
| Max Potion | 2500 |
| Full Restore | 3000 |
| Full Heal | 400 |
| Revive | 2000 |
| Max Repel | 700 |
| Protein | 10000 |
| Calcium | 10000 |
| Iron | 10000 |
| Zinc | 10000 |
| Carbos | 10000 |
| HP Up | 10000 |
A girl in a small house along the east coast would love to trade you a Skitty for a Zygarde (10%), if you have one.
Exchange Service Corner
Here is the full catalog from the four sales counters inside the Exchange Service Counter, where you can trade BP for rare Items and Secret Base decorations.
| Far-Left Counter Merchandise | |
| Item | Price (in BP) |
| Kiss Poster | 16 |
| Kiss Cushion | 32 |
| Smoochum Doll | 32 |
| Togepi Doll | 48 |
| Meowth Doll | 48 |
| Clefairy Doll | 48 |
| Ditto Doll | 48 |
| Cyndaquil Doll | 80 |
| Chikorita Doll | 80 |
| Totodile Doll | 80 |
| Left Merchandise | |
| Item | Price (in BP) |
| Lapras Doll | 128 |
| Snorlax Doll | 128 |
| Venusaur Doll | 256 |
| Charizard Ball | 256 |
| Blastoise Doll | 256 |
| Right Merchandise | |
| Item | Price (in BP) |
| Protein | 1 |
| Calcium | 1 |
| Iron | 1 |
| Zinc | 1 |
| Carbos | 1 |
| HP Up | 1 |
| Far-Right Counter Merchandise | |
| Item | Price (in BP) |
| Leftovers | 48 |
| White Herb | 48 |
| Quick Claw | 48 |
| Mental Herb | 48 |
| BrightPowder | 64 |
| Choice Band | 64 |
| King’s Rock | 64 |
| Focus Band | 64 |
| Scope Lens | 64 |
Ranking Hall

You can chart your performance at the Ranking Hall’s Battle Frontier. Inside, several slates are dedicated to tracking the best Trainers on the island. Maybe your records will be posted here someday?
Battle Factory
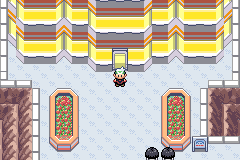
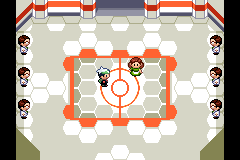
Remember the Battle Tent where you had to choose randomly selected Pokémon and compete against Trainers with their own random Pokémon? That was a warm-up exercise for the Battle Factory, which holds battles in groups of seven. After seven wins, you can take a breather before heading into the next stretch of next battles.
When you enter the Battle Factory challenge, you must relinquish your Pokémon for a sack of six Poké Balls. Choose three Pokémon from the random collection. Think about what kinds of moves these Pokémon will have available to them—choose Pokémon that can take out multiple types, such as Electric-type Pokémon, which can dish out serious damage to both Water- and Flying-type Pokémon.
Factory Head Noland
After you win consecutive battles in the Battle Factory, you have a shot at Noland, the champion. If you can defeat Noland, you win the Knowledge Symbol for your Frontier Pass. Noland must play by the same rules as you—he must choose random Pokémon, so if you face Noland multiple times, you will encounter different Pokémon at each battle.
| Factory Head Noland’s Pokémon |
| Noland uses random Pokémon with each battle. |
Battle Dome
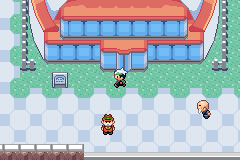
The Battle Dome is set up tournament-style, where new entrants join 16 Trainers challenges. There are Quarter-Finals, Semi-Finals, and Finals in each tournaments—by the end of a single tournament, you will have had four battles. A tournament tree charts your progress through each tournament.
When you enter a tournament, you must choose three of your Pokémon. Before every round in the tournament, you are allowed a glimpse at the generalities of your opponent’s team. This will help you form a strategy based on your own Pokémon selections before the next battle.
Dome Ace Tucker
After you win five consecutive tournaments, Dome Ace Tucker challenges you. The Frontier Brain is a tough champion, but if you win the battle, you win the Tactics Symbol for your Frontier Pass. Because of Tucker’s team, it is difficult to rely on a single Pokémon. For example, an Electric-type Pokémon will help against the Flying-type natures of Charizard, but Swampert’s Ground-type negates the extra power of Electric-type Moves. Choose Pokémon with moves that straddle at least two of your opponent’s Pokémon weaknesses.
| Dome Ace Tucker’s Pokémon | ||
| Name | Type | |
| Swampert | Water | Ground |
| Salamence | Dragon | Flying |
| Charizard | Fire | Flying |
Battle Pike
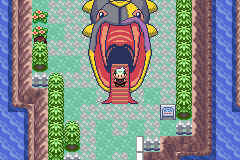
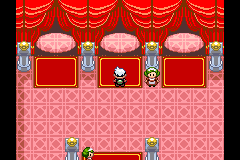
The entrance of the Battle Pike is shaped like a giant Seviper—and the tricky nature of that Pokémon betrays the challenges you will find within. The nature of the Battle Pike is Battle Choice, a contest where you must walk down a hall of rooms. Each room has three doors. There are four possibilities of what is beyond.
Some rooms have Trainers in them, wishing to battle.
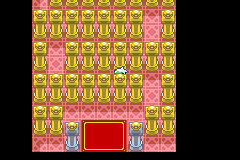
Other rooms are winding walkways (they all look the same) where you encounter one of two wild Pokémon.

When you enter some rooms, you startle a Pokémon inside. The scared Pokémon will damage your lead Pokémon.

If you are lucky, the room will have a healder inside that restores your Pokémon’s HP and PP, as well as curing any Status irregularities.
If you are unsure of which door to try, ask the lady standing in front of them for a hint on what is behind only one of them. You try your luck if you try the other two doors. Each run through the Battle Pike lasts 14 rooms, which includes the three-door corridors between each surprise room.
Pike Queen Lucy
After completing 28 consecutive rooms, you can challenge Pike Queen Lucy. Lucy holds the Luck Symbol. Her team is deceptive—it will be easy for you to defeat the Milotic and Seviper. But the Shuckle will give you a headache. The Pokémon can heal itself with TM56 (Rest) multiple times in an effort to drain the PP of your Attack moves. If you can outlast Shuckle’s TM56 (Rest), use your remaining attack moves to defeat it. Because you may run low (or out) of PP, use a Pokémon that can poison Shuckle. Save one use of the move with Shuckle’s fifth and final TM56 (Rest) has been used, then use the move to start the countdown.
| Pike Queen Lucy’s Pokémon | ||
| Name | Type | |
| Seviper | Poison | |
| Milotic | Water | |
| Shuckle | Bug | Rock |
Battle Arena
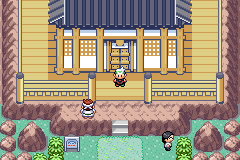
The Battle Arena is a continuation of the Fallarbor Town Battle Tent challenge, where you have only three moves to knock out your opponent’s Pokémon. This is called a Set KO Tourney. You have three moves to make your opponent faint. If you cannot accomplish this, the battle results go to the judges. The battle is judged on three categories: Mind, Skill, and Body. You can earn between zero and two points in each category. The Pokémon with the most points after judging wins. You must choose three Pokémon from your team when you enter this contest, so choose those with the most powerful moves that affect the greatest number of Pokémon types.
Arena Tycoon Greta
After your 27th win, you must battle Arena Tycoon Greta for the Guts Symbol. Greta attacks with three powerful Pokémon, but two of them are Bug-type, so exploit that. Enter the challenge with a good Bug-type to use against Umbreon, then use a Flying-tpye move or two to neutralize Heracross and Shedinja.
| Arena Tycoon Greta’s Pokémon | ||
| Name | Type | |
| Heracross | Bug | Fighting |
| Umbreon | Dark | |
| Shedinja | Bug | Ghost |
Battle Palace
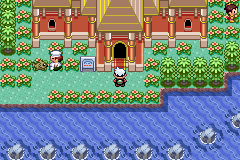
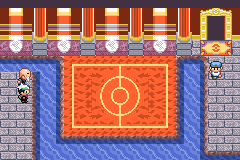
The Battle Palace presents a unique challenge—you can choose which Pokémon you want to enter in the competition, but you cannot choose which moves they make in battle. You must rely on the Pokémon’s instincts. However, that doesn’t mean you don’t have any control over the battle. Consider which are your strongest Pokémon—which have moves that served you well during the adventure in Hoenn? If you choose a double challenge, there’s an added wrinkle: You cannot select which one of your opponent’s Pokémon your Pokémon will attack.
Palace Maven Spenser
Palace Maven Spenser challenges you after 21 battles. You must beat him to win the Spirits Symbol. This is easier said than done because Spenser anchors his team with the Normal-type Pokémon Slaking. This Pokémon has high HP and can take a bit of damage before getting in trouble. However, an Electric-type Pokémon with a powerful move set can dismantle Slaking’s teammates, Crobat and Lapras.
| Palace Maven Spenser’s Pokémon | ||
| Name | Type | |
| Crobat | Poison | Flying |
| Slaking | Normal | |
| Lapras | Water | Ice |
Battle Pyramid
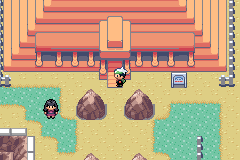
The Battle Pyramid hosts the Battle Quest, a challenge that drops you into a dark, randomly generated maze without your regular Items. Instead, you are given a special Bag that holds any Items you find while exploring the dark labyrinth, such as Potions. The maze is full of wild Pokémon and Trainers. You cannot see the first few Trainers, thanks to your limited view, but with every successful battle, you can see a little farther. Your goal is to find the warp square that sends you to the next maze. There are seven mazes to complete every time you enter the Battle Pyramid.
Pyramid King Brandon
Pyramid King Brandon confronts you after you clear your 21st consecutive maze. In order to win the Brave Symbol, you must defeat his team of Legendary Pokémon: Regice, Registeel, and Regirock. Fortunately, Regice and Regirock are weak against Steel-type Moves, but no such luck when battling Registeel. Instead, make sure you have a strong Fire-type Pokémon on your team. A good Fire-type Move is strong against Regice, too.
| Pyramid King Brandon’s Pokémon | |
| Name | Type |
| Regirock | Rock |
| Regice | Ice |
| Registeel | Steel |
Battle Tower
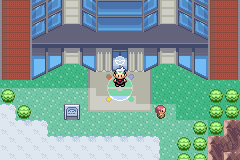

The Battle Tower offers a multitude of Trainer Battles where you can where you can hone your skill until you challenge the Battle Tower champion. You can enjoy three kinds of battles in the Battle Tower:
- Single: After picking three Pokémon, you engage Trainers in one-on-one matches.
- Double: After picking four Pokémon, you engage Trainers in two-on-two mathces.
- Multi: After picking two Pokémon, you choose another Trainer (controlled by the game) to team up with. Then you challenge teams of two Trainers.
No matter which challenge you select, you must earn seven consecutive wins to complete the round.
Salon Maiden Anabel
You cannot challenge Anabel unless you selected the Single option. After 35 consecutive wins, you battle against Anabel for the Ability Symbol. Anabel’s three Pokémon work together, with one Pokémon’s weakness being another’s strength. For example, a Fighting-type Pokémon will do well against Snorlax, but Alakazam can exploit Snorlax with its Psychic nature. Choose Pokémon that target these types, but be ready to switch them out constantly during the battle.
| Salon Maiden Anabel’s Pokémon | |
| Name | Type |
| Alakazam | Psychic |
| Entei | Fire |
| Snorlax | Normal |
| Catching New Pokémon |
| There are two Pokémon you can catch in the Battle Frontier: Sudowoodo and Smeargle. Sudowoodo  Look next to the waterfall near the center of the Battle Frontier. There is a tree that looks a little different than all of the others. Approach the tree and attempt to water it with the Wailmer Pail. The tree springs to life, revealing that it’s no ordinary foliage. Battle the Sudowoodo to capture it. Smeargle    Surf down the waterfall in the middle of the Battle Frontier and follow the river to the left. You will find a small cave entrance carved into the side of the riverbank. This is the entrance to the Artisan Cave, a shortcut route beneath the |
Battle Frontier that drops you off next to the Battle Tower. Only one kind of wild Pokémon inhabits the cave: Smeargle. And the place is crawling with them.
The Artisan Cave also contains several Items. Inside the cave, you will find these Items:
| Items |
| AuroraTicket |
| Calcium (HIDDEN) |
| Eon Ticket |
| Iron (HIDDEN) |
| MysticTicket |
| Old Sea Map |
| Protein (HIDDEN) |
| Zinc (HIDDEN) |